10 Stunning Windows Themes to Elevate Your Desktop
Last Updated:
Over the years, I’ve tried more Windows themes than I can count.
Most were “meh” at best.
But every once in a while, I stumble across an absolute gem that makes me go “Wow, I had no idea my desktop could look this good!“
So I’ve rounded up my top 10 favorite stunning Windows themes that are guaranteed to blow you away and make your desktop uniquely yours.
Dark Theme: Simple, Yet One of the Best
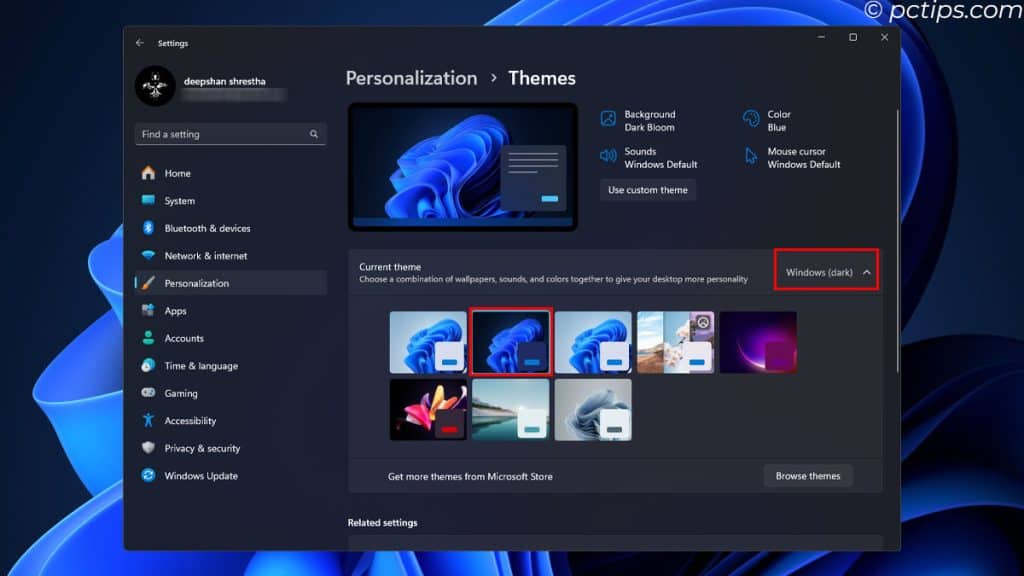
You might be shocked, but the best theme, in my opinion, is available at your disposal. And it is the Windows Dark Theme.
Now, this might seem a little underwhelming. However, research by JÖNKÖPING University shows more than 92% of individuals use dark mode for a satisfying experience.
Not only this, the 2020 IEEE Conference on Virtual Reality also showed dark mode graphics increased visual comfort and acuity, especially when working in low-light environments.
From personal experience, I could not go back to the light theme once I switched to dark.
Now, I am not saying you will like the dark theme. But, the consensus does, and you will likely love it too.
Minimalism (Dark)
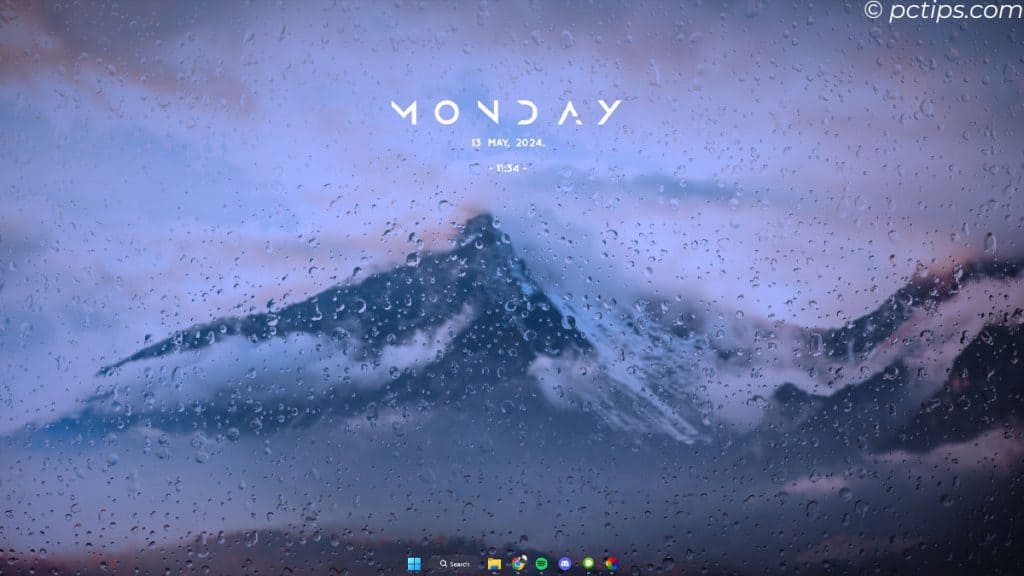
Sometimes, less is more. And this is exactly what’s happening in the theme above.
No one likes to see an unmanaged desktop right from the start. Research from Princeton University also proves that clutter overwhelms and makes it harder to focus.
This theme is the key to an organized desktop.
With a simple combination of a transparent taskbar, an empty desktop, a dark mouse cursor, and a live wallpaper, everything is perfect.
And the best part? You can achieve this look just by installing four applications.
- TranslucentTB (For transparent taskbar and to remove system tray)
- Lively Wallpaper (For live raining wallpaper)
- Rainmeter (Mii power & Mond skin)
- Any Mouse Cursor (from DeviantArt)
You will, however, need to tweak some settings.
For example, I had to remove all the desktop applications and remove unnecessary layouts in the Rainmeter.
I also switched to a minimal-looking dark cursor to match the minimal theme.
And the final result is close to awesome.
Minimalism (Light)
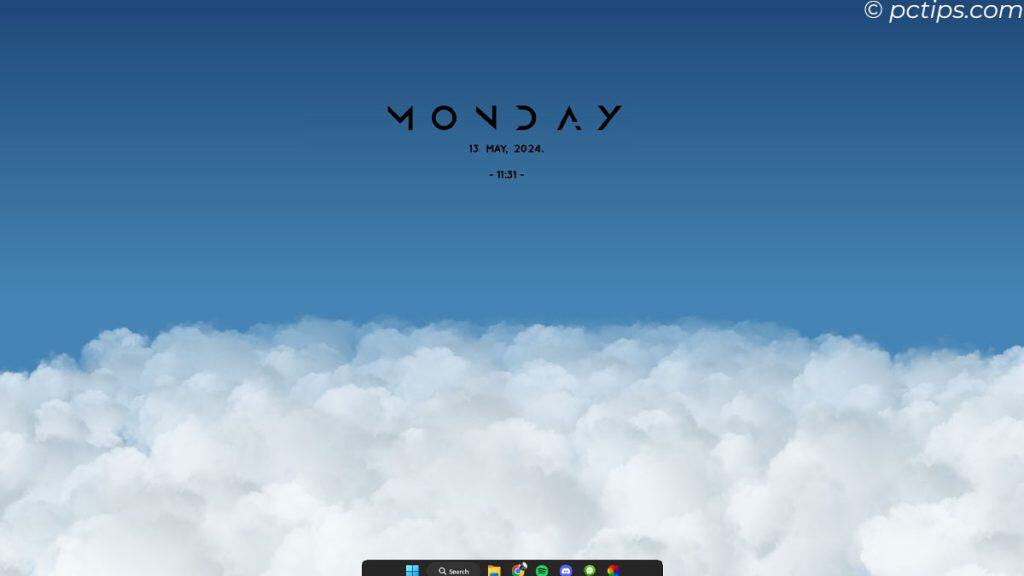
Now, if you are not a fan of the dark minimal theme, you can always change it to a light color.
Here, you can see I switched to a light wallpaper, and adjusted the taskbar using RoundedTB and the theme looks completely new and fresh
But remember all your icons in Windows Explorer will remain the same. Why not change that as well?
SynthWave 84: For a Neon Look
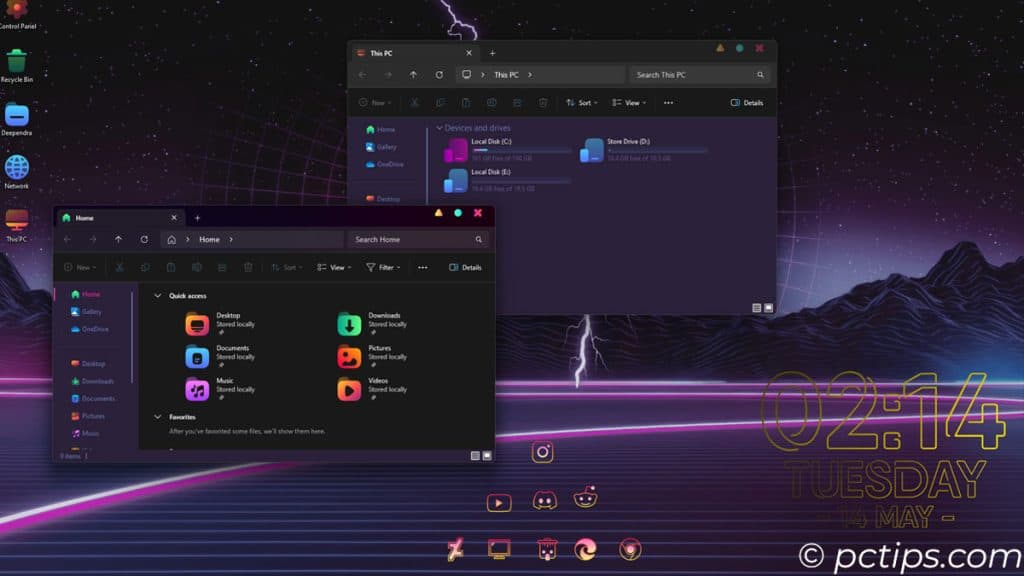
Now, this is the complete opposite of minimalism. And I do not mean it in a bad way.
If your PC already has a complete RGB setup, having a minimal-looking desktop screen is not going to cut it.
You will require your screen to have some sort of RGB.
And this is where SynthWave 84’ comes in. Inspired by the VSCode theme SynthWave, this is a perfect theme if you love vibrant colors.
So, if you are a developer, combining these two themes from Windows and VSCode looks completely unique. Just take a look at it!!
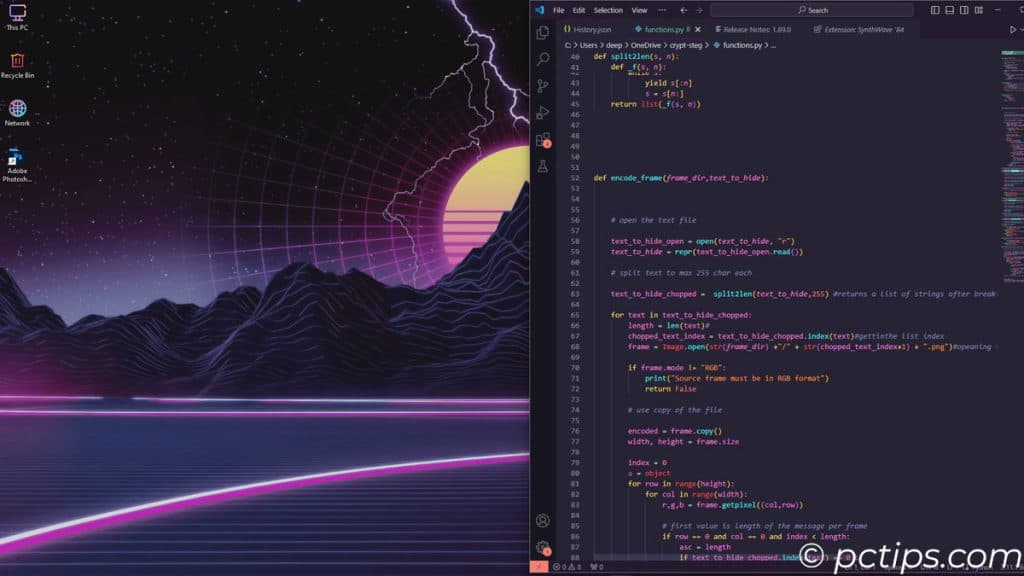
To achieve this, you will need to do some app installation and configuration.
- UltraUXThemePatcher (To install SynthWave 84’)
- 7tsp GUI (To install Sweet Paranoia Icon Packs)
- RainMeter (for Neon Time skins)
macOS Suite: A mac Replica
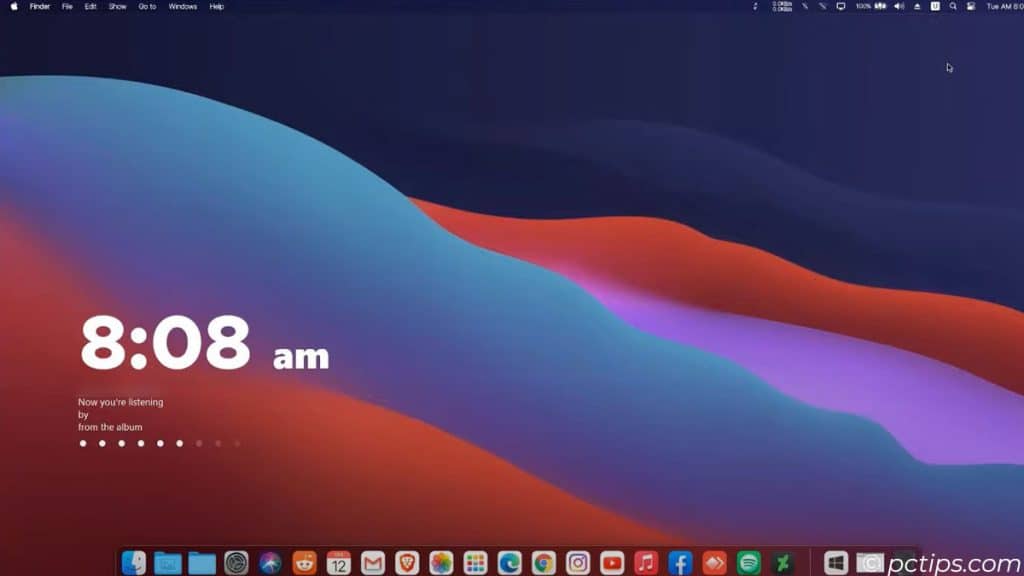
This is probably my personal favorite theme. And you will probably love it especially if you want your system to look like an Apple device.
Unlike other themes mentioned above, here you will need to change the taskbar to get the iconic Apple dock.
Along with this, you will also need icons that match macOS’s icons. Well, we’ve got that covered as well
It is a complete game changer when it comes to getting a new look to your desktop.
From icons to the docker, everything will look different once you are done with it.
You are probably excited now, so here are the things you need.
- UltraUXTheme Patcher & 7tsp GUI (to install macOS Suite and icons that come along with it)
- OldNewExplorer (To slightly customize File Explorer *optional)
- MyDockFinder (For that iconic dock)
- Rainmeter (For Widgets of your choice)
The theme pack will automatically customize the File explorer.
After you intall necessary packages, both the task bar and lower dock will pop up when you move the mouse cursor to the bottom of the screen.
To avoid this, I hid the taskbar. Now the task bar only appeared when hovering to the side of the screen. And finally, I ran both TranslucentTB and RoundedTB for taskbar minimalistic look.
And just like that, my task bar was some-what gone and I was just left with that clean docker.
Nouvo: For a Futuristic Look
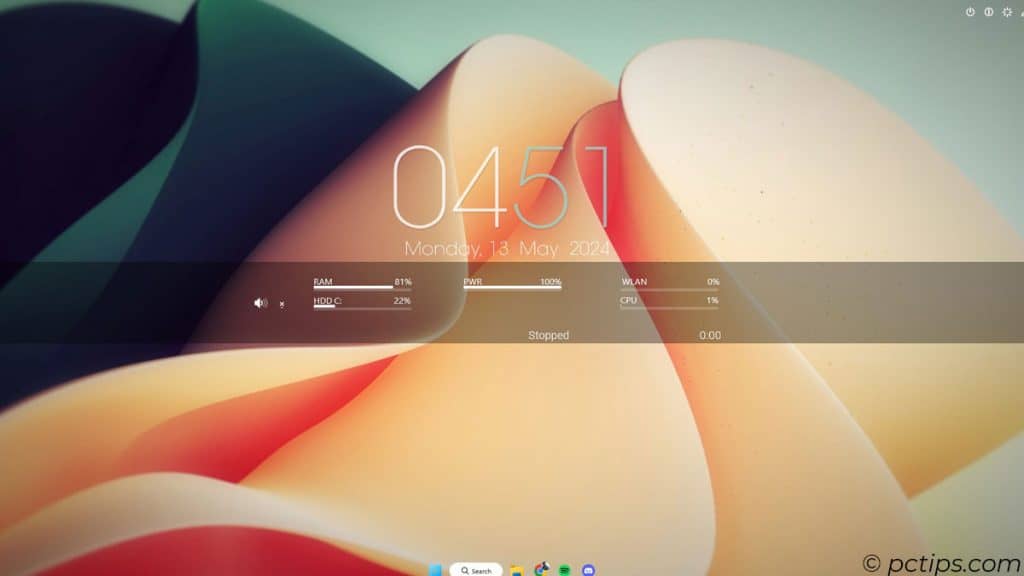
A futuristic look always looks great on a computer, especially if you have a future-proof system.
And of course, you would want a futuristic feel when you use your computer. And this is where the Nouvo themes come in.
To pair with Nouvo themes, I also used the following
- RoundTB (To customize Taskbar)
- 7tsp GUI (for Fluent icon)
Fluent icons were the perfect choice for this theme. It looks futuristic and at the same time does not overwhelm the user.
Along with this, I also used a Rainmeter skin named Flat Blue. This opened the door for numerous widgets as you saw above.
Not bad huh? Not only this, you can get creative and create your own design using any skins you want.
Unfortunately, here is what your Windows Explorer will look like with this theme.
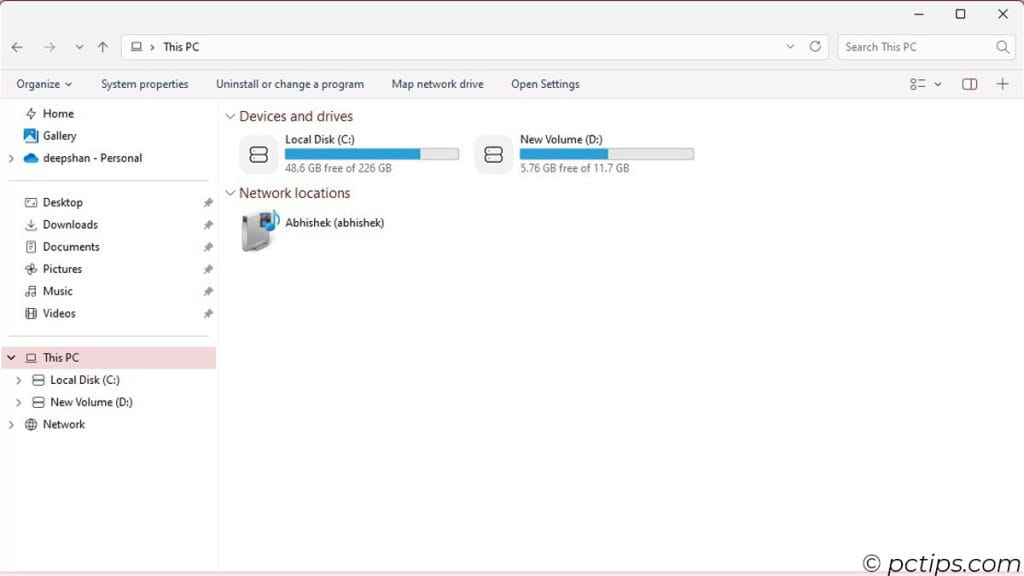
Above you can see, I could not completely apply the Nouvo theme as the minimize, resize and close icon did not change. Not only this, the graphics denoting the drive storage also did not change. The only thing I saw change was the icons.
This was likely because I went back and forth while through the themes. I tried the same on another PC, and the results were the same. I could not completely change the File explorer theme.
Spider-Man: Miles Morales Theme
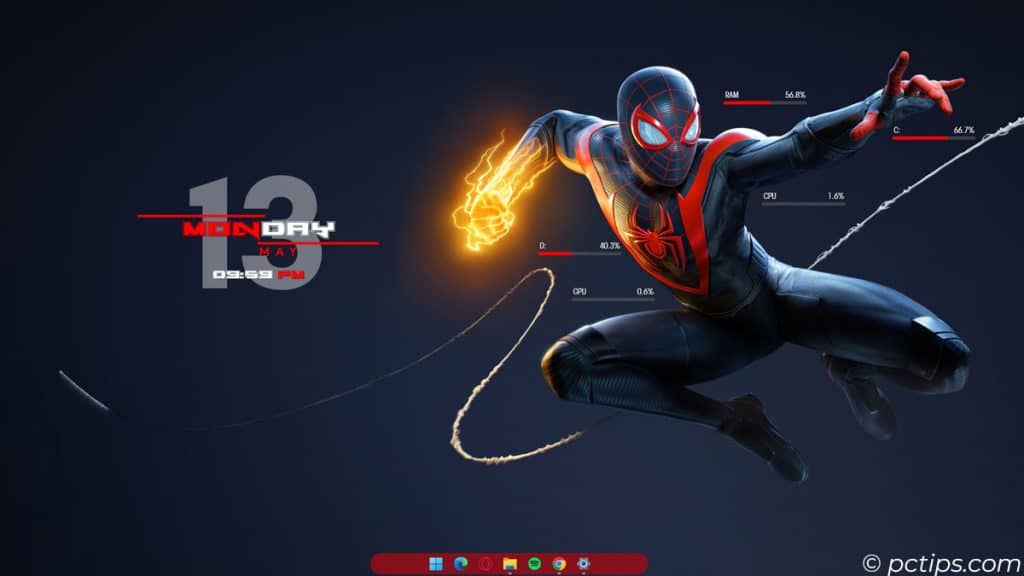
Now this is more of a personal project that I did while writing this article.
It uses just a single wallpaper that I took from Sony’s official website. Combine it with Miles Morales Rainmeter skin and a red ascent, and you have a Spider-Man theme.
You can go a step further by getting a red Windows theme to customize the file explorer.
And if you want I also found a red 7tsm icon pack that you can patch to pull everything together.
See how easy it is to create a theme?
I’m telling you all this to show you how simple it is to create your own theme that feels personal and looks aesthetically pleasing.
Windows 98′ Theme
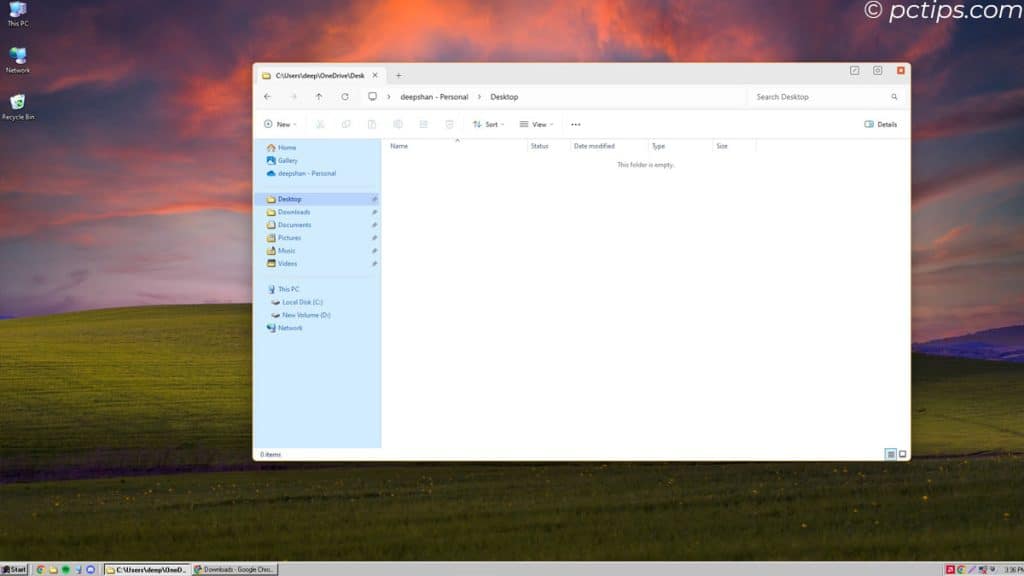
Want to go back down the memory lane? Well, Windows 98 is the theme for you.
With the retro taskbar, Windows File Explorer, and old icons, you can recreate your old days of Windows 98.
For this, you will need
- 7tsp GUI (To get 98′ GUI)
- UltraUXTheme Patcher (To install Windows 11 98)
- Retro Taskbar
The 98 tsp GUI will transform most if not all icons. The second one is to convert your Windows Explorer to a 98’ look-alike, and finally, the Retro taskbar is to get rid of the modern-looking Task Bar and switch with an old taskbar.
And that’s it, you have a retro-looking desktop. Pretty amazing, don’t you think?
Caution: I did like the looks of the old Windows theme, but when reverting the changes, I was not able to change some icons.
And this is when I had to restore my system using the previous system restore point.
Themes Available on Microsoft Store
The themes I listed above, except the dark theme, require some sort of application. And users might hesitate to install them.
Moreover, with all the warnings, one would choose a simple method to change the theme.
And I have got just that, Themes from Microsoft Store. EASY!
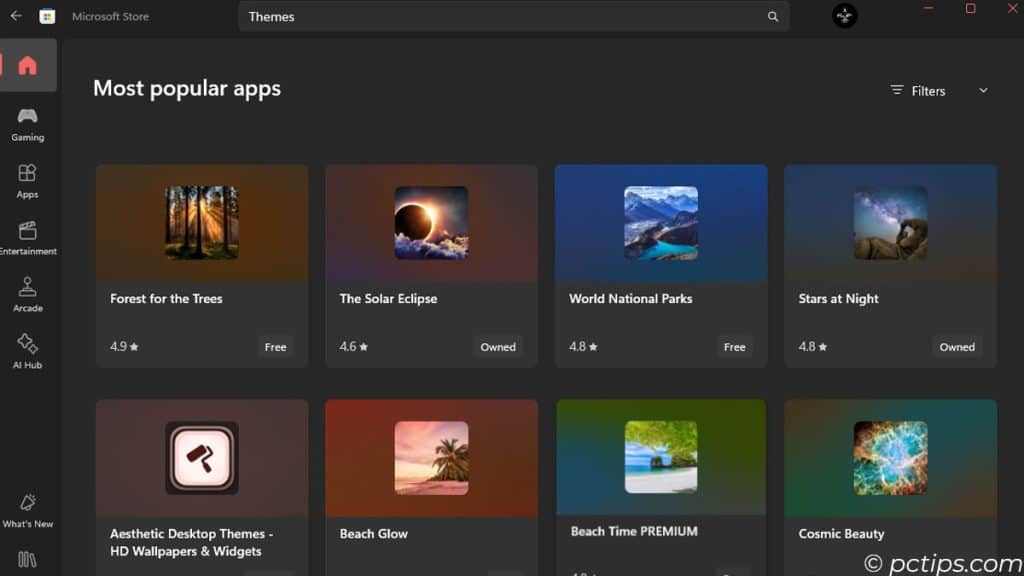
This is the simplest way to change your computer theme. You just search for themes and choose one that you find interesting.
But remember this, these themes will not contain the features of the themes I presented above.
Here, you get wallpapers and colors.
But, it still is a great choice to avoid those risks.
So, here are some great themes currently available on the Microsoft Store.
- Baby Animals: For Animal Lovers
- A Moment of Hygee: Comfy & Cozy Themes
- Earth from Above: For Astronomy Nerds
- Stars at Night: Themes for Stargazing
- World National Park: Themes With the Best View
- Purple World: Best Aesthetic
You can also download themes from other genres on Microsoft’s official support page. Just download and use a theme of your choice.
Hidden Educational Themes
With all themes available readily in the Microsoft Store, you will likely never run out of Windows themes.
But some aren’t available to general users. You need to tweak the registry to make them visible, Here’s how.
- Run regedit and navigate to
HKEY_LOCAL_MACHINE\SOFTWARE\Microsoft\PolicyManager\current\device - Create a New Key inside Devices and name it Education.
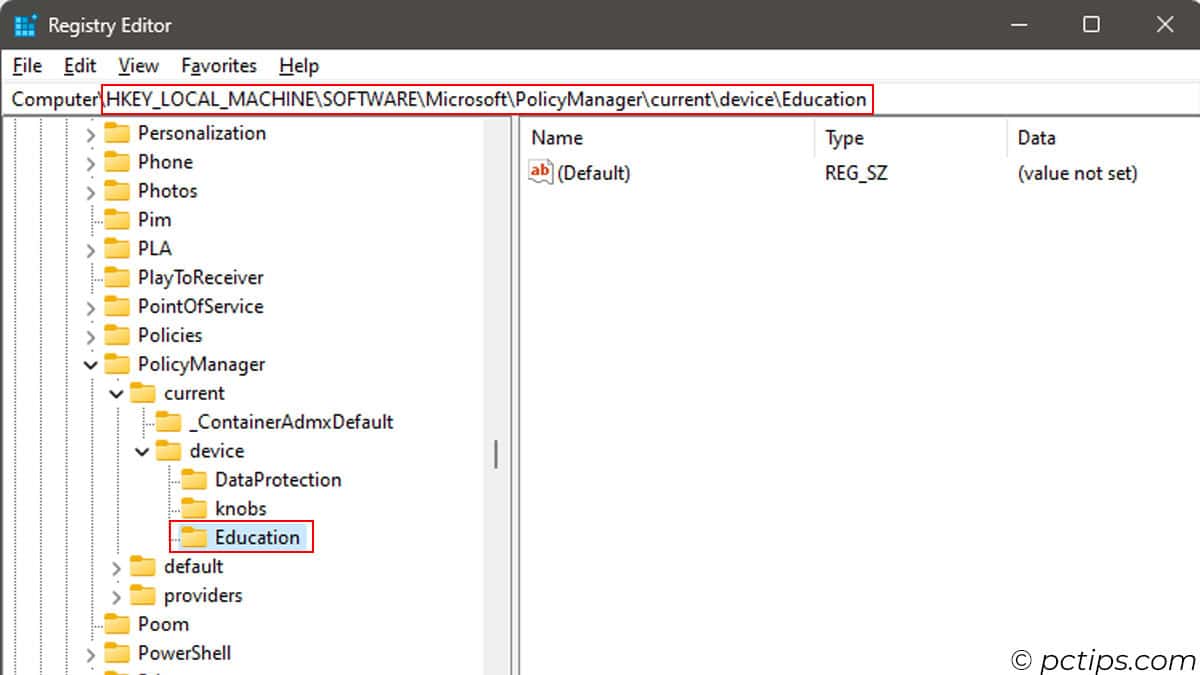
- In Education, on the right panel, create a new D-WORD value and name it EnableEduThemes.
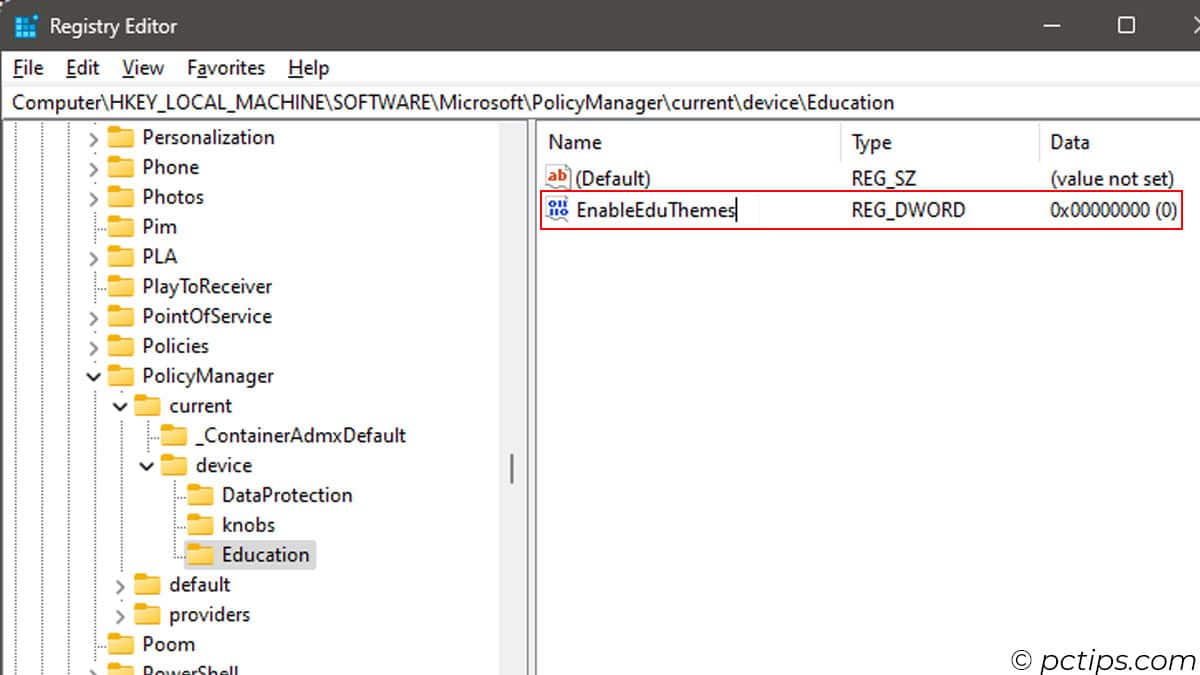
- Double-click on it and set its value data to 1.
- Restart your PC.
Now, in Windows settings > Personalization > Themes, you should see some new Windows Themes. Bet you didn’t know about that.
How To Install Windows Theme?
With all that, you probably want to change your theme right away.
So, lets jump into it.
In the above listicle, you probably noticed that there are two types of theme installation process. The easiest one is through Microsoft Store. You can just search and install desired theme there.
The second, and the best one, is a little complicated. Before I teach you how to install it here is a little caution.
Some apps mentioned below change the registry, and system files. Wrong changes can even render your OS useless.
So, to recover from this, set a restore point from system recovery.
Once you do this, time to go nuts and customize the entire PC theme.
Using UltraUXThemePatcher: To Install Themes
The UltraUXThemepatcher allows the system to detect themes.
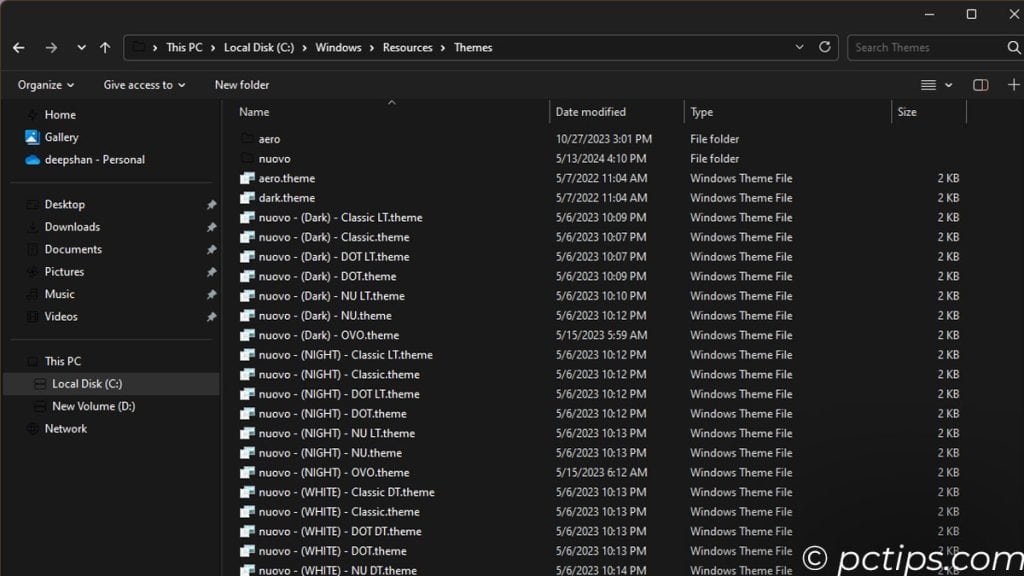
All the themes I mentioned above, just download it and paste inside C:\Windows\Resources\Themes.
Now, head over to Windows Setting > Personalization > Themes and you will see a list of themes. Just select the one you love.
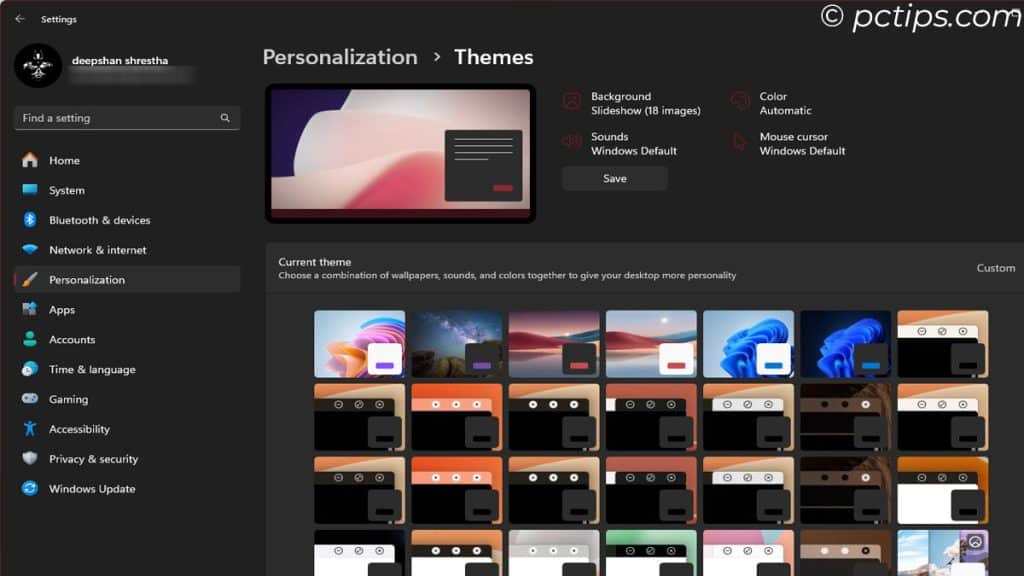
All the themes above are from DeviantArt. Most of these are from a user named Niivu.
Most themes here are compatible for Windows 11 22H2. And I have upgraded to 23H2, which could be the reason why icons and themes did not work like its supposed to.
Getting Icons with 7tsp GUI Patcher
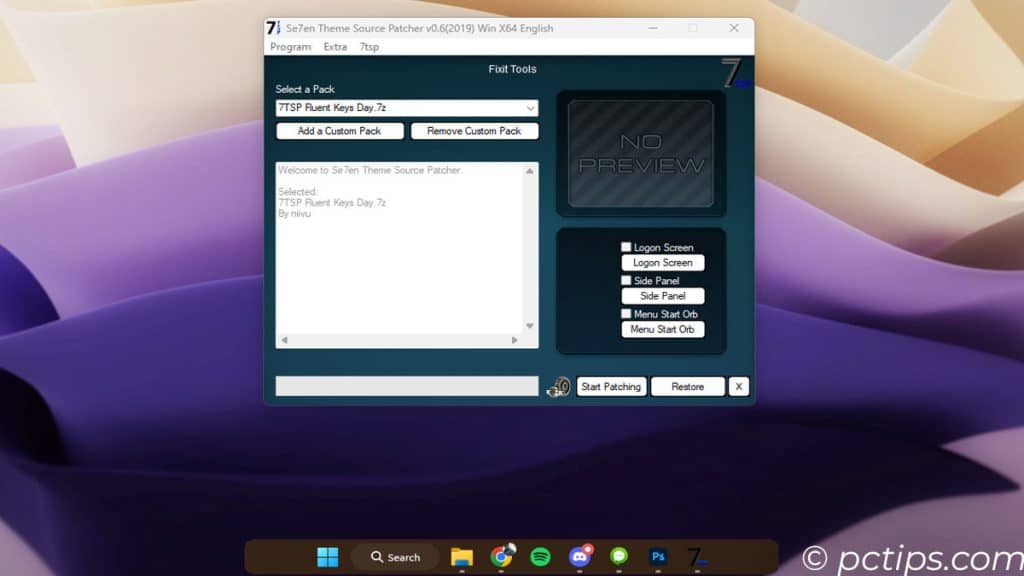
7tsp GUI Patcher is for installing those beautiful icons you saw above. Just run the patcher and select the icon zip file that I linked above. The app automatically patches the icons.
When downloading the 7tsp GUI patcher, you need to change its extension to .exe from .ee.
Similarly, when you download icon packs, change its extension from *.7z.remove to *.7z.
Now, if you want to remove an icon packs, you simply click on Restore and remove all packs.
Again, since I switched back and forth between icons packs, I was not able to go back to my original icon pack,
Although the system files were restored, Windows still showed the customized icon pack.
So, the only option to get the original theme is to reset my entire PC.
Optional Applications
Finally, here is a list of other application that you simply run the .exe file to activate its style.
- MyDockFinder: For Apple Dock
- Rainmeter: For clock, weather and information widgets. You need to install rainmaster skins as well
- TranslucentTB: To make the taskbar transparent.
- RoundedTB: For rounded taskbar
- OldNewExplorer: To customize File Explorer
- Retro Taskbar: For Windows 98′ taskbar
If you are going for a macOS theme, you just need to install MyDockFinder and run MyDock.exe. It will automatically bring out both the dock.
However, you might need to change the language to English by deleting the Chinese.ini file in Lang folder.
Well, there you go. These are, in my opinion, some of the best Windows themes out there and how to get them. But, as I said, you can customize theme in any way you want. This is where your creativity comes in.
Be creative, and create your themes with the tools I mentioned above. And most importantly, do drop some of your best Windows themes down below.
Love it,thanks