17 Must-Know Registry Tweaks for Windows
Last Updated:
The Windows Registry is a core part of Windows. It stores settings used by most apps and OS components (kernel, drivers, services, etc.) as registry entries.
So, what happens if you change values in the registry?
Well, you either tweak things or break things. I’m here to ensure you do the former.
I’ve listed 17 tested tweaks you can use to improve various parts of Windows. Let’s dive right in.
Backup the Registry First [DO NOT SKIP!]
Search regedit to launch the Registry Editor.
The entries are stored as encrypted groups of keys and values, so you’ll need the editor to tweak them.
And remember, whichever tweaks you try from this guide, back up the relevant key before you change anything.
It’s very easy to edit the wrong values. They can get lost amidst thousands of other keys, and you’ll be left with a broken system. But if you have a backup, you can simply restore the key.
So, Do NOT skip out on backups.
The quickest/easiest method is to right-click the key, select Export, and save it.
Changing registry values affects various Windows components. Randomly doing so can break your system.
To ensure this doesn’t happen, please accurately follow the steps provided in this guide.
Use the next section as a template. It visually explains how to open the editor, find keys, back up keys, create and edit values, and restore keys in case things go wrong.
Reduce Startup Apps Load Time
As I said earlier, search regedit to open the Registry Editor. Then,
- Paste this path into the address bar:
Computer\HKEY_CURRENT_USER\Software\Microsoft\Windows\CurrentVersion\Explorer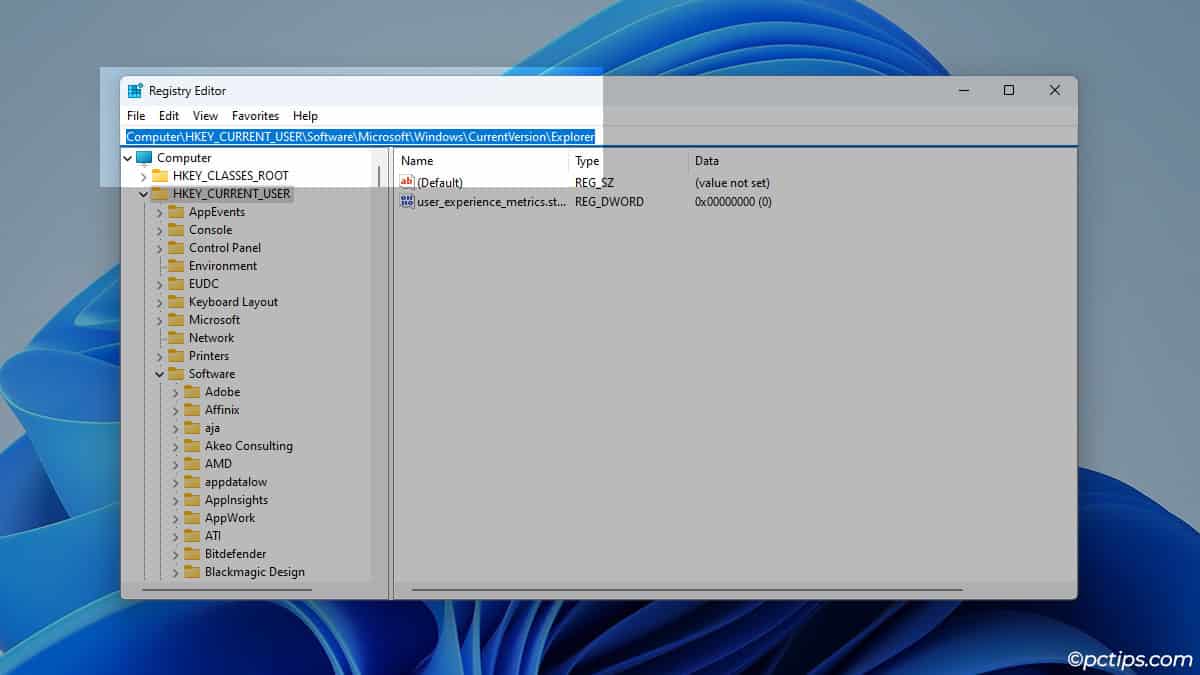
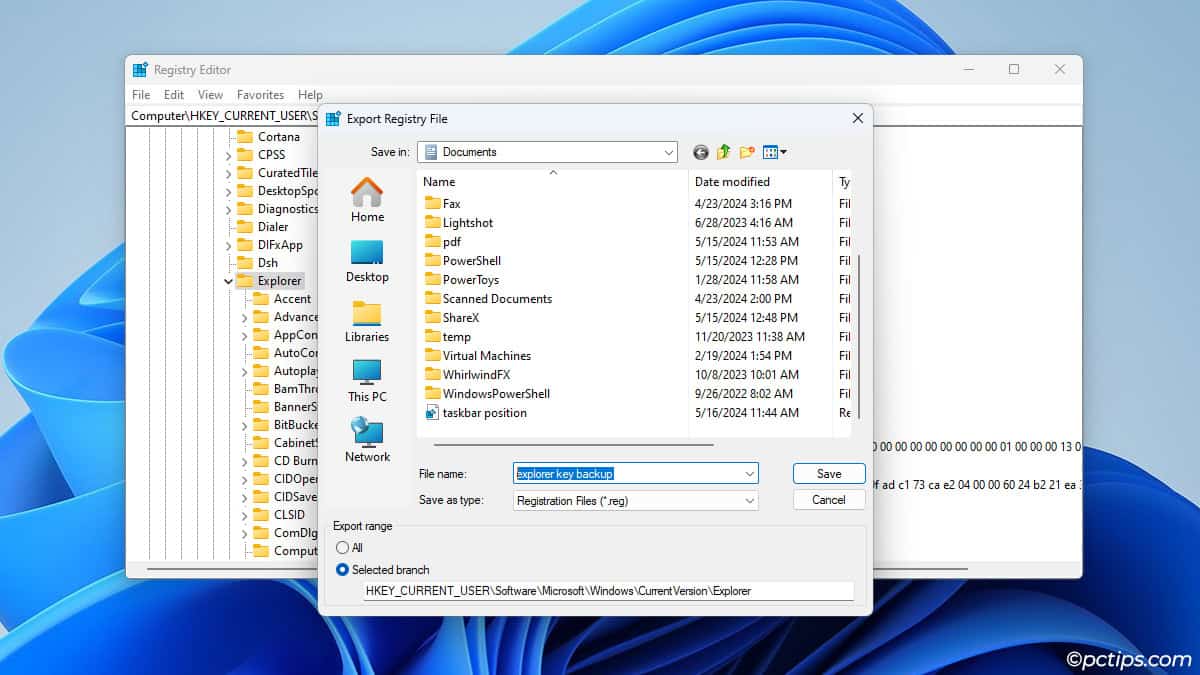
- Right-click the Explorer key and select Export.

- Name the file whatever you want and save it.
- Right-click Explorer again and select New > Key.
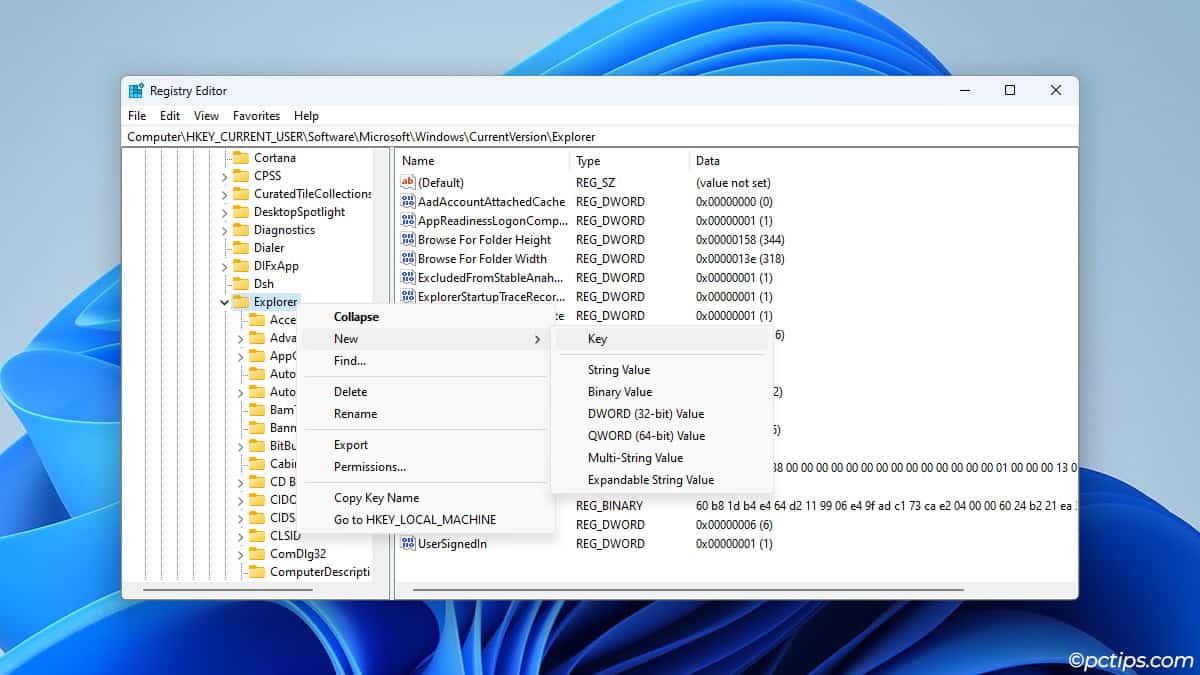
- Name it
Serialize.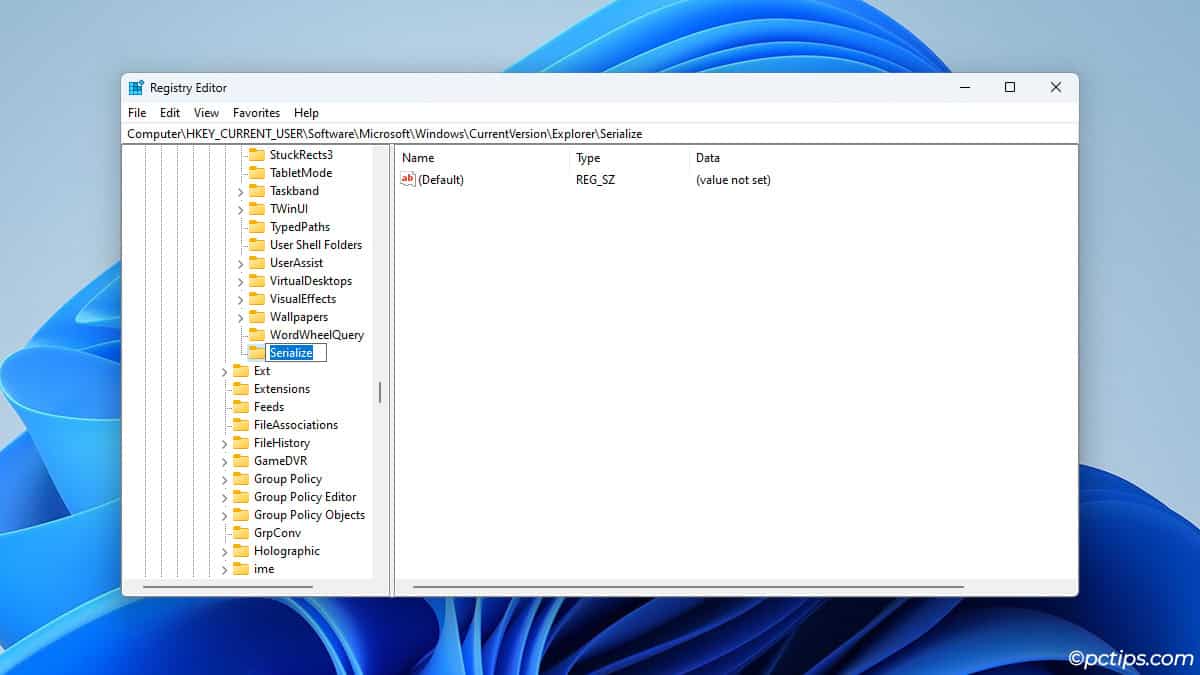
- Right-click it and create a DWORD (32-bit) value named
StartupDelayinMSec.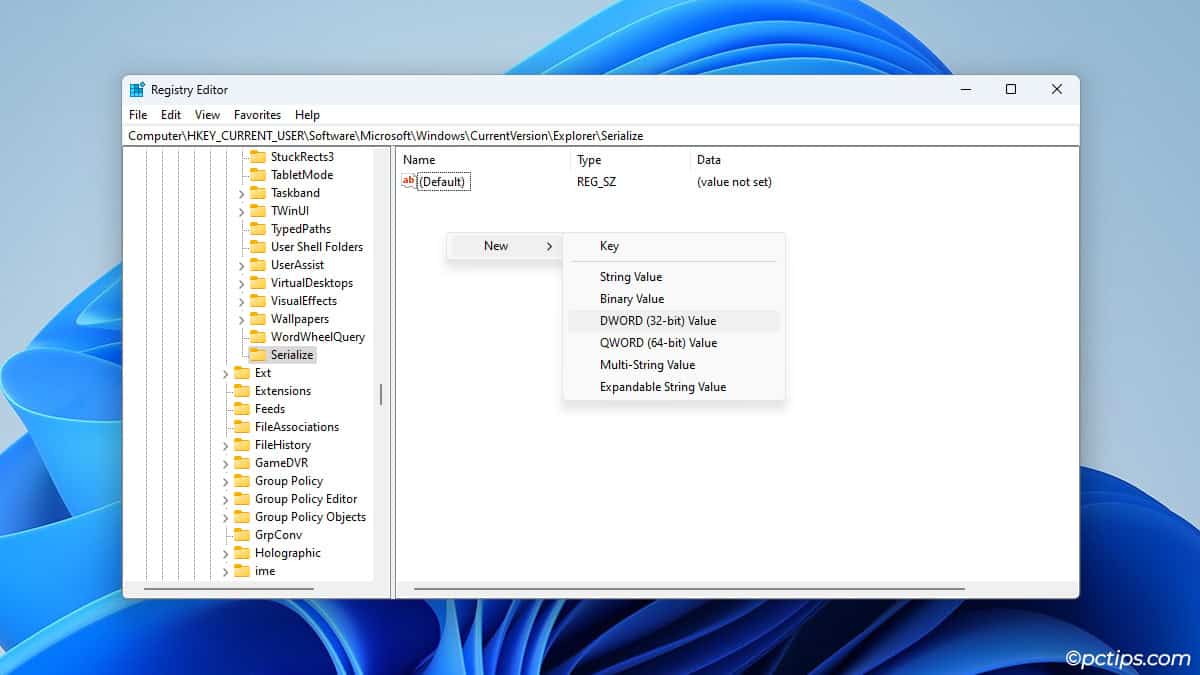
- Double-click it, set the value data to
1, and press OK.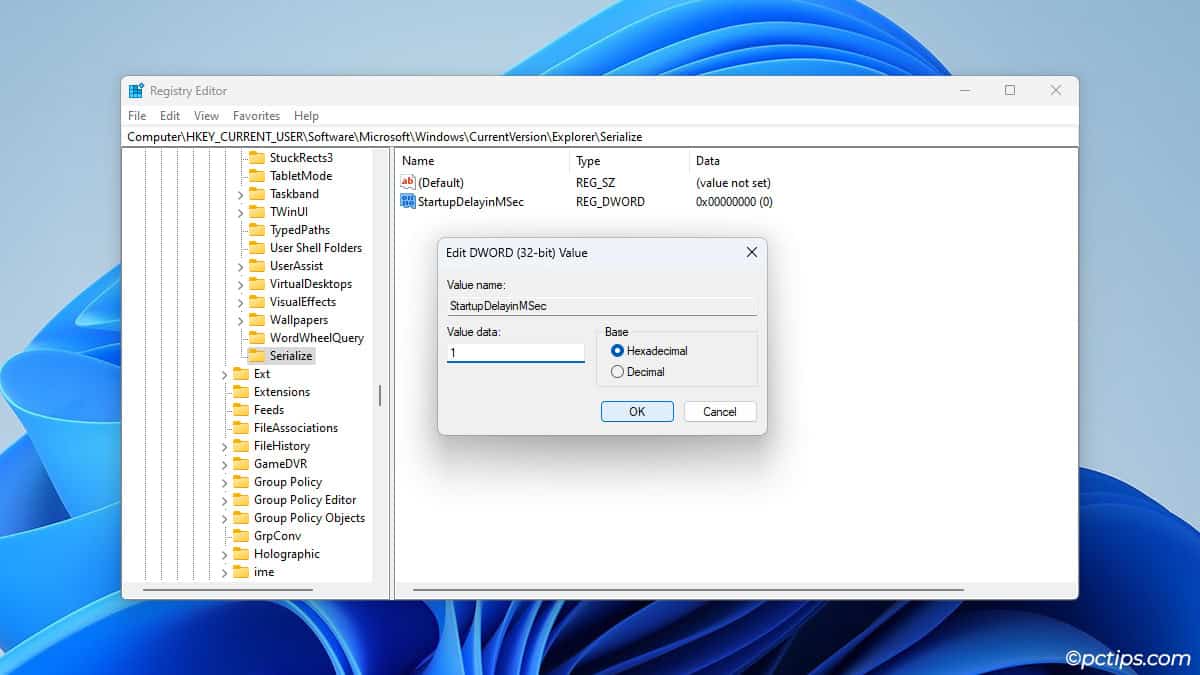
- On Windows 22H2 and newer versions, you may also need a key named
WaitForIdleStatewith the value 0.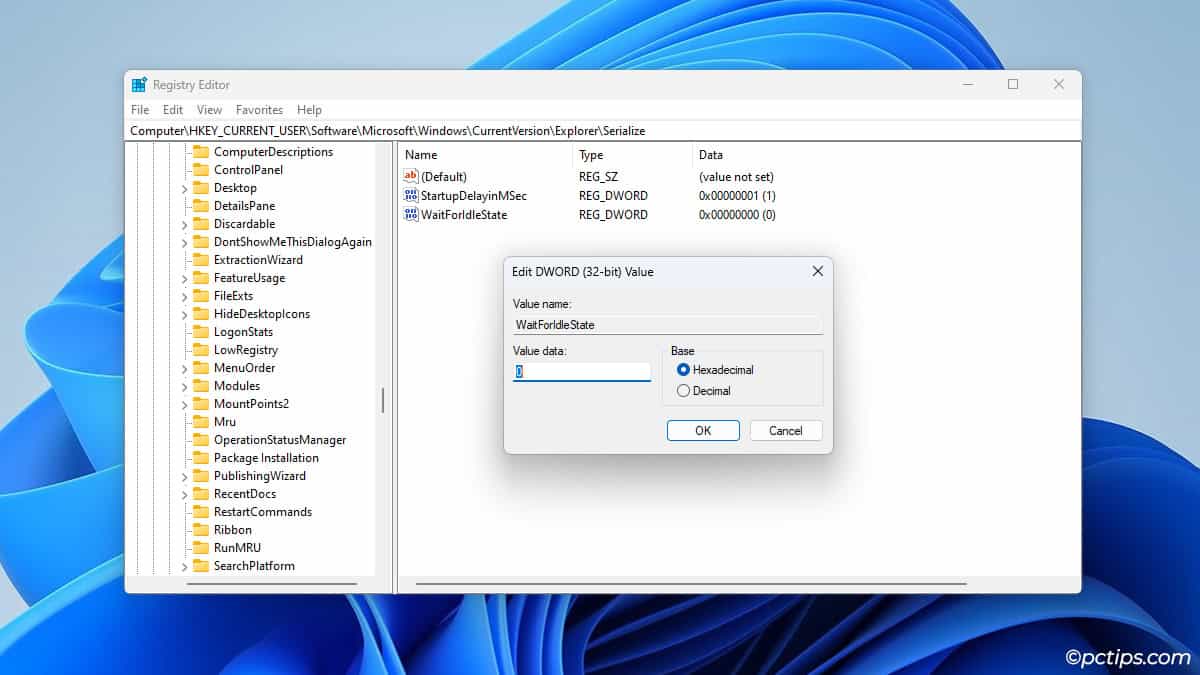
After using this tweak, my startup apps load as soon as I log in. No more 10-second delay.
As these apps are loading before OS components like services, some users may encounter problems. In that case, simply double-click the backup file from Step 3 to restore the key.
Speed Up Shutdown Time
Tired of those “app is preventing shutdown” screens?
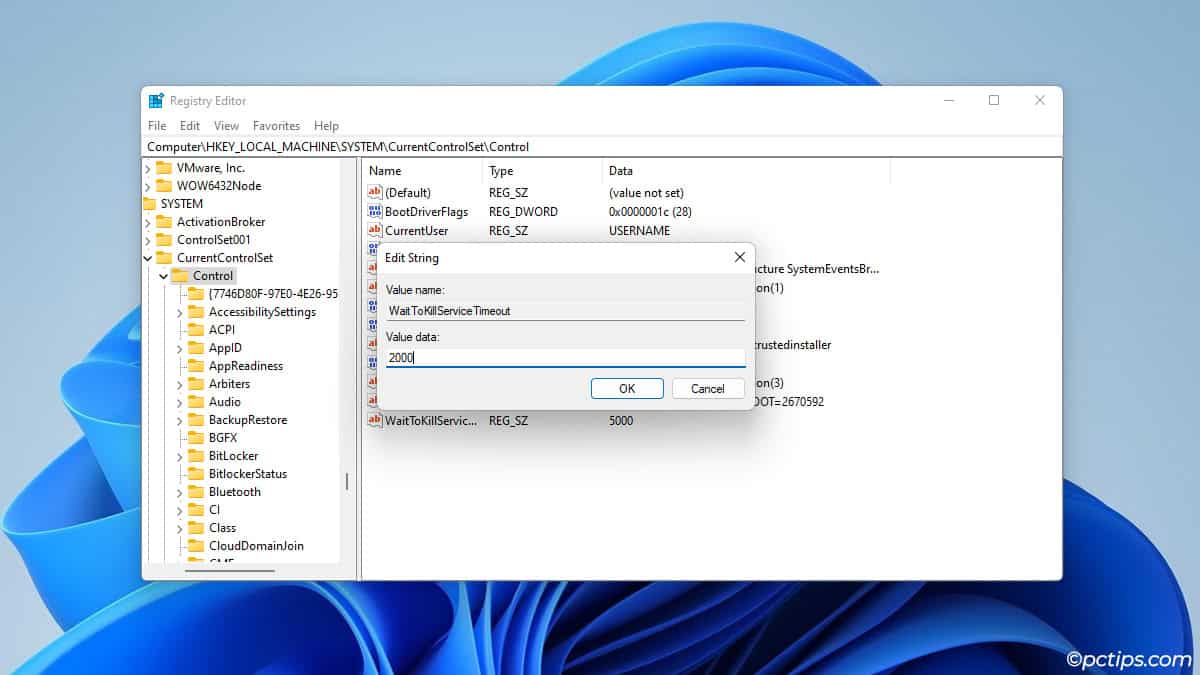
By default, Windows waits 5000 ms (i.e. 5 seconds) before killing the service. You can reduce this value to end the services and shut down much quicker.
- Paste this path:
Computer\HKEY_LOCAL_MACHINE\SYSTEM\CurrentControlSet\Control - Back up the Control key.
- Lower the value of WaitToKillServiceTimeout. 2000 ms (2 seconds) is a good starting point.
I tried a 1 second wait time which halved the shutdown time from 8 seconds overall to 4 seconds.
Remember that this is a double-edged sword, though. It’s faster, but if you mistakenly shut down without saving your work, you may not have enough time to press the Cancel button.
Squeeze Out More FPS
A lot of programs running in the background can mean less CPU time for your game.
By setting a higher priority for games, you can ensure they have all the resources they need and provide much higher FPS.
- Paste this path:
Computer\HKEY_LOCAL_MACHINE\SOFTWARE\Microsoft\Windows NT\CurrentVersion\Multimedia\SystemProfile - Back up the SystemProfile key.
- Double-click NetworkThrottlingIndex and set it to
ffffffff.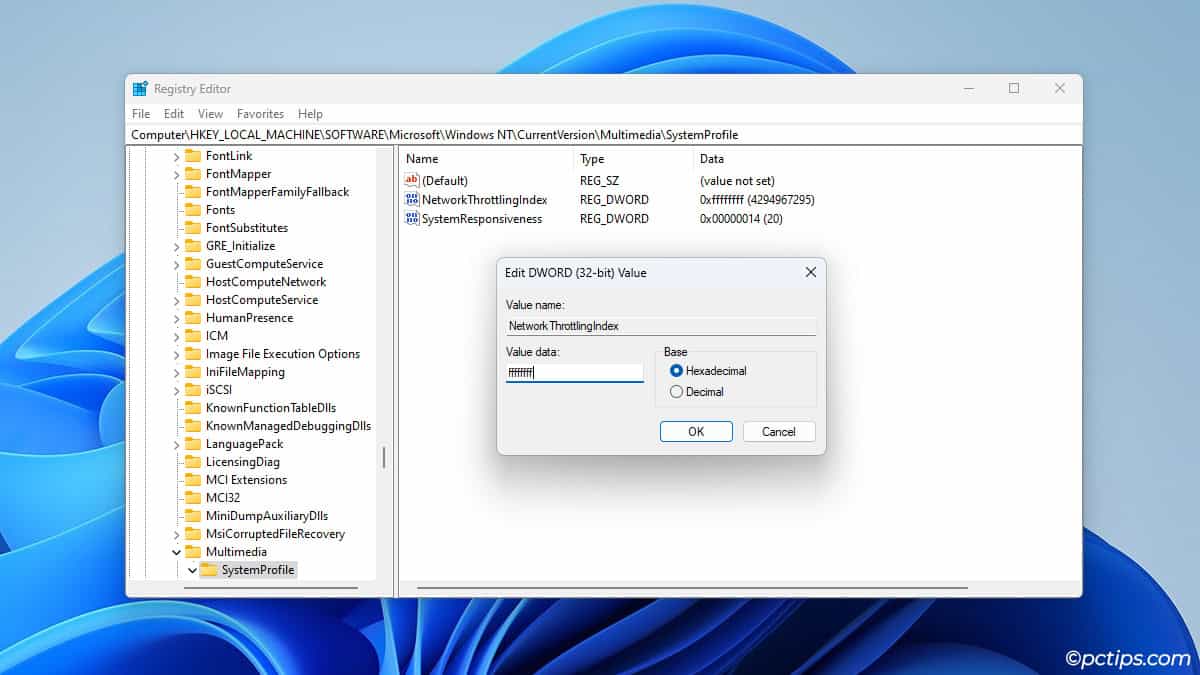
- Next, go to:
Computer\HKEY_LOCAL_MACHINE\SOFTWARE\Microsoft\Windows NT\CurrentVersion\Multimedia\SystemProfile\Tasks\Games - Back up the Games key.
- Set GPU Priority to
8, Priority to6, Scheduling Category toHigh, and SFIO Priority toHigh.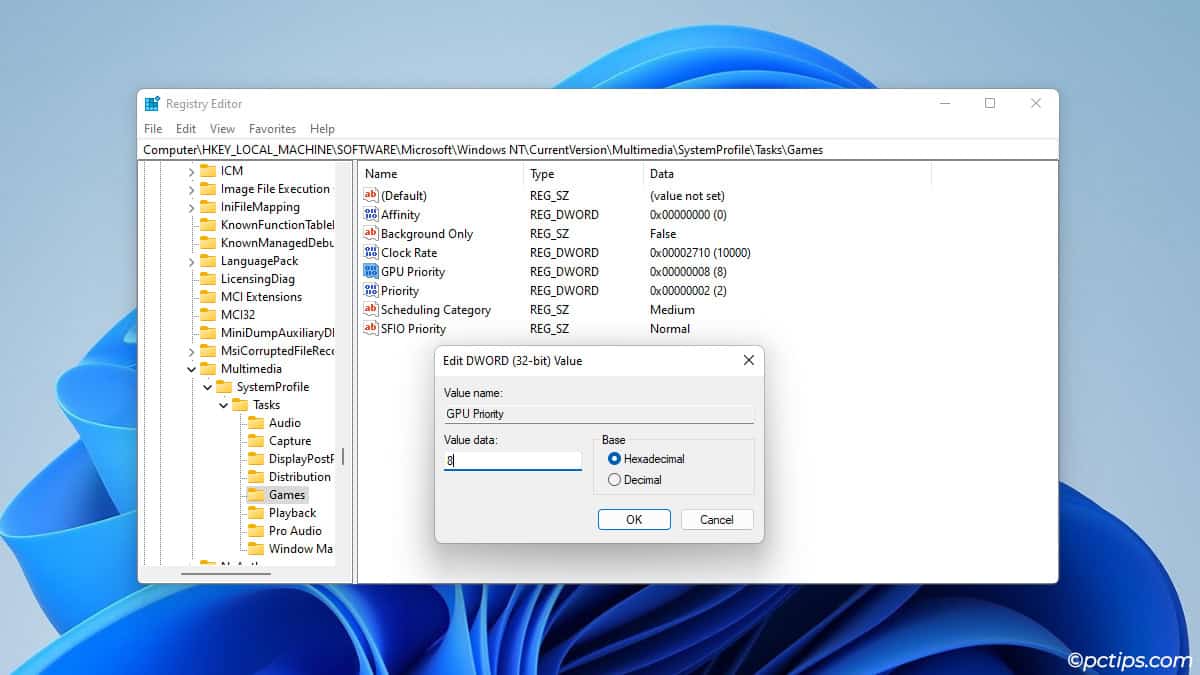
Related: We have the perfect guide for you if you want to make your PC faster in general and not just in games.
Get Lower Ping in Games
TCP packets use a delayed ACK timer of 200 ms by default. Removing this delay can reduce network latency.
If you’re playing a competitive online game, this can mean significantly lower ping.
- Paste this key:
Computer\HKEY_LOCAL_MACHINE\SYSTEM\CurrentControlSet\services\Tcpip\Parameters\Interfaces - Open each sub-key and check the DhcpIPAddress until you find your network adapter.
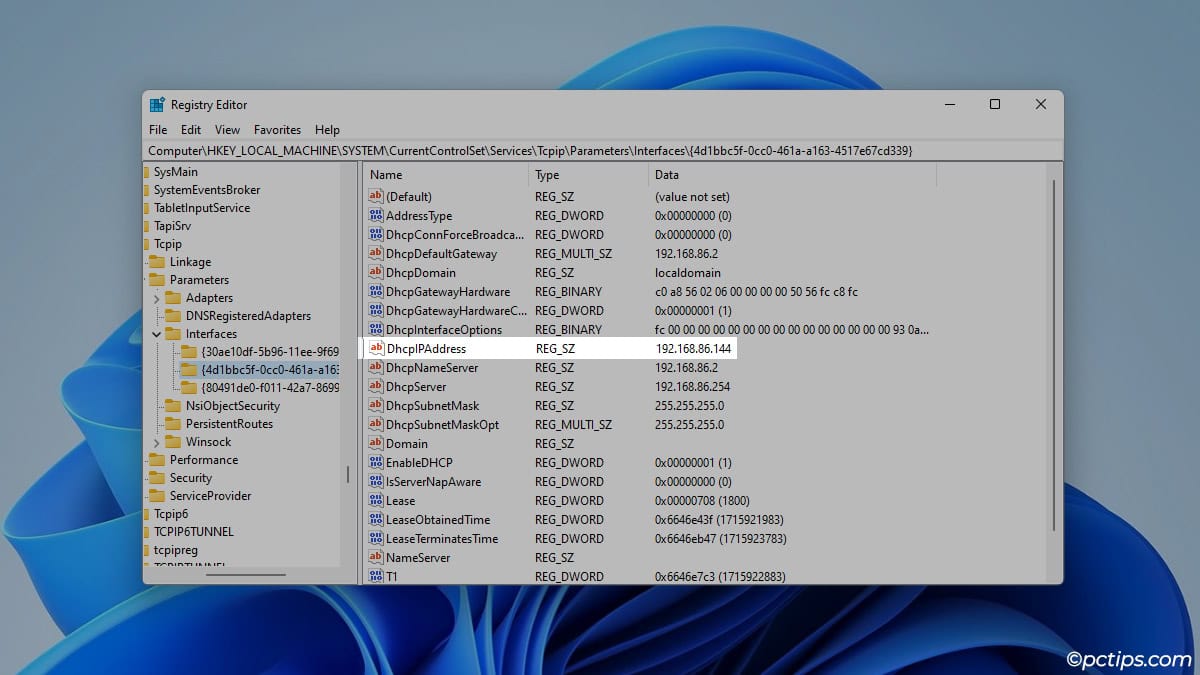
- Back up this subkey.
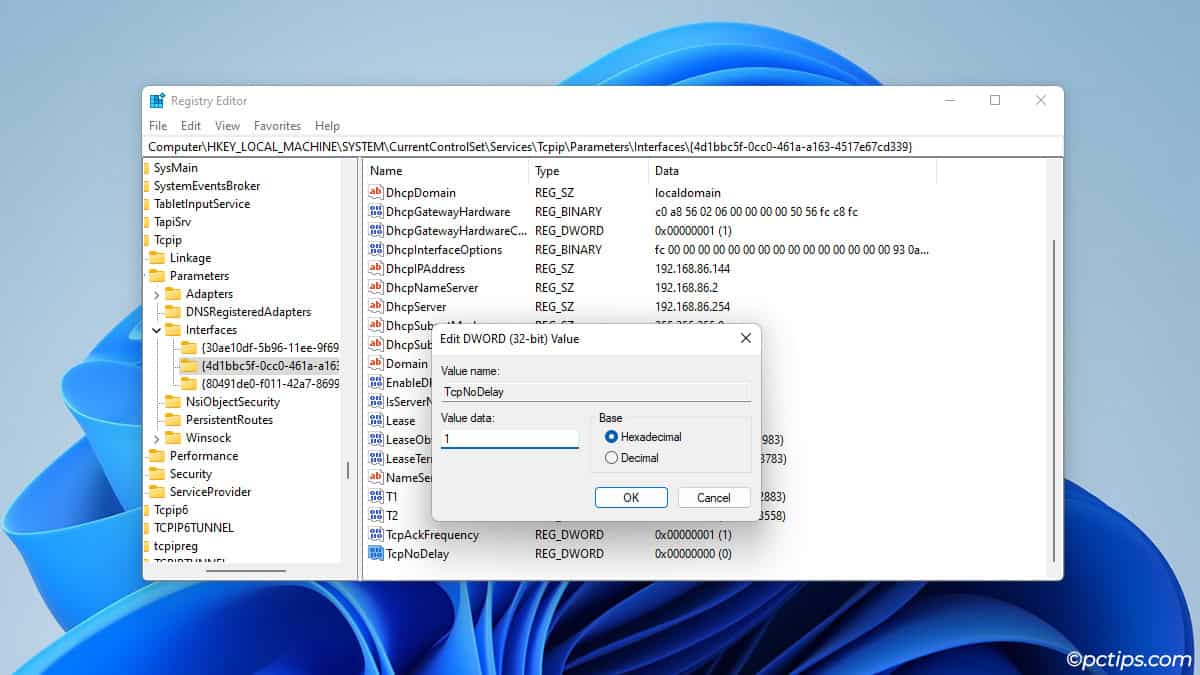
- Create two new DWORD values named
TcpAckFrequencyandTCPNoDelay. - Set both to
1.
Disable Windows Auto Updates
I prefer to keep my system up-to-date. But I know plenty of people don’t like how Windows constantly auto-updates without asking the user.
If you’d like to change this behavior,
- Go to:
Computer\HKEY_LOCAL_MACHINE\SOFTWARE\Policies\Microsoft\Windows - Back up the Windows key.
- Right-click and select New > Key. Name it
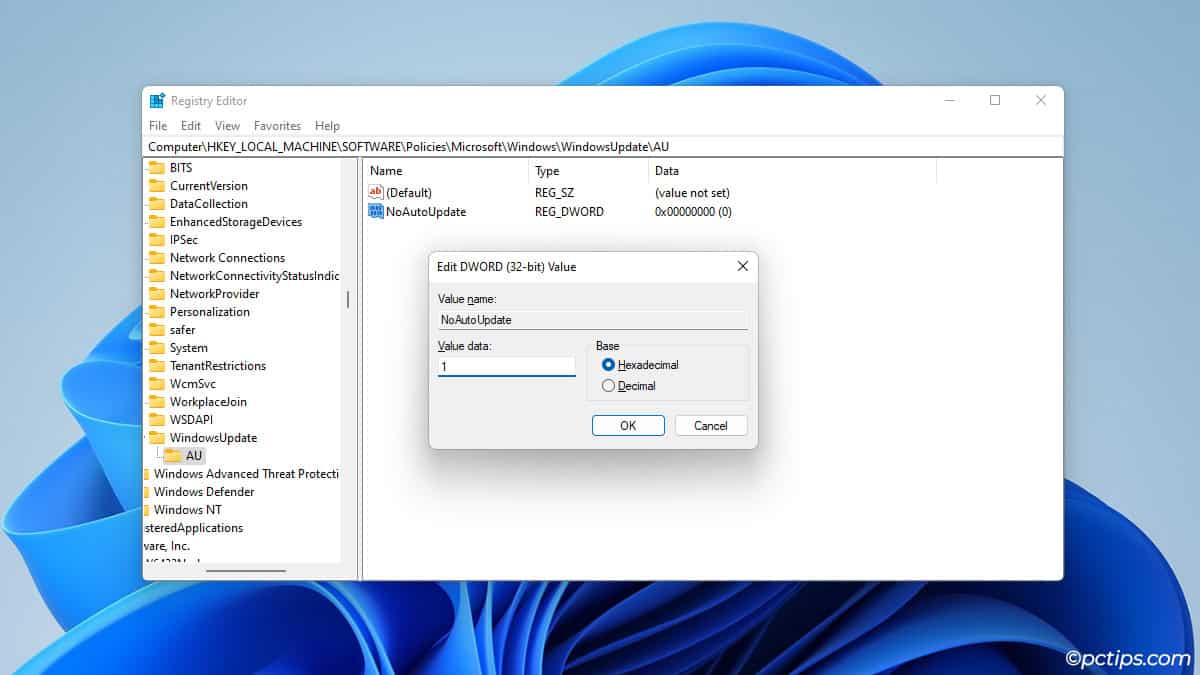
WindowsUpdate. - Create another new key inside WindowsUpdate named
AU. - Inside AU, create a DWORD value named
NoAutoUpdate. - Set the value data to 1 to disable auto-updates.
- To enable auto-updates again, delete the key or set the value to
0.
Bypass Windows 11 Requirements
Windows 11 often isn’t supported on older devices due to its stringent requirements.
But it’s actually very easy to bypass these requirements if you edit the registry.
- Paste this path:
Computer\HKEY_LOCAL_MACHINE\SYSTEM\Setup - Back up the Setup key.
- Right-click it and create a new key named
MoSetup. - Open it and create a DWORD value.
- Name it
AllowUpgradesWithUnsupportedTPMOrCPUand set the value data to1.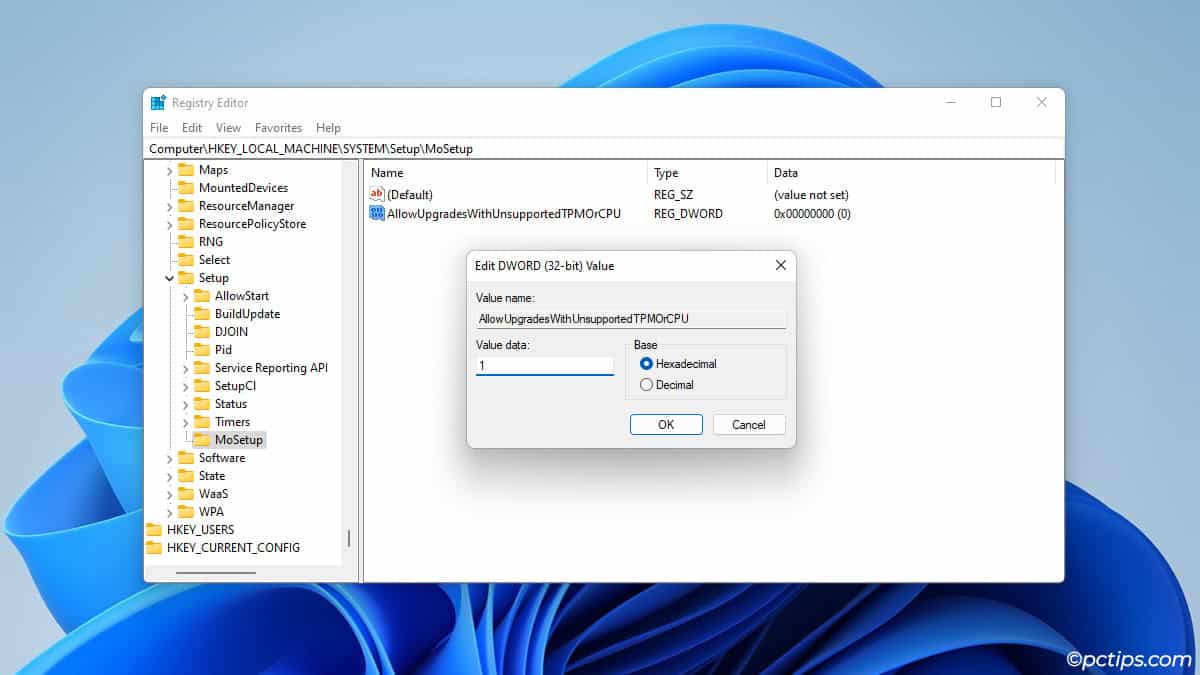
- Create another new key named
LabConfig. - Open it and create a new DWORD value.
- Name it
BypassSecureBootCheckand set the value to1. - Create another DWORD value named
BypassTPMCheckwith the value1. - Create one more DWORD value named
BypassRAMCheckwith the value1.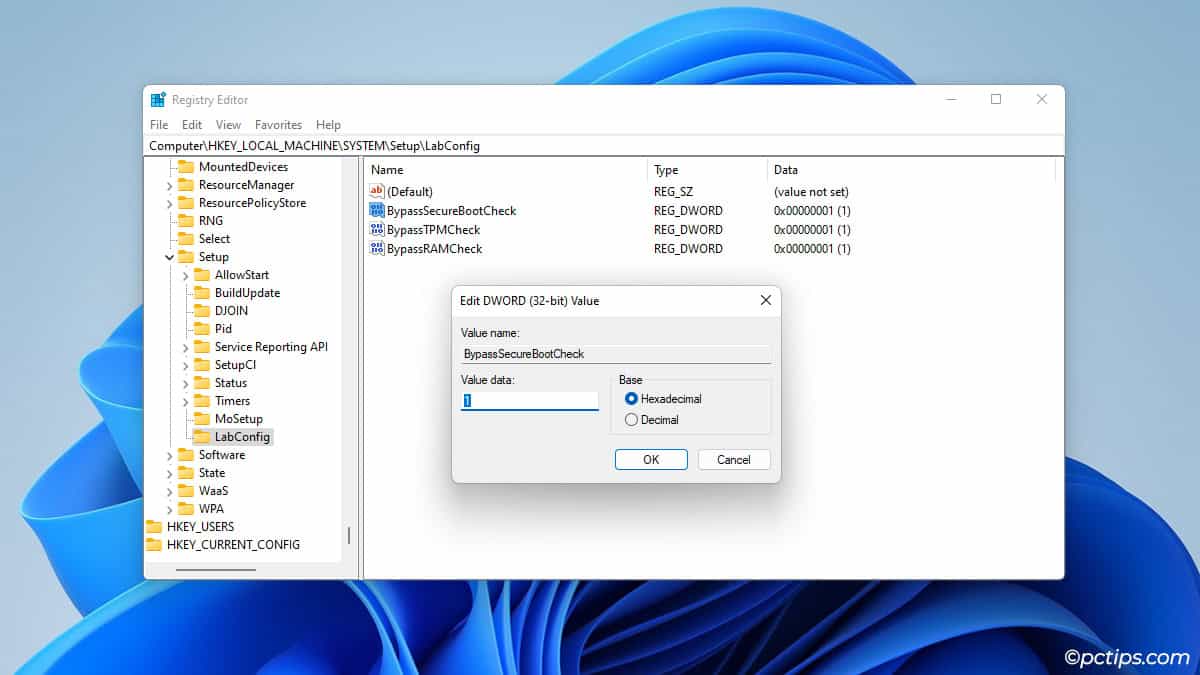
Quick Tip: If you’re stuck on the This PC can’t run Windows 11 page, press Shift + F10 and enter regedit. This will launch the registry editor and allow you to make these changes.
Disable Bing Search Suggestions
It can get pretty annoying when you’re trying to find a file on your PC but Windows keeps suggesting Bing results. I know from experience.
You have two options; switch to a third-party search app like Everything, or disable Bing results in Windows Search.
- Paste this path:
Computer\HKEY_CURRENT_USER\Software\Policies\Microsoft\Windows - Back up the Windows key.
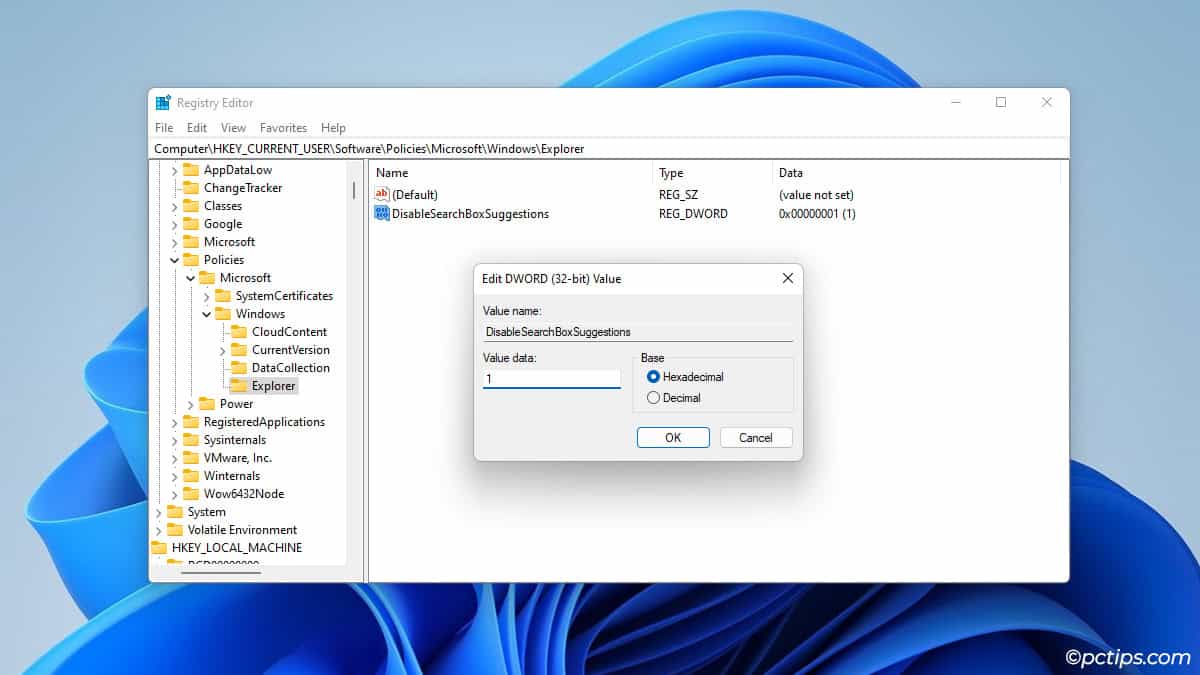
- Create a new key named
Explorer. - Create a DWORD value named
DisableSearchBoxSuggestions. - Set the value to
1.
Use Task Manager to restart Windows Explorer. Or, log off, or restart the PC. Once you do any of these, you’ll find that the Bing suggestions are now disabled.
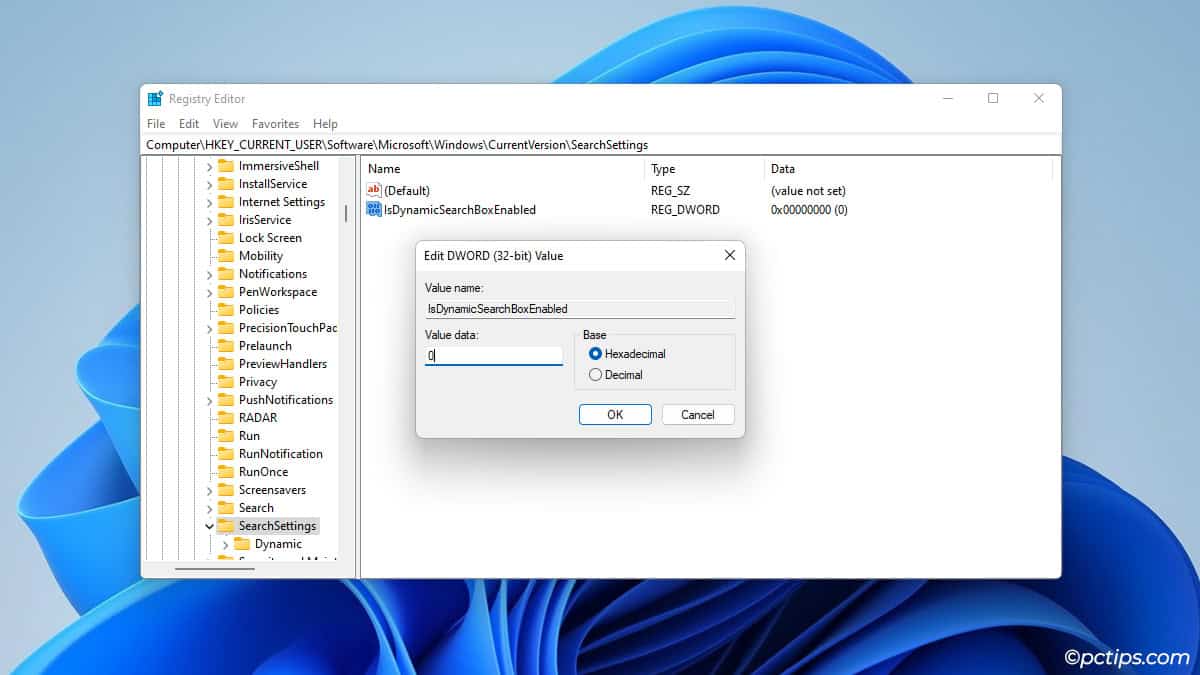
Disable Dynamic Search Highlights
Windows Search displays new interesting info daily (trending news and videos, travel recommendations, recipes, etc.).
If you don’t care for this section and would prefer a cleaner look,
- Go to:
Computer\HKEY_CURRENT_USER\Software\Microsoft\Windows\CurrentVersion\SearchSettings - Back up the SearchSettings key.
- Create a DWORD value named
IsDynamicSearchBoxEnabled. - Set the value data to
0.
Disable Cortana
Windows 11 ditched Cortana a long time ago, but some of you might still be on Windows 10. In that case, it’s possible to disable Cortana with this easy registry tweak:
- Go to:
Computer\HKEY_LOCAL_MACHINE\SOFTWARE\Policies\Microsoft\Windows - Back up the Windows key.
- Create a new key named
Windows Search. - Open it and create a DWORD value named
AllowCortana. - Set the value data to
0and restart your PC.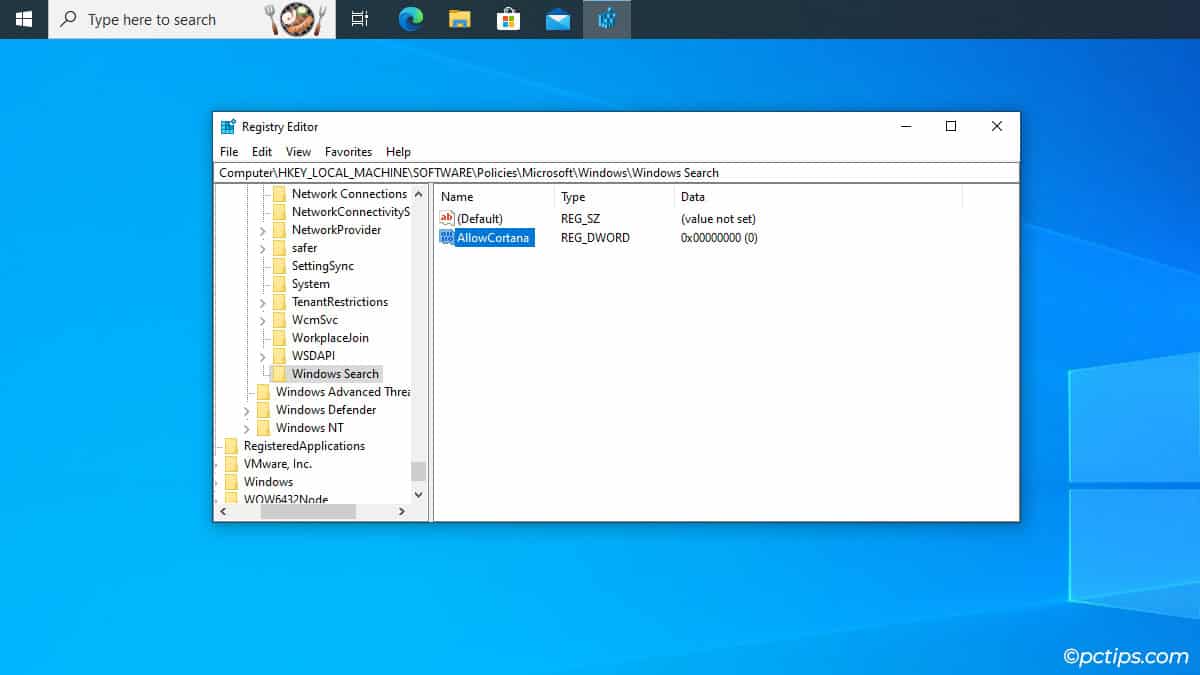
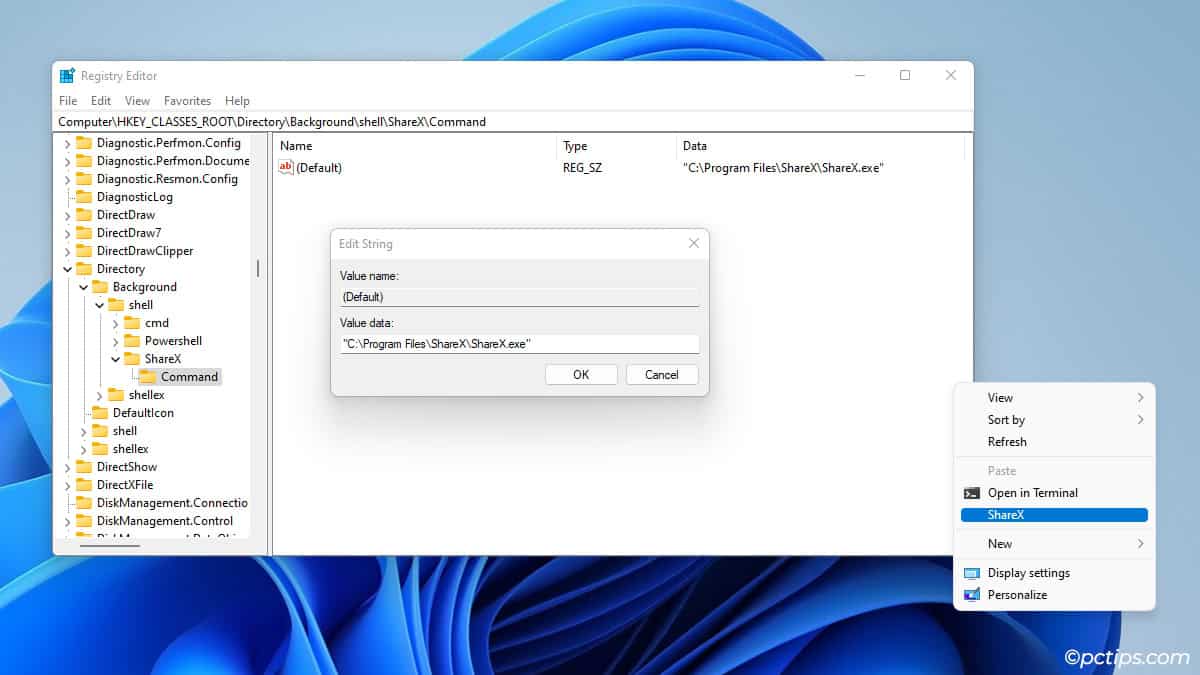
Add Programs to Right-Click Menu
You’ve probably opened the NVIDIA Control Panel or the AMD Software from the context menu before.
But did you know you can also add other apps to this menu for easy access? Here’s how:
- Go to:
Computer\HKEY_CLASSES_ROOT\Directory\Background\shell - Back up the shell key.
- Create a new key named after whatever program you want to add (e.g., Steam).
- Open that key and create another key named
Command. - Locate the exe file, right-click it, and select Copy as path.
- Set the value of Default to the exe path from Step 5.
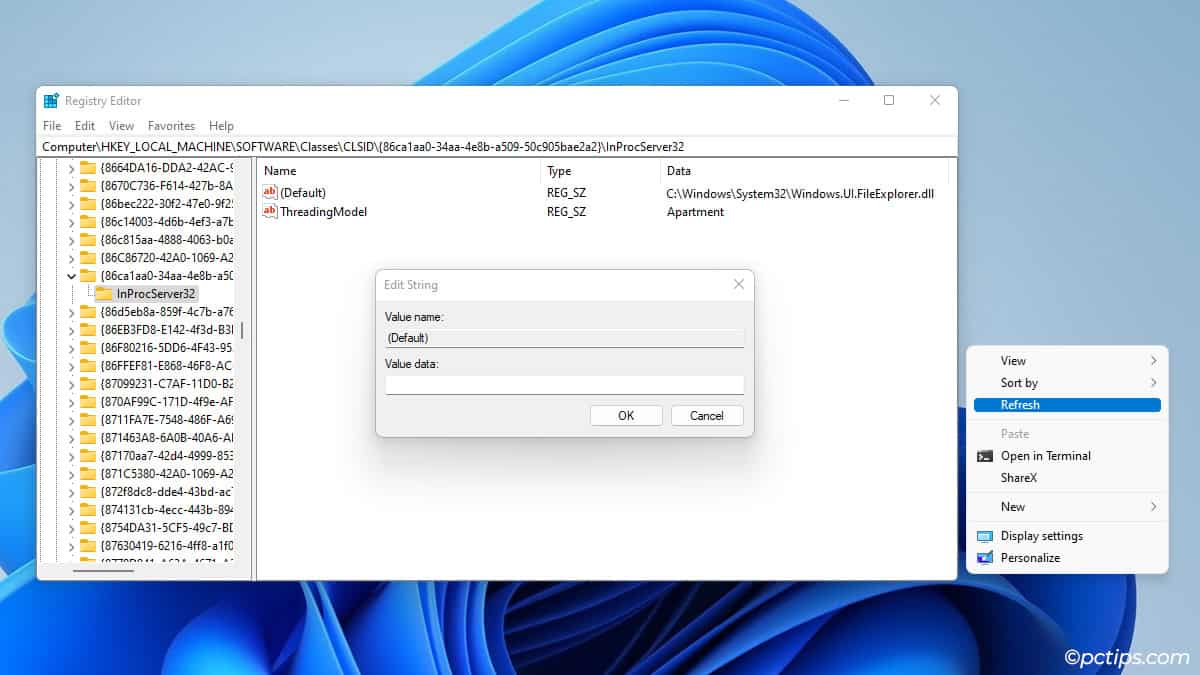
Get Old Context Menu Back
The new Windows 11 context menu was almost universally disliked at launch.
Almost 4 years later, it doesn’t look like Microsoft plans to revert it. So, you might as well do it yourself:
- Paste this path:
Computer\HKEY_LOCAL_MACHINE\SOFTWARE\Classes\CLSID - Back up the CLSID key.
- Find the
{86ca1aa0-34aa-4e8b-a509-50c905bae2a2}key, or create it if it doesn’t exist. - Right-click it and create a new key named
Inprocserver32. - Clear the value of Default and leave it blank.
- Once you restart the PC, the old context menu should be back.
Move the Taskbar
You can align the Taskbar to the Bottom or Left via Windows Settings. But if you edit the registry, it’s also possible to unlock the Top alignment.
- Go to:
Computer\HKEY_CURRENT_USER\Software\Microsoft\Windows\CurrentVersion\Explorer\StuckRects3 - Back up the StuckRects3 key.
- Double-click on Settings. Change the
03value underFEto01.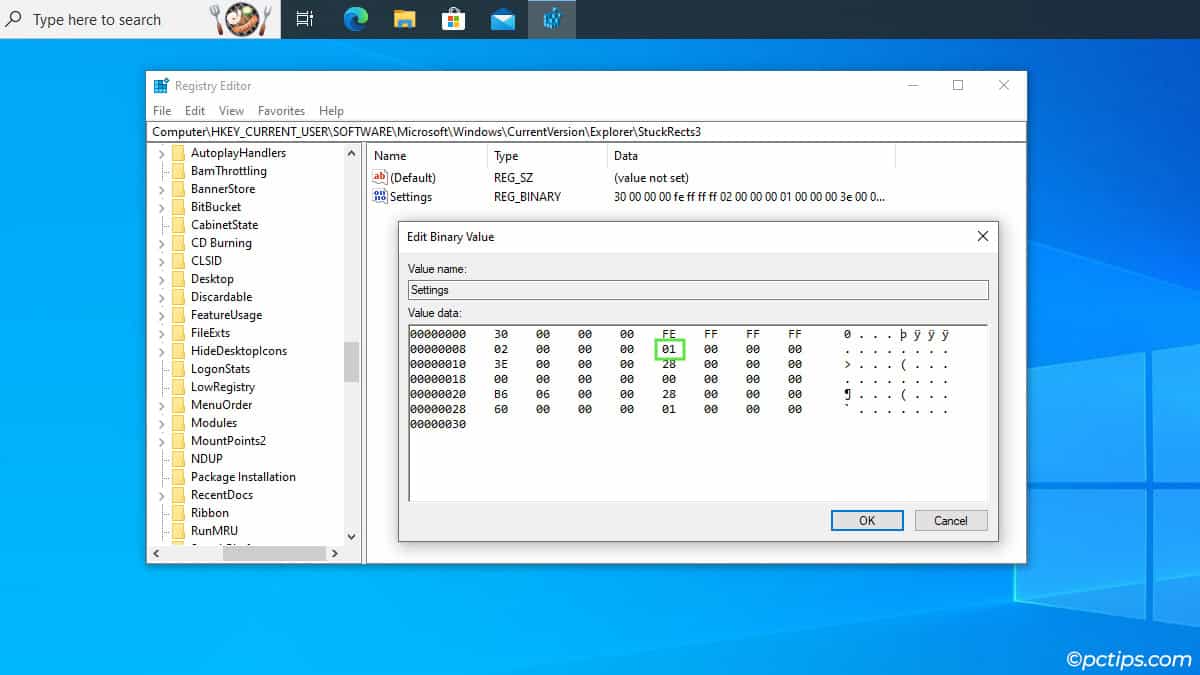
- Restart your PC.
Note: We tested this tweak on multiple PCs and found that it works reliably on Windows 10 but not on Windows 11. If you need an alternative way to move the Taskbar, consider customizing with an app like NeXuS Dock.
Open Last Active Window from Taskbar
Say you have multiple Chrome or Explorer windows open. When you click on the icon, you have to select the window to open.
If you hold Ctrl and click, that instantly opens the last active window. It’s possible to set this as the default behavior with a simple registry tweak:
- Go to:
Computer\HKEY_CURRENT_USER\Software\Microsoft\Windows\CurrentVersion\Explorer\Advanced - Back up the Advanced key.
- Create a DWORD value named
LastActiveClickand set it to1.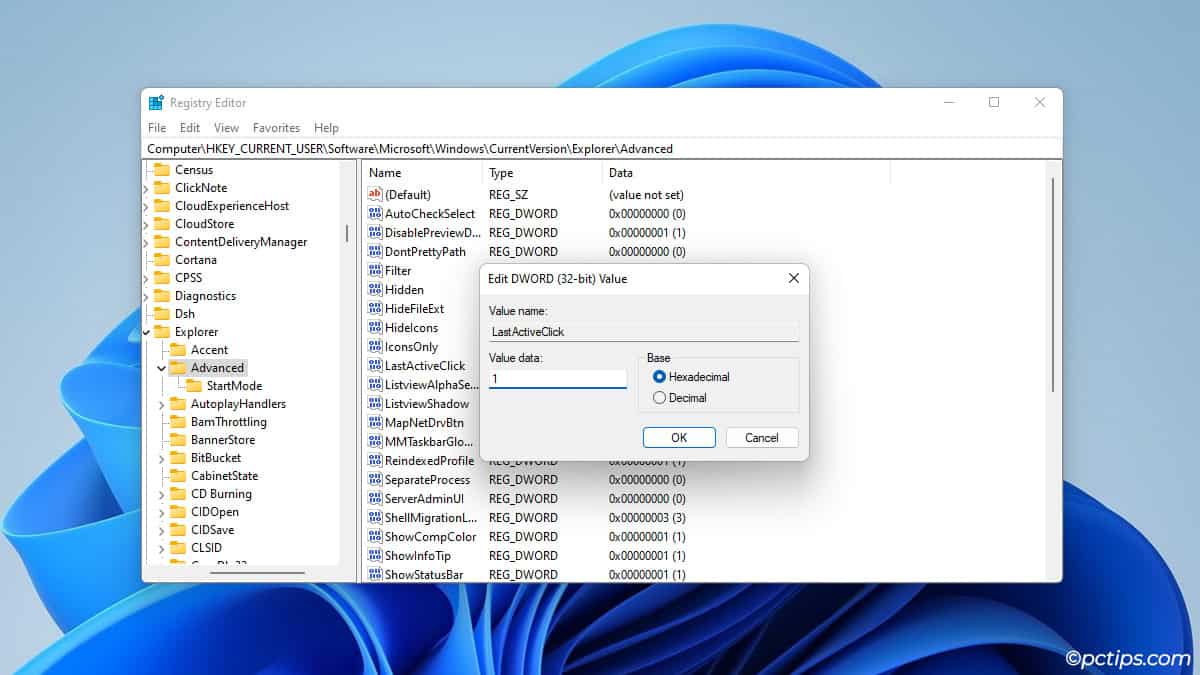
Change Default Folder Icon
Did you know you can replace the default folder icon with a custom one? Whether you’re going for macOS or any other look, making this change is quite easy.
- Go to:
Computer\HKEY_LOCAL_MACHINE\SOFTWARE\Microsoft\Windows\CurrentVersion\Explorer - Back up the Explorer key.
- Create a new key and name it
Shell Icons. - Open this key and create two new String values.
- Name them
3and4. - Locate the icon, right-click it, and select Copy as path.
- Use this path as the value of 3 and 4.
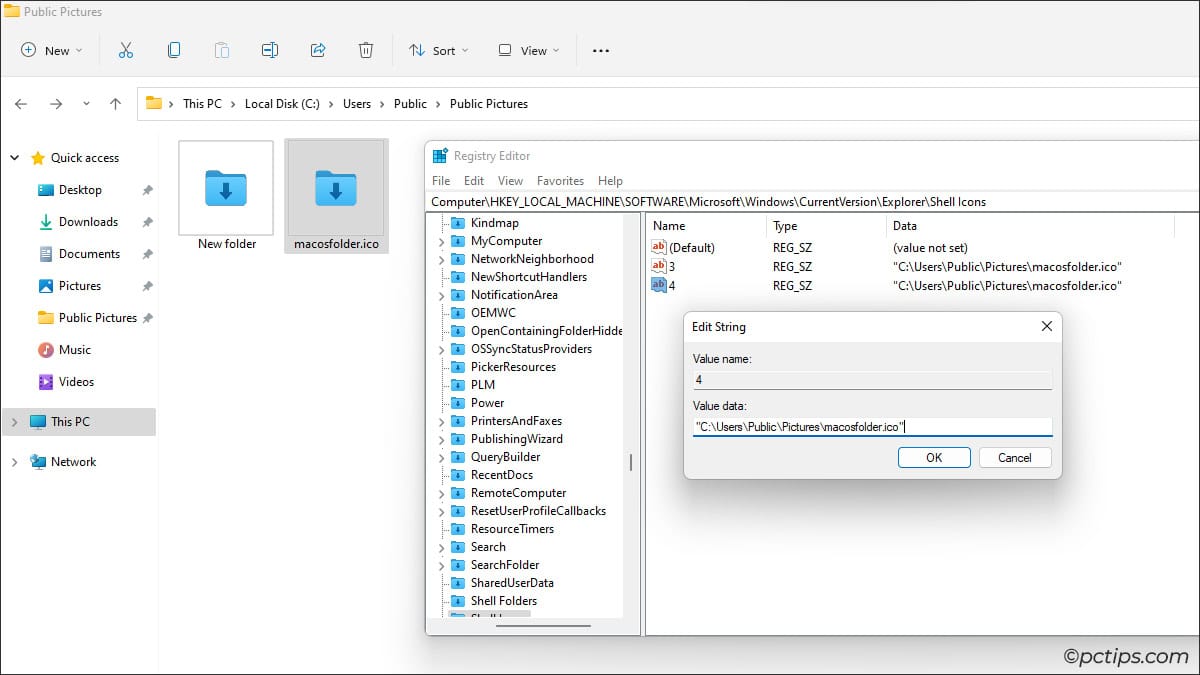
- Restart your PC to see the new icon in action.
Remove OneDrive from Quick Access
If you don’t use OneDrive, you may not want it taking up space in the Quick Access section. In that case,
- Go to:
Computer\HKEY_CURRENT_USER\Software\Classes\CLSID\{018D5C66-4533-4307-9B53-224DE2ED1FE6} - Back up the CLSID key.
- Set the value of
System.IsPinnedToNameSpaceTreeto0.
Skip to the Login Screen
Lock screens make sense on portable devices like phones or laptops. But on a desktop, they can feel like just one extra click to get through. To disable it,
- Go to:
Computer\HKEY_LOCAL_MACHINE\SOFTWARE\Policies\Microsoft\Windows - Backup the Windows key.
- Open the
Personalizationkey. If it doesn’t exist, create a new key with that name. - Create a DWORD value named
NoLockScreen. - Set the value to
1.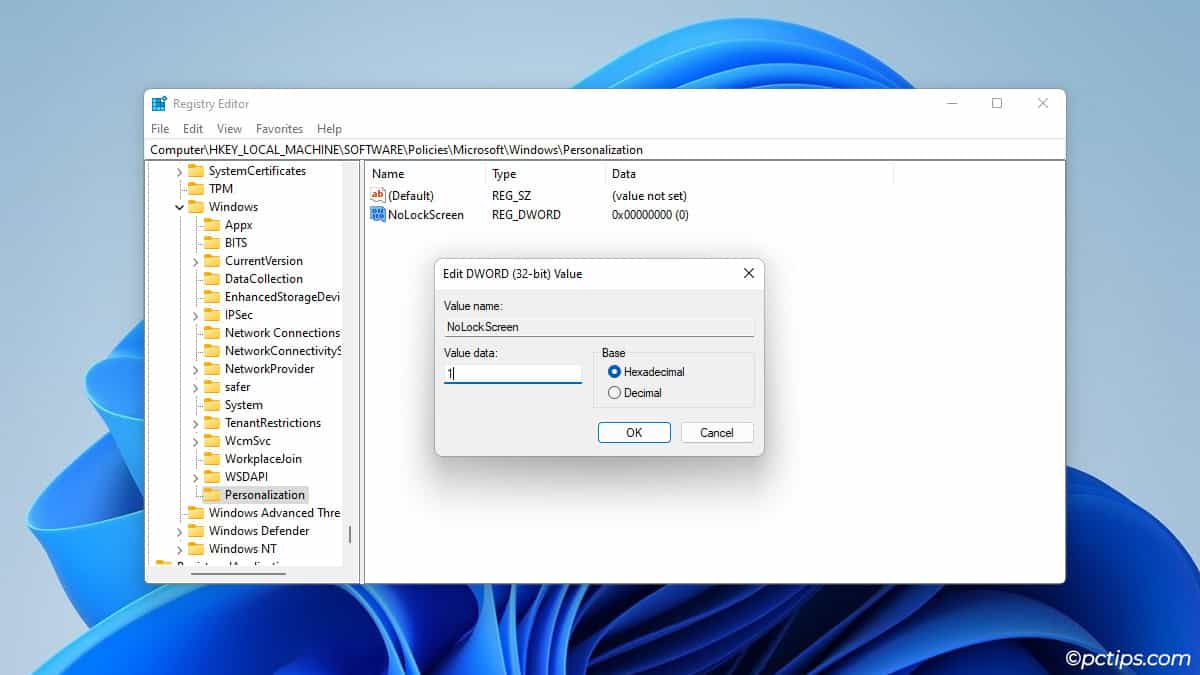
Press Win + L to lock your PC. You should land at the password prompt right away.
Activate Verbose Mode
If your PC is slow to boot or shut down, it’s a good idea to enable verbose status messages. This way, you’ll know what exactly is going on in the background that’s causing the delay.
- Go to:
Computer\HKEY_LOCAL_MACHINE\SOFTWARE\Microsoft\Windows\CurrentVersion\Policies\System - Backup the System key.
- Create a new DWORD value named
verbosestatus. - Set the value to
1.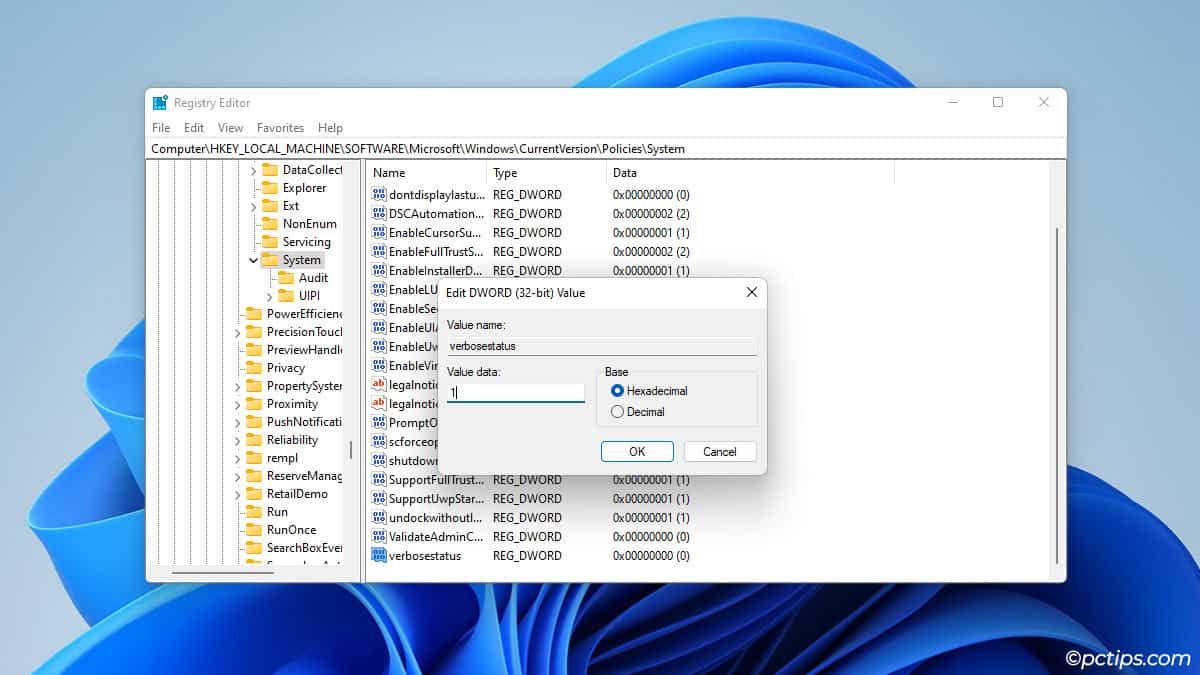
Now, Windows will provide additional messages like X service is starting or Waiting for X app to close.
But Wait, There’s More!
Those were all the registry hacks I have for you today. I hope you enjoyed the list!
Want to look like a Windows PRO? Show off some of these tweaks to your friends!
And if you want to learn about even more cool stuff, check out these 50 File Explorer secrets most people don’t know about.