How to Stop Microsoft from Spying on You
Last Updated:
Look, I’ll be straight with you—Windows is spying on you.
It collects all sorts of data on how you use your PC, and it’s sharing that data with Microsoft and who knows what other third parties.
And most folks have no clue it’s even happening!
Maybe you’re thinking, “Okay, but does it really matter? I’ve got nothing to hide.”
But this isn’t about having something to hide—it’s about taking control of your digital privacy.
In this guide, I’m going to show you how to put a stop to Windows telemetry once and for all.
We’ll cover:
- What data Windows hoovers up without your consent
- How to check what’s actually being sent out
- The settings you need to change ASAP
- My top tools for maximum Windows privacy
- Advanced tricks to block Microsoft entirely
So if you’re ready to keep your private data actually private, let’s jump in!
How Windows Siphons Your Data
First things first—what data is Windows even collecting?
Windows have all sorts of built-in telemetry that’s turned on by default.
We’re talking:
- Keystrokes, app usage, browsing history
- Error reports and diagnostic data
- Location, search queries, microphone audio
- Device specs, network, other hardware info
And Windows doesn’t just keep this data to itself.
It’s constantly phoning home to Microsoft servers and sharing your info with third-party “partners”. Sketchy much?
I was curious to see this snooping in action, so I did a little network analysis.
I fired up Wireshark (it’s like a window into your network traffic) on a fresh Windows Virtual Machine.
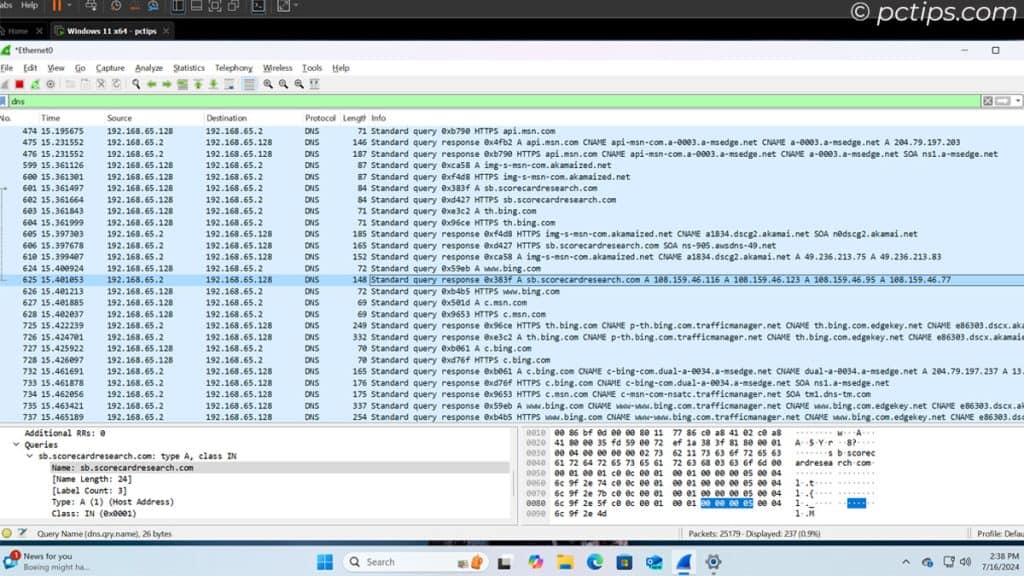
And I was blown away by the results!
There were connections to all sorts of Microsoft domains, plus a bunch of third-party servers I’d never heard of.
Some quick research revealed these servers belong to data brokers and analytics firms.
Not cool, Microsoft!
First Steps to Stop the Spying
So what can we actually do about all this shady data collection?
Your first stop should be Windows’ built-in privacy options.
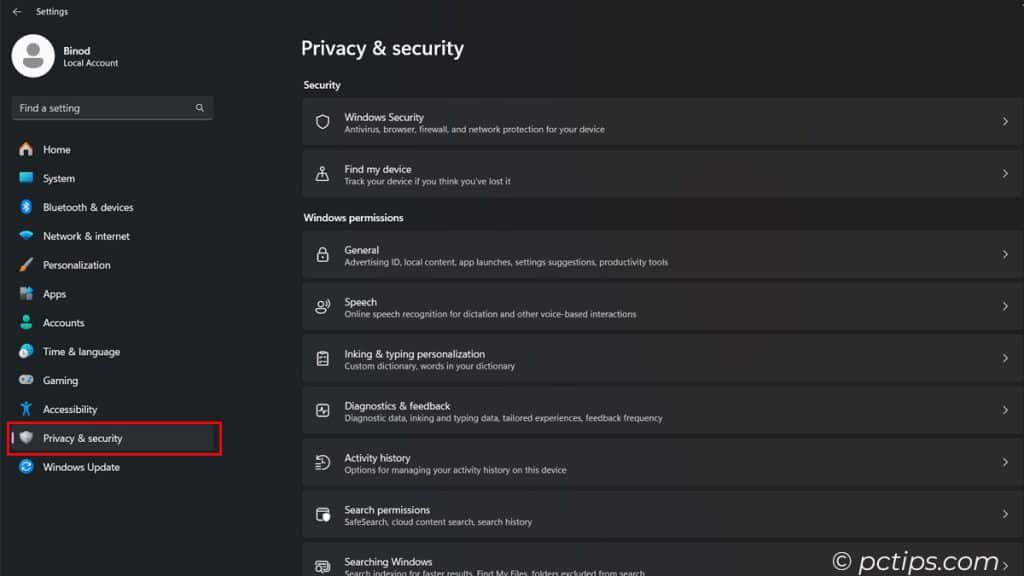
Open up Settings and head to Privacy & Security.
You’ll see toggles for things like location, diagnostic data, activity history, and ad ID.
I recommend turning all of these off unless you have a specific reason to keep them on.
Here are the most important settings to disable:
- Send diagnostic data
- Tailored experiences
- Let apps access your location, camera, mic, etc.
- Show me suggested content in Settings
- Show me the Windows welcome experience
For a deeper dive, check out my article on 30 Windows Settings to Disable Right Now. It walks you through even more privacy-enhancing tweaks you can make in a few minutes.
While you’re in Settings, I also suggest switching to a local account instead of signing in with Microsoft.
Using an MS account gives Windows an easy way to associate all your activity with your identity. No thanks!
These built-in settings are a good start, but let’s be real—Microsoft buries telemetry toggles all over the place.
Flipping them off one-by-one is a huge chore.
That’s where this privacy tool comes in clutch.
O&O Shutup 10++: Privacy Power Tool
If you want an easy way to nuke all the hidden Windows spyware at once, you gotta try O&O Shutup 10++.
It’s a free utility that gives you an easy central interface to access hundreds of hidden privacy settings in Windows 10 and 11.
And unlike some other apps, it doesn’t require installation—just download and run it.
Here’s how to use O&O Shutup 10++ for maximum privacy:
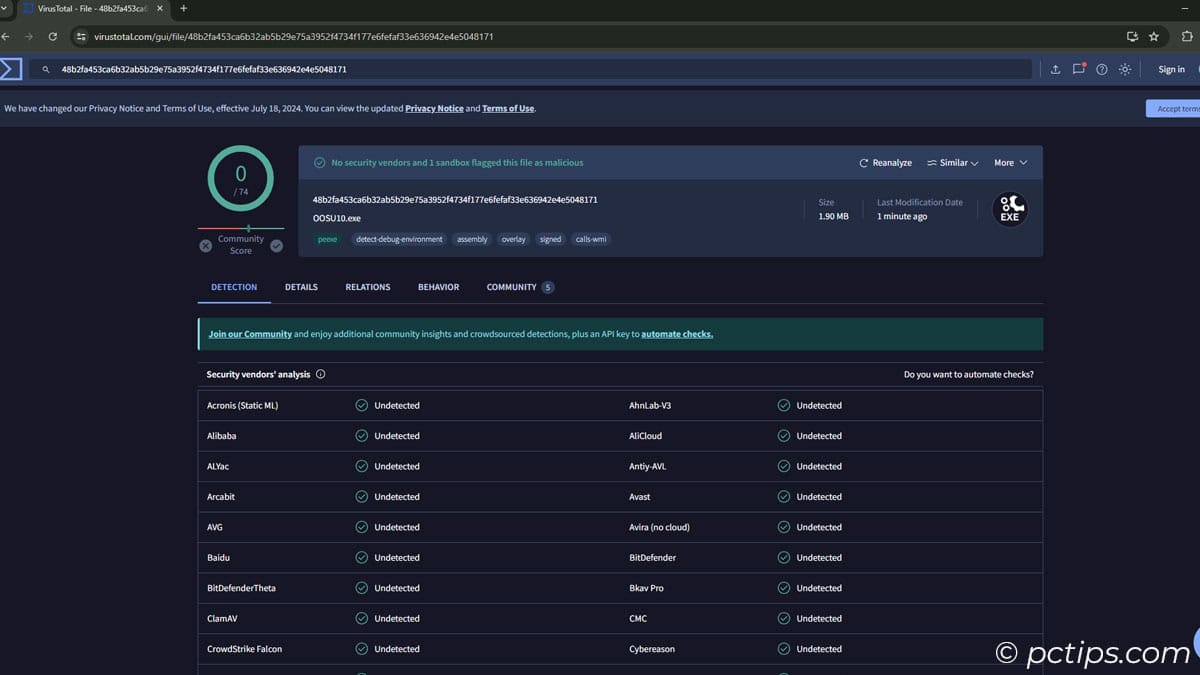
- Download it from the official site (avoid shady third-party sites!)
- Scan the file with an antivirus or VirusTotal to verify its safety
- Run the app and go through the settings under both “Current User” and “Local Machine“
- Click on any unfamiliar settings for a plain English explanation of what they do
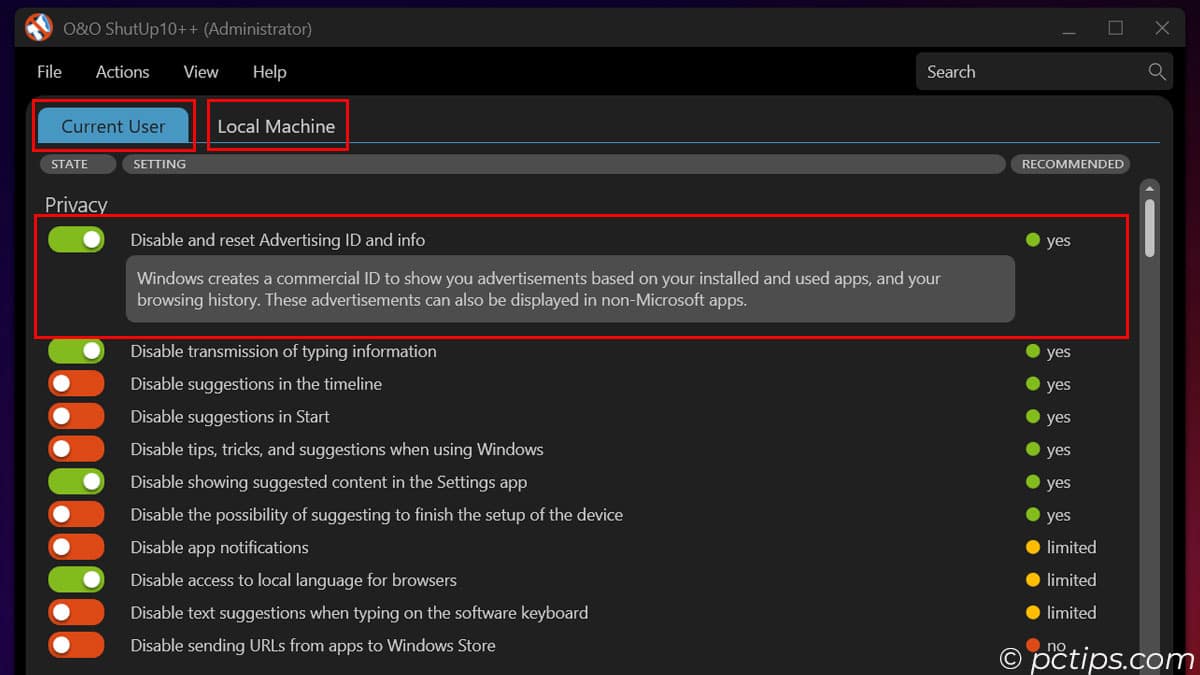
- Use the “Recommended” checkmarks as a starting point, then disable additional items as you see fit
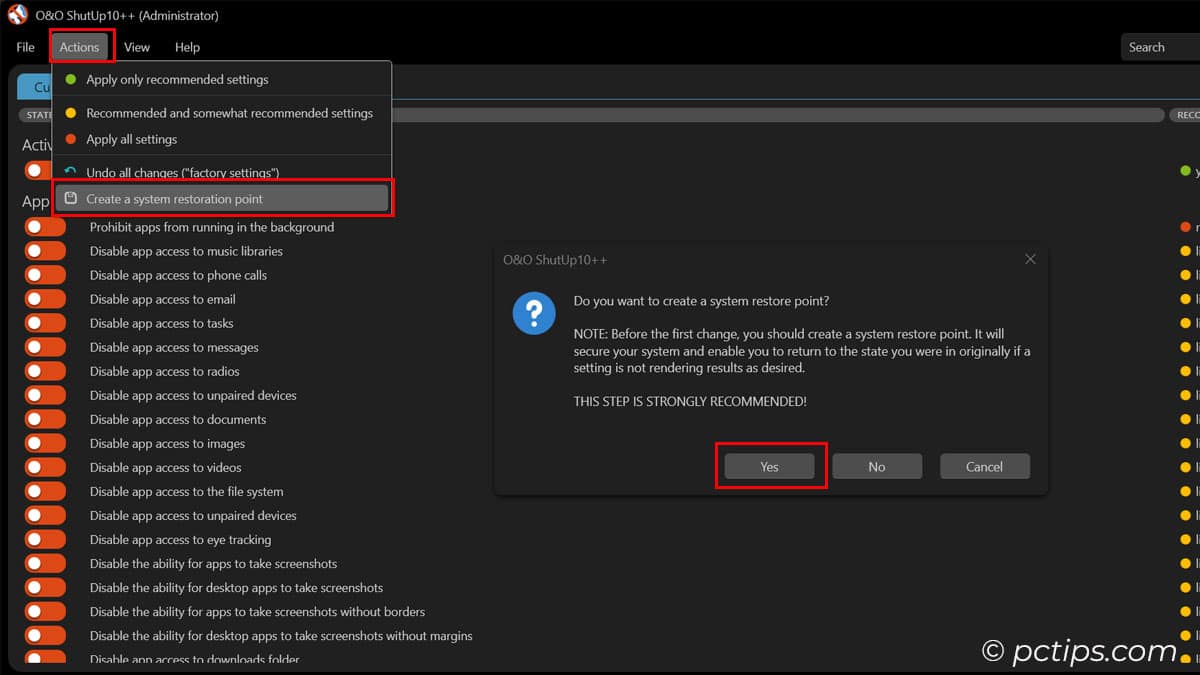
- Go to Actions > “Create a system restore point” (to be extra safe)
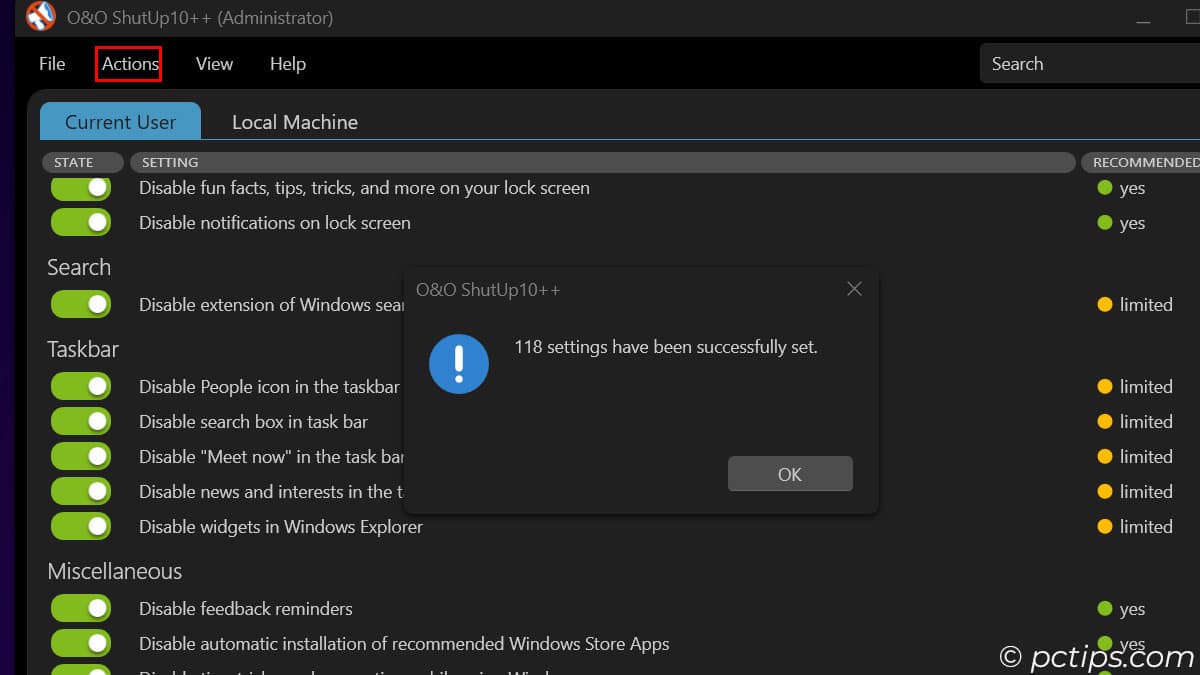
- Go to Actions > “Apply all settings” for an easy one-click privacy boost
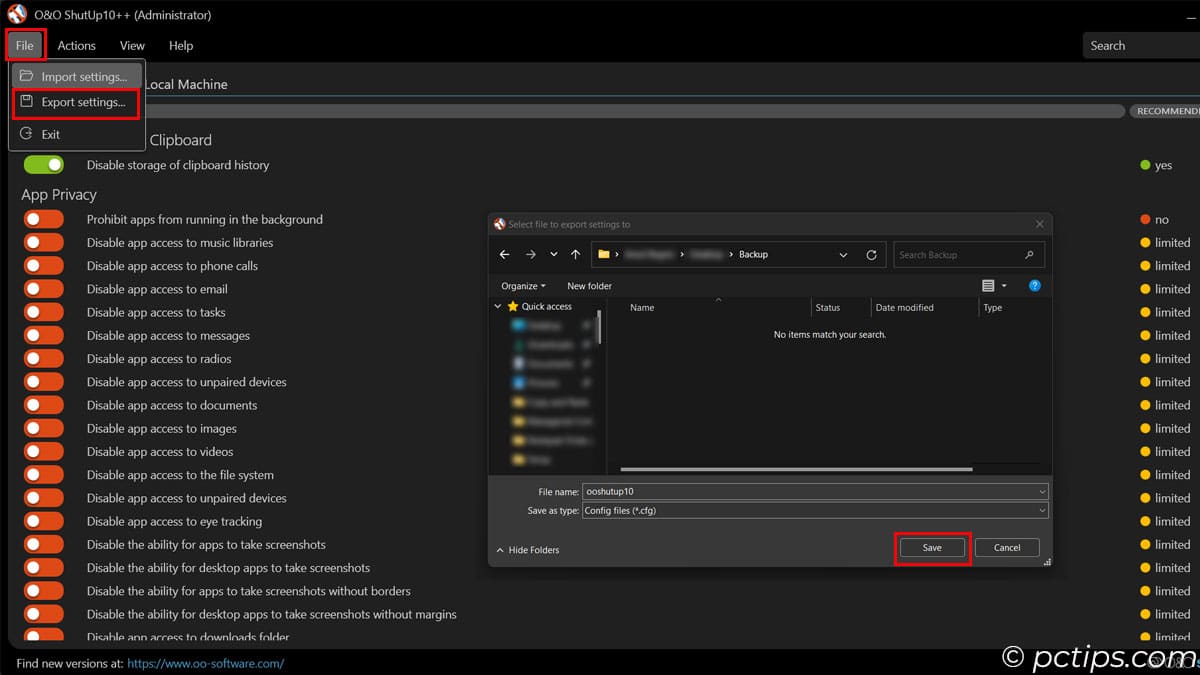
- Export your settings so you can quickly re-apply them after Windows updates
O&O Shutup 10++ is great because it turns off telemetry most people don’t even realize exists.
It makes it dead simple to get rid of all of it in one fell swoop.
Now, you might be wondering—will shutting off all this telemetry break anything?
It’s a valid question.
In my experience, you can turn off the vast majority of info-harvesting toggles without any major issues.
But there are a few settings that can cause trouble if you’re not careful:
- Windows Update (can miss important security patches)
- Apps can’t access location (Location and Sensors)
- Cortana and start menu web search won’t work
- No more personalized ads or article recommendations
- Windows Update might get wonky if you disable peer-to-peer
If any of those are dealbreakers for you, no worries—just leave the relevant settings on when you run through O&O Shutup 10++.
When in doubt, leave the setting on or do a quick web search to see what it does.
And of course, always create a restore point before making changes!
It’s all about finding the right balance of privacy and functionality for how you use your PC.
Cut Off Microsoft’s Access Entirely
Want to take a more nuclear option?
You can stop your PC from communicating with Microsoft servers at all using a nifty trick with Windows’ “hosts” file.
It takes a bit more effort, but it’s the ultimate way to prevent any telemetry from escaping your machine.
The key is the Domain Name System (DNS)—basically the phone book of the internet.
When your browser wants to go to a website like google.com, it first looks up google.com in the DNS to find the matching IP address.
Only then can it actually connect to Google’s servers.
The Windows “hosts” file lets you override the normal DNS process and point specific domains to any IP address you want—including a dead end.
So by filling the hosts file with Microsoft telemetry domains that lead nowhere, we can stop Windows from “phoning home” entirely!
Here’s how to do it step-by-step:
- Open File Explorer and go to
C:\Windows\System32\drivers\etc
- Find the “hosts” file, right-click > Copy to make a backup
- Rename the “hosts – copy” file to “
hosts.bak” to preserve the original - Open Notepad or Notepad++ as an administrator
- Drag the original “hosts” file into the text editor
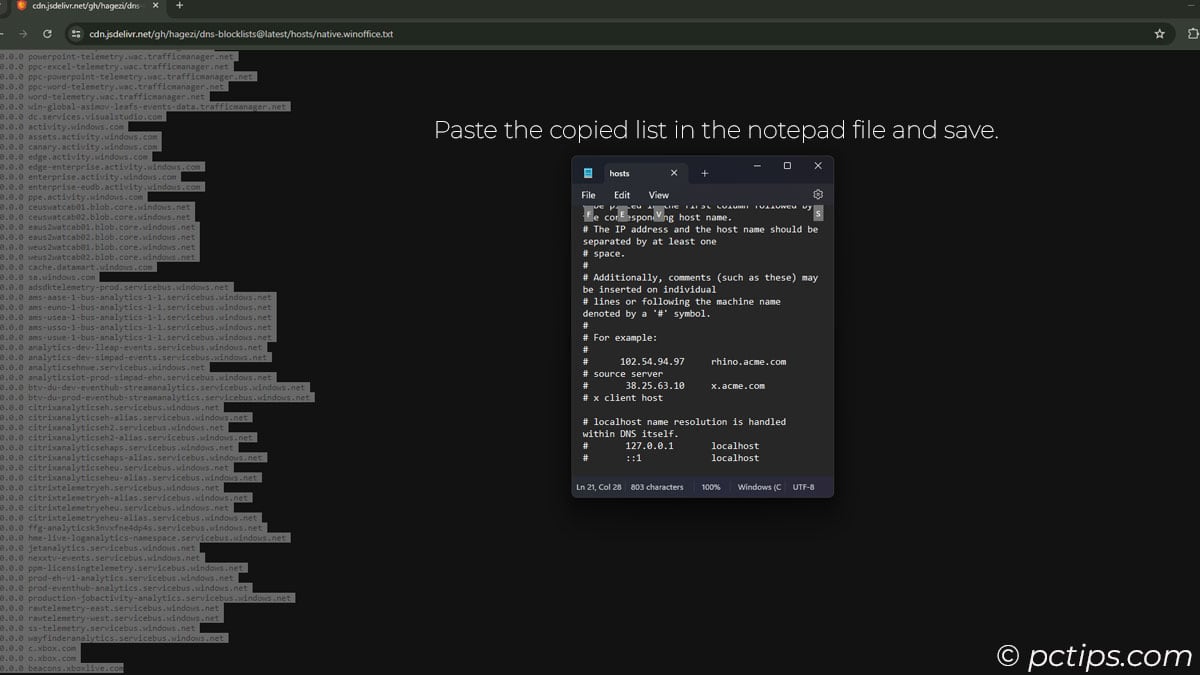
- Copy the latest anti-spying hosts list
- Paste the entire list into your “hosts” file and Save (You can either completely replace the entire content of Notepad or paste the list at the end)
- Test it out! Try going to a Microsoft telemetry domain in your browser—it should fail
If you followed those steps, you’ve now blocked 100+ Microsoft spying domains from ever connecting.
Your PC will keep trying to send the telemetry, but it’ll never reach Microsoft’s servers.
The only downside is you have to keep the hosts file updated, since Microsoft is always adding new tracking domains.
Luckily the community keeps a running list that blocks all the known culprits.
Swap in the latest version every few months to stay a step ahead.
Block Telemetry on Your Whole Network
Editing the hosts file is a great way to stop telemetry on a single PC.
But what if you want to block Microsoft’s snooping across your entire network? Enter Pi-hole.
Pi-hole is a free, open-source tool that acts as a DNS sinkhole for your whole network.
You can install it on a Raspberry Pi, in a Docker container, on a virtual machine, or on any always-on computer.
Then any device that connects to your network gets the Pi-hole treatment.
What does that mean?
Just like with the hosts file trick, Pi-hole lets you block domains at the DNS level.
But instead of having to edit a file on each device, you just add the Microsoft telemetry domains to your Pi-hole blocklist once.
Boom, network-wide ad and tracker blocking!
The best part is it works for any device on your network—Windows PCs, Macs, smartphones, smart TVs, you name it.
No more messing with individual browser extensions or device settings.
Here’s a quick overview of how to set up Pi-hole:
- Choose your Pi-hole hardware (Raspberry Pi, old PC, virtual machine, etc.)
- Run the automated Pi-hole installer script
- Configure your router’s DHCP settings to use the Pi-hole as its DNS server
- Add the Microsoft telemetry domains to your Pi-hole blocklist
- Marvel at all the nasty tracking requests getting blocked in real time!
There’s a bit more to it than that, but the official Pi-hole docs walk you through the whole process.
If you’re comfortable SSH-ing into a Raspberry Pi and tweaking some network settings, you can be up and running in under an hour.
With Pi-hole quietly guarding your network 24/7, you can enjoy a massive reduction in telemetry, ads, and other unwanted connections across all your devices.
It’s a true “set it and forget it” privacy solution.
You might also like: 15 Brilliant Ways to Repurpose an Old Laptop
The Myth of Total Privacy
Now at this point you might be thinking, “Great, I ran O&O Shutup 10++ and tweaked a bunch of settings.
Microsoft can’t spy on me anymore… right?!”
Well, I hate to burst your bubble, but no matter what you do, you can never achieve 100% privacy on the modern internet.
It’s just not possible.
Think about it—even if you lock down Windows, you’re still using the internet.
That means:
- Your ISP can see every website you visit
- Google/Facebook/etc. are tracking you across the web
- Your antivirus is scanning your files and browsing
- “Free” VPNs are selling your data to advertisers
- Every app and service you use is collecting telemetry
So even with a locked-down copy of Windows, you’re still leaking data left and right just by using the internet.
It’s an unfortunate reality of the world we live in.
Does that mean you shouldn’t bother with privacy tools like O&O Shutup 10++? Of course not!
Every bit of data you can keep out of Microsoft’s hands is a win.
Just don’t expect any tool to make you completely invisible online. It’s not gonna happen.
What You CAN Do
You can lock down your OS six ways from Sunday, but if you’re handing your data to Google, Facebook, Amazon, etc… you’re still hemorrhaging personal info.
So if total privacy is a pipe dream, what can you actually do to keep your data safe?
It all comes down to harm reduction.
You’ll never stop the data collection completely, but you can definitely cut it down to a bare minimum.
Here’s how:
- Use privacy tools like O&O Shutup 10++ religiously
- Opt out of everything you can in Windows settings
- Block trackers and ads with uBlock Origin or Pi-hole
- Ditch Google for a private search engine like DuckDuckGo or Startpage
- Use a paid VPN from a trustworthy provider (not a “free” one)
- Favor open-source software when possible
- Be very selective about which apps/services you use and what permissions you grant them
- Keep your system and apps updated to patch security holes
- Compartmentalize sensitive activities to separate devices/VMs
- Accept that there’s no such thing as perfect privacy these days.
It’s all about reducing your attack surface and making it as hard as possible for companies to snoop on you.
Will you still be leaking some data here and there? Yeah, probably.
But it’ll be a heck of a lot less than if you just threw up your hands and did nothing!
If you found this guide helpful, why not share it with your friends and family?