The Ultimate Guide to Windows Key Combos for Beginners
Last Updated:
Are you still reaching for the mouse every time you need to do something in Windows?
STOP!
Your keyboard is WAY faster.
I ran some real-world tests, timing myself on common tasks using both the mouse and Windows key shortcuts.
The results were staggering:
| Task | Mouse Time | Windows Key Time | Time Saved |
| Launch Chrome | 6 seconds | 2 seconds | 4 seconds |
| Open File Explorer | 5 seconds | 1 second | 4 seconds |
| Lock the computer | 8 seconds | 1 seconds | 7 seconds |
| Open the Settings app | 7 seconds | 2 seconds | 5 seconds |
The numbers don’t lie.
Using Windows key shortcuts, I consistently completed tasks 2-3 times faster than with the mouse.
Extrapolate that over a full day of computing and we’re talking serious time savings.
But it’s not just about speed.
Keeping your hands on the keyboard also reduces strain from repetitive mouse movements.
Your wrists will thank you.
So let’s jump in and I’ll show you these must-know Windows key combos.
Basic Windows Key Combos Everyone Should Know
Let’s start with the fundamentals.
These are the Windows key shortcuts I use daily, and once you get the hang of them, you’ll wonder how you ever lived without ’em.
Win (tap): Opens or closes the Start menuWin + D: Shows/hides the desktop (my favorite for quickly hiding my mess of open windows )Win + E: Opens File ExplorerWin + I: Opens Windows SettingsWin + L: Locks your PC (essential before dashing to the breakroom for more coffee)Win + R: Opens the Run dialog box
Master these six and you’re well on your way to impressing your coworkers and saving your wrists from RSI.
Launch Apps Super Fast
The most basic but essential shortcut of all: Windows Key.
It’s like a hub for everything on your PC.
You can launch any app from the Start menu with just your keyboard.
I timed it – finding and clicking an app takes me about 4.8 seconds on average.
Using the keyboard? 1.5 seconds flat. That’s a 68.75% time savings!
Here’s how:
- Press
Winto open the Start menu - Start typing the name of the app you want (e.g. “word” for Microsoft Word)
- Press
Enterwhen it’s highlighted
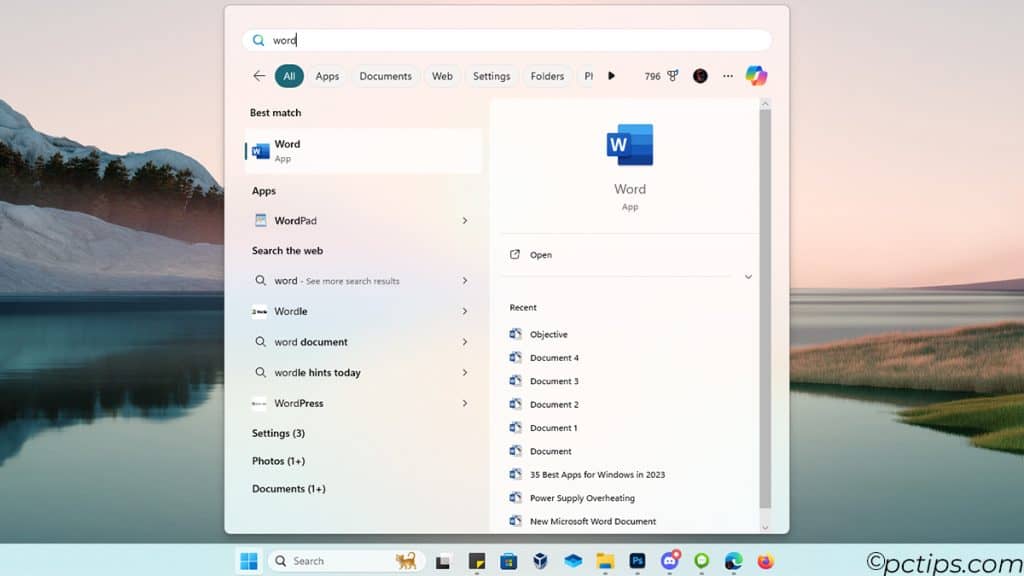
Once you get the habit, you’ll hardly use the mouse.
Hit the Windows key and type a few letters like “wo” or “ex” and let the Start menu search do the rest.
Pro Tip: Right-click on your most-used apps and choose “Pin to Start” or “Pin to Taskbar” for even faster access.
Taskbar Tricks That’ll Make Your Day
Your taskbar is more than just a pretty launch pad.
With the right keyboard shortcuts, it becomes a productivity powerhouse.
Press Win + 1 to launch the first app pinned to your taskbar, Win + 2 for the second, and so on.
This works all the way up to Win + 0 for the 10th app. Mind. Blown.
But wait…
Use Win + Alt + 1/2/3/etc. to open the Jump List for the corresponding taskbar app.
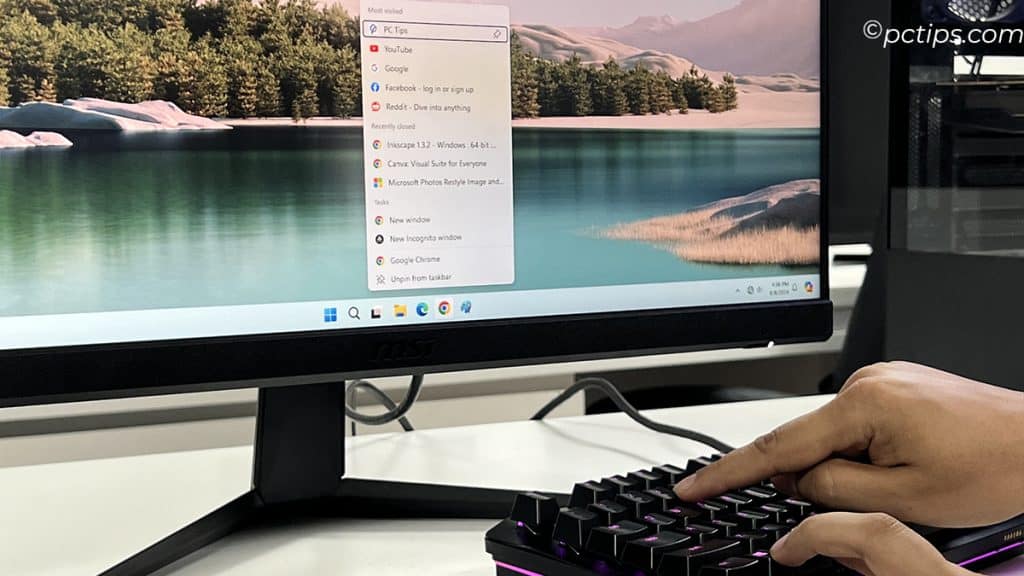
And if you need to launch a taskbar app as an admin, Win + Ctrl + Shift + 1/2/3/etc. is your new best friend.
A fast way to open your most-used apps.
I’ve carefully curated my taskbar with my most-used apps, so muscle memory kicks in, and I can launch them almost without thinking.
Experiment with different app arrangements to find what works best for you!
Here are a few other taskbar and system tray-related shortcuts:
- Win + X: Open the Quick Access Menu (also known as the Power User Menu) for easy access to essential system tools and settings, such as Device Manager, Power Options, Event Viewer, and more.
- Win + T: Cycle through the apps on your taskbar. This is great for quickly switching between pinned apps without reaching for your mouse.
- Win + B: Focus on the system tray icons.
- Win + Shift + Click on a taskbar app: Open a new instance of the app.
- Win + A: Open the Action Center to manage notifications and quick settings.
- Win + P: Quickly configure display settings when connecting to a projector or external monitor.
For more taskbar customization tips, check out this article 18 Clever Ways to Customize Your Windows Taskbar.
Power User Tricks
Alright, power users – this section is for you.
These advanced shortcuts might take a bit more memorization, but trust me, they’re worth it.
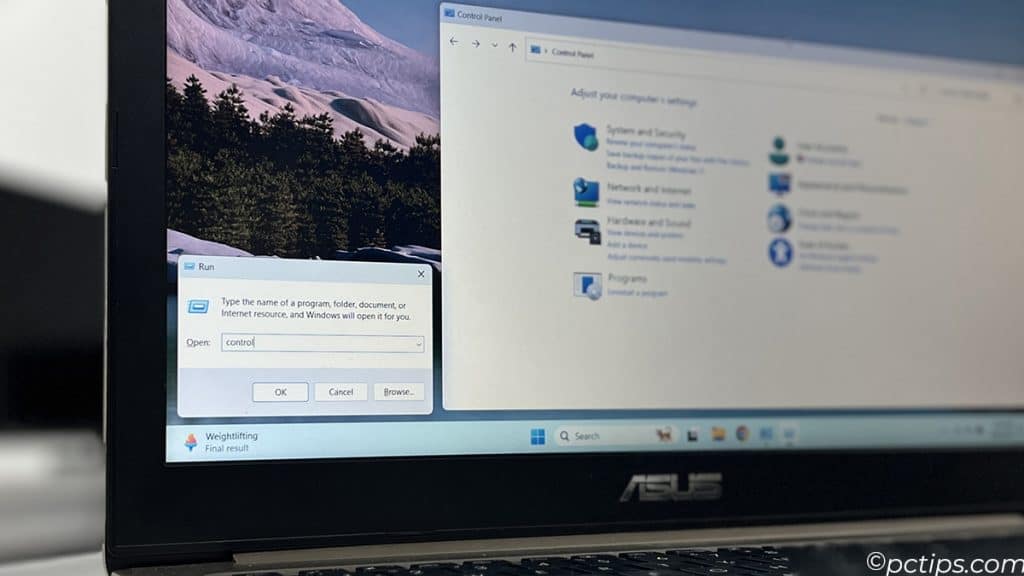
Windows Key + R: Open the Run dialog box.
This is the quickest way to launch apps, open specific files or folders, or even run command-line tools.
Some handy Run commands to know:
notepad: Opens Notepadmspaint: Opens Paintcmd: Opens Command Promptcontrol: Opens Control Panelcalc: Opens the Calculator app
…and tons more. There are literally hundreds of useful Run commands.
Here’s what I do to take it to the next level:
- Create a folder on your computer (I have mine.,
D:\setup\path-scripts) - Add this folder to your system’s PATH variable
- Fill the folder with batch scripts, shortcuts, and more
Now, by simply pressing Win + R and typing a file name, you can launch any app or automate any Windows task.
For example, I have a pctips.bat file that opens a dedicated Firefox profile I use for PCtips-related tasks.
Whenever I need to access that profile, I simply hit Win + R, type pctips, and hit Enter.
Screenshots Made Easy
You know what’s cooler than describing an error message to tech support?
Sending them a screenshot!
Windows 11 has some slick built-in tools for capturing all or part of your screen.
Here are a few handy Windows key combinations:
- Win + PrtScn: Take a screenshot of your entire screen and automatically save it as a PNG file in the “Screenshots” folder.
- Win + Shift + S: Open the Snipping Tool to capture a specific area of your screen, a window, or the entire screen.
- Win + Alt + PrtScn: Take a screenshot of the active window and copy it to the clipboard.
Say goodbye to the days of pasting screenshots into Paint!
For more screenshot tips, don’t miss my article on How To Take Screenshots Like a Pro.
Snap your windows into place
Window management is usually a tedious chore of carefully resizing, dragging, and arranging.
Ain’t nobody got time for that!
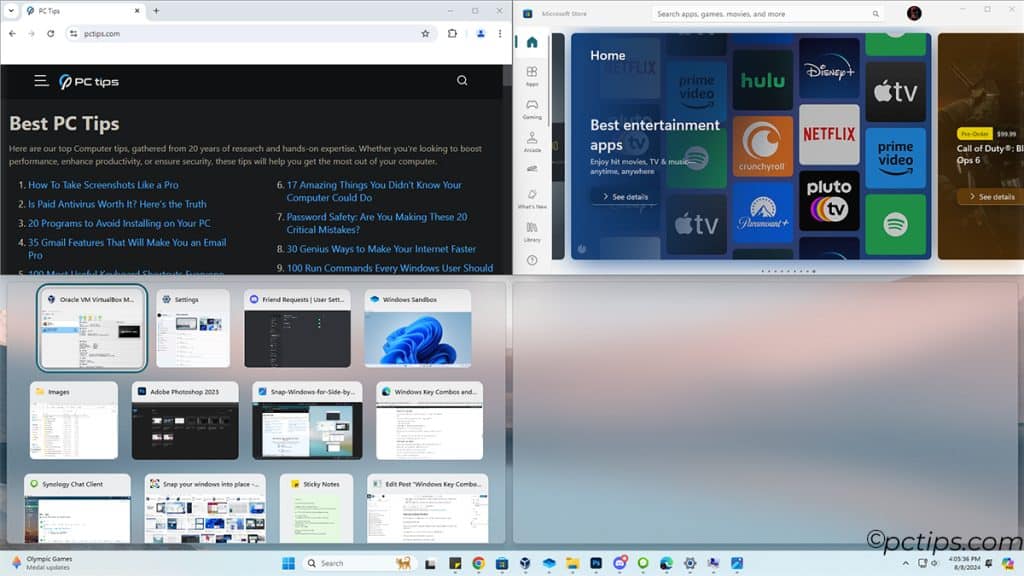
Windows 11 has these killer “snap layouts” that let you quickly arrange your windows in a bunch of useful configurations.
To use them, hover over a window’s “maximize” button or hit Windows Key + Z.
Pick a layout, plop your windows in, and you’re good to go.
You can also use these key combos to snap windows in a jiffy:
- Win + Left Arrow: Snap the active window to the left half of your screen.
- Win + Right Arrow: Snap the active window to the right half of your screen.
- Win + Up Arrow: Maximize the active window.
- Win + Down Arrow: Minimize the active window or restore it if already maximized.
- Windows Key + Shift + Left/Right Arrow: Move the active window to your next monitor
You can even get fancy and snap windows to specific quadrants using combinations like Win + Left Arrow followed by Win + Up Arrow.
These shortcuts have become second nature for me. I hardly ever manually resize windows anymore.
Experiment and find your perfect window arrangement!
But if you really want to take your window management to the next level, you’ve got to check out Microsoft PowerToys.
Master Windows Management
In addition to snapping, the Windows key offers several shortcuts for managing your windows:
- Win + M: Minimize all windows
- Win + Shift + M: Restore minimized windows
- Win + Home: Minimize all but the active window (restores all windows on second press)
- Win + Comma (,): Temporarily peek at the desktop
These shortcuts are particularly handy when you’re working with multiple windows and need to quickly minimize, restore, or move them around.
Maximize Your Workspace with Virtual Desktops
You’re not limited to one measly desktop on Windows 11.
You can spin up multiple “virtual” desktops, each with its own set of apps and windows.
This is a killer way to organize different projects or contexts.
Here’s how to master them:
- Win + Ctrl + D: Create a new virtual desktop.
- Win + Ctrl + Left/Right Arrow: Switch between virtual desktops.
- Win + Ctrl + F4: Close the current virtual desktop.
- Win + Tab: Open Task View. Get a bird’s eye view of all your open windows and desktops.
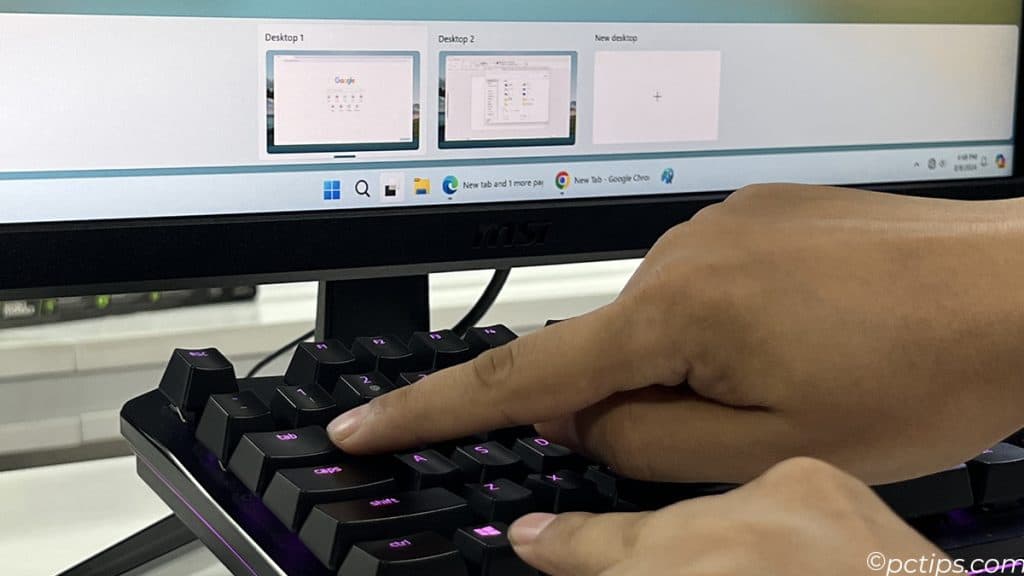
I personally use various virtual desktops for different use cases, depending on my projects, tasks, or the things I’m doing.
For example, I might have one desktop for writing articles like this one, another for coding and terminals, and yet another for entertaining myself with some gaming or music.
This way, I can switch between projects without losing focus or getting distracted by the clutter on my screen.
Pro Tip: Give your virtual desktops descriptive names to help you remember what’s on each one. Just open Task View (Win + Tab), right-click a desktop, and choose “Rename.”
Never Lose a Copy Again
How many times have you copied something important, only to overwrite it with your next copy? Never again!
Windows 10 and 11 feature a clipboard history that stores multiple copied items:
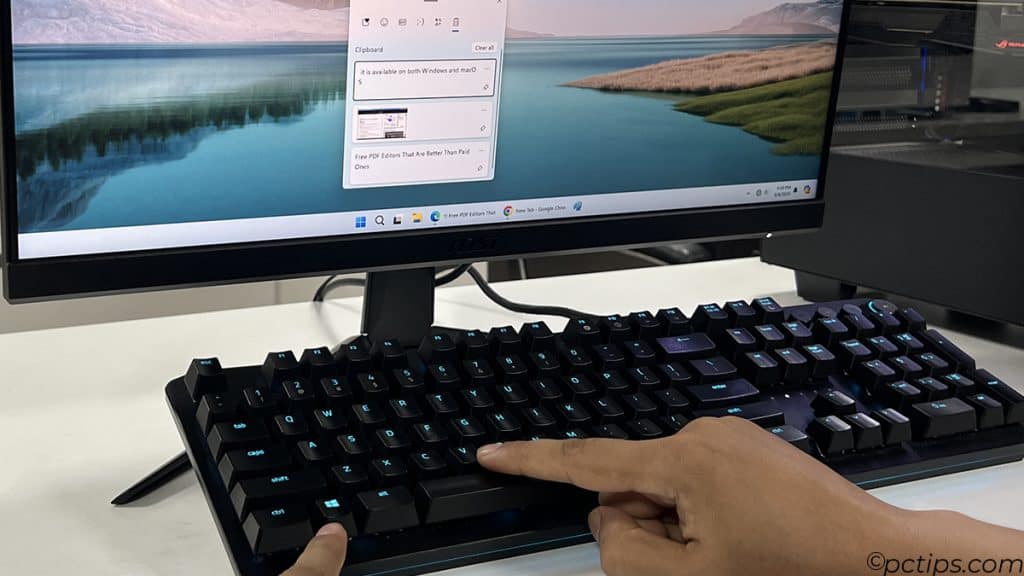
- Win + V: Open the clipboard history
- Ctrl + C as usual to copy
- Ctrl + Shift + V to paste and remove from clipboard history
Remember Win + Shift + S from the screenshot section?
That combo copies your screenshot directly to the clipboard, ready to be pasted into the app of your choice.
Pro Tip: You can also sync your clipboard across devices using the same Microsoft account.
Enable this feature in the Settings app under System > Clipboard.
Make Copilot Your Copilot
Remember Cortana? Microsoft’s AI assistant has gotten a major overhaul and rebranded in Windows 11.
Meet Windows Copilot, your new voice-activated productivity partner.
To summon Copilot, use the Win + C combo or say “Hey Copilot.”
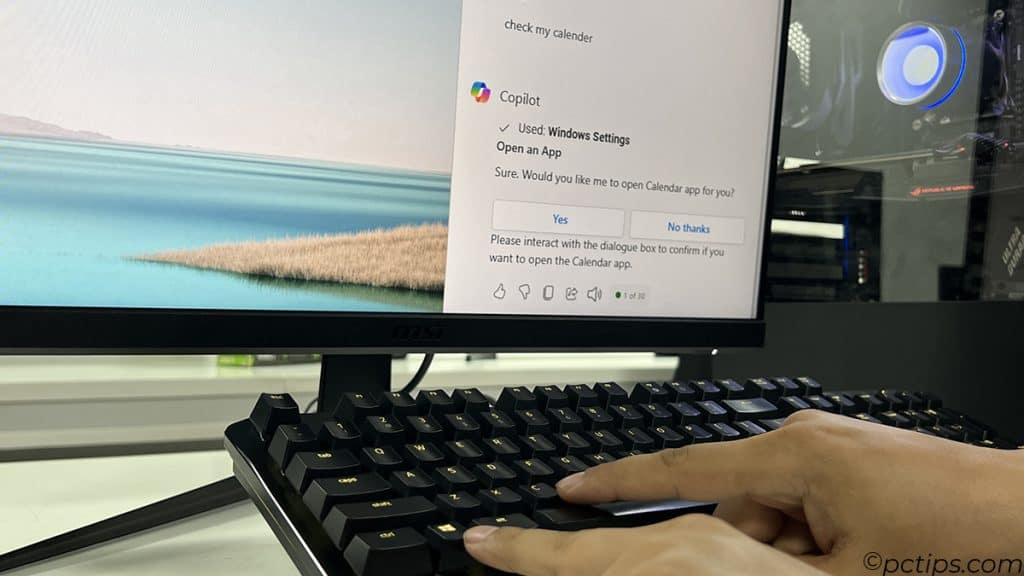
From there, you can ask it to open apps, set reminders, check your calendar, and more.
It’s like having a personal assistant right on your PC.
Copilot is still relatively new, so its capabilities are constantly expanding.
Keep an eye on it – this is one feature that’s only going to get more useful over time.
Crack Open the Emoji Keyboard
Gone are the days of copying and pasting emojis from the web.
Windows now has a built-in emoji keyboard, and it’s just a combo away:
Press Win + . (period) or Win + ; (semicolon) to open the emoji panel.
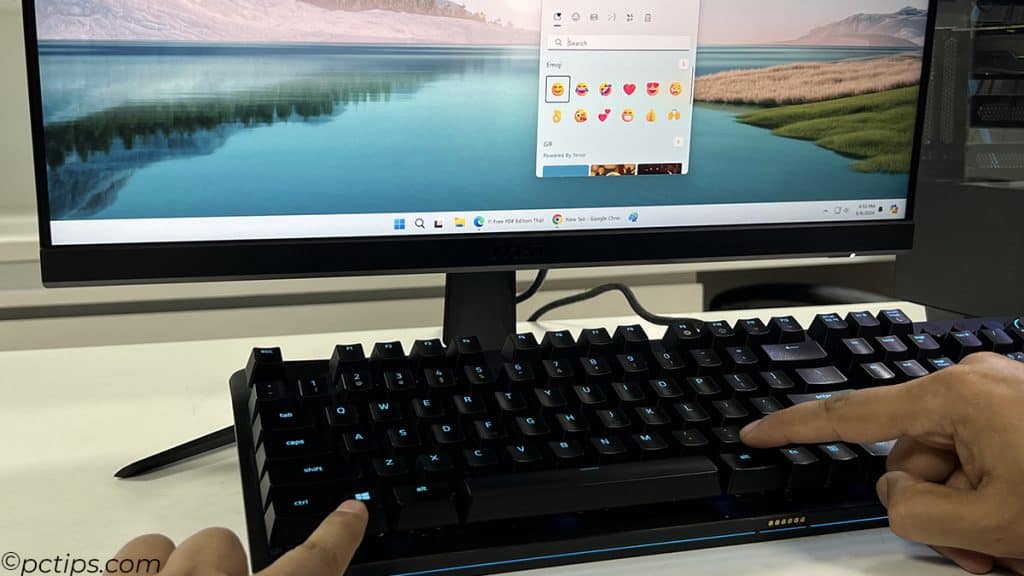
From there, you can click the emoji you want or use the arrow keys to navigate and Enter to select.
But it’s not just emojis. This panel also includes kaomoji, special characters, and even GIFs.
So go ahead; spice up those emails and documents with some expressive flair.
Also Read: 35 Gmail Features That Will Make You an Email Pro
Accessibility at Your Fingertips
Windows offers a variety of accessibility features to make computing more inclusive.
Here are a few key combinations to know:
- Win + U: Open the Accessibility settings to configure features like Magnifier, Narrator, and High Contrast.
- Win + + (plus): Zoom in using the Magnifier.
- Win + – (minus): Zoom out using the Magnifier.
- Win + H: Start dictation. Let Windows type for you by converting your speech to text.
- Win + Ctrl + Enter: Turn on Narrator for audio guidance.
Whether you have visual, auditory, or motor impairments, these shortcuts can help you customize Windows to your needs.
Remember, accessibility features aren’t just for those with disabilities.
They can benefit everyone in different situations.
Suggested Reading: Make Your Computer Easier to See (and Use!)
More “Windows Key +” Goodness
There are still plenty more Windows key combinations to explore. Here’s a quick rundown of some additional shortcuts:
- Win + S : Open the Search panel
- Win + F : Open the Feedback Hub
- Win + Alt + R : Start/stop recording in the Xbox Game Bar
- Win + Ctrl + Shift + B restarts the graphics driver (handy if a full-screen app freezes)
- Win + Ctrl + O opens the on-screen keyboard
- Win + G : Open the Xbox Game Bar (to record screen, take screenshots, and monitor performance)
- Win + K : Open the quick Connect setting (to connect to wireless displays and audio devices)
The Ultimate Windows Key Cheat Sheet
Learning keyboard shortcuts can feel awkward at first.
You’ll probably find yourself instinctively reaching for the mouse out of habit.
Don’t get discouraged! It’s all about building that muscle memory.
To help you on your journey, I’ve compiled the ultimate Windows key cheat sheet.
Bookmark this article, Print it out and refer to it often.
| Shortcut | Action |
| Win (tap) | Open/close the Start menu |
| Win + D | Show/hide the desktop |
| Win + E | Open File Explorer |
| Win + I | Open Windows Settings |
| Win + L | Lock your PC |
| Win + R | Open the Run dialog box |
| Win + 1/2/3/etc. | Launch the app pinned to the taskbar in that position |
| Win + Alt + 1/2/3/etc. | Open the Jump List for the app pinned to the taskbar in that position |
| Win + Ctrl + Shift + 1/2/3/etc. | Open a new instance of the app pinned to the taskbar in that position as an admin |
| Win + T | Cycle through apps on the taskbar |
| Win + Shift + Click on a taskbar app | Open a new instance of the app |
| Win + X | Open the Quick Access Menu |
| Win + Z | Open the Snap Layouts menu |
| Win + Left/Right Arrow | Snap the active window to the left or right half of the screen |
| Win + Up Arrow | Maximize the active window |
| Win + Down Arrow | Minimize the active window or restore if maximized |
| Win + Shift + Left/Right Arrow | Move the active window to the next monitor |
| Win + M | Minimize all windows |
| Win + Shift + M | Restore minimized windows |
| Win + Home | Minimize all but the active window (restores all windows on second press) |
| Win + Comma (,) | Temporarily peek at the desktop |
| Win + Ctrl + D | Create a new virtual desktop |
| Win + Ctrl + Left/Right Arrow | Switch between virtual desktops |
| Win + Ctrl + F4 | Close the current virtual desktop |
| Win + Tab | Open Task View to manage windows and virtual desktops |
| Win + PrtScn | Take a screenshot of the entire screen and save it as a file |
| Win + Shift + S | Open the Snipping Tool to capture a specific area, window, or the entire screen |
| Win + Alt + PrtScn | Take a screenshot of the active window and copy it to the clipboard |
| Win + V | Open the clipboard history |
| Win + U | Open the Accessibility settings |
| Win + Plus (+) | Zoom in with Magnifier |
| Win + Minus (-) | Zoom out with Magnifier |
| Win + H | Start dictation |
| Win + Ctrl + Enter | Turn on Narrator |
| Win + . (period) or Win + ; (semicolon) | Open the emoji panel |
| Win + C | Summon Microsoft Copilot |
| Win + S | Open the Search panel |
| Win + F | Open the Feedback Hub |
| Win + Alt + R | Start/stop recording in the Xbox Game Bar |
| Win + Ctrl + Shift + B | Restart the graphics driver |
| Win + Ctrl + O | Open the on-screen keyboard |
| Win + G | Open the Xbox Game Bar |
| Win + K | Open the Quick Connect setting |
If you found this article helpful, don’t keep it to yourself!
Share it with your friends, family, and coworkers.
Such a wonderful article! You are the BEST, thankyou❤️