15 Windows Drag-and-Drop Secrets Nobody Told You
Last Updated:
Select a file, drag it, and drop it somewhere; it’s as simple as it gets. What hidden secrets could such a basic feature possibly have?
If that’s what you’re thinking, prepare to be surprised!
Windows has a bunch of genuinely useful drag-and-drop tricks that most people haven’t caught on to.
They do add up and your workflow will be all the better for it.
Don’t believe me? Let me just show you – won’t take more than 5 minutes!
Try Right-Click Drag Move
Instead of the usual left-click drag, try moving a file or folder with a right-click drag instead.
You’ll get to choose how to proceed – copy it, move it, create a shortcut, etc.
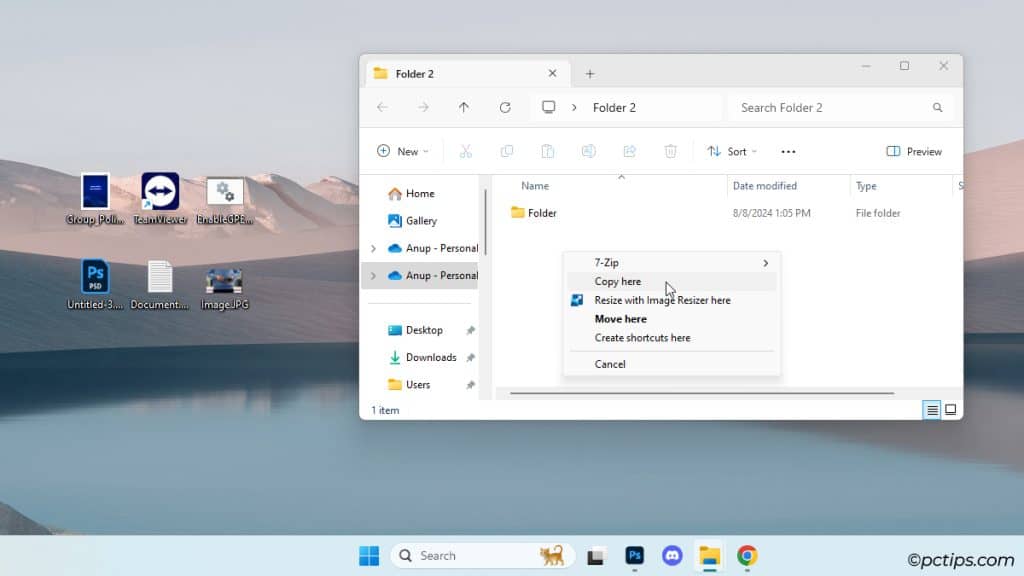
Depending on what programs you’ve installed on your PC, you may also see extra options.
For instance, 7-Zip lets me copy files to an archive and save that archive in the dropped location. Image Resizer lets me resize images and save them to the dropped location.
Related: 10 Must-Have Windows Apps Everyone Should Install
Use Ctrl, Shift, Alt
If you drag and drop files between locations on the same drive, Windows will move the file. Same thing when you drop files into the Recycle Bin.
In all other cases (e.g., when dropping to a different drive), Windows will copy the file.
As I said above, right-click drag will let you pick the exact action to perform when dropping a file. Another way to do this is with the Ctrl, Shift, and Alt keys.
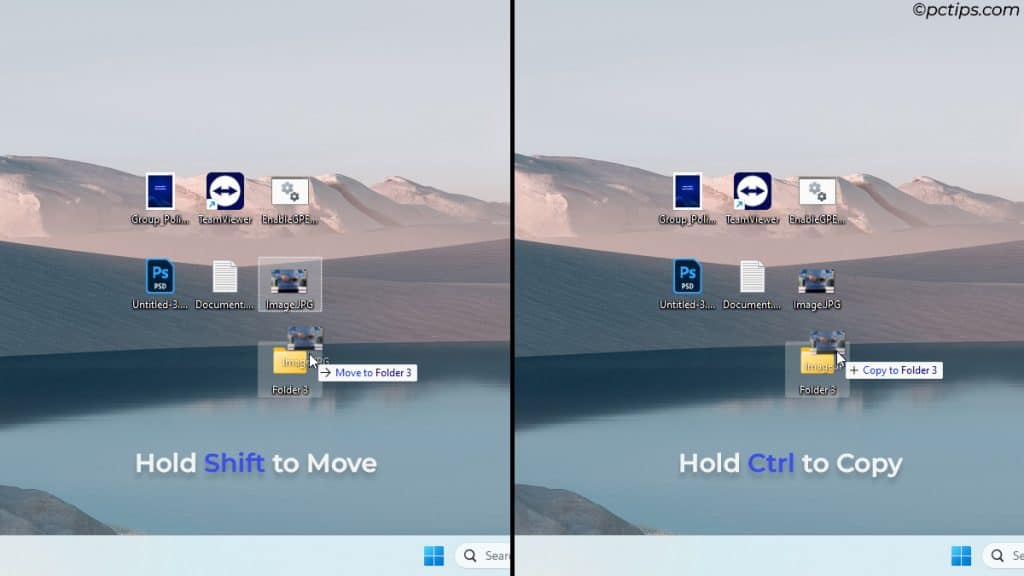
- Ctrl: Copy
- Shift: Move
- Ctrl + Shift: Create shortcut
- Alt: Create shortcut
- Esc: Cancel drag & drop
You Might Like: 20 Keyboard Tricks You Need to Know
Pin Folders to the Navigation Pane
One of my favorite File Explorer features is that you can pin folders to the navigation pane for quick access.
Most people right-click a folder and select Pin to Quick Access.
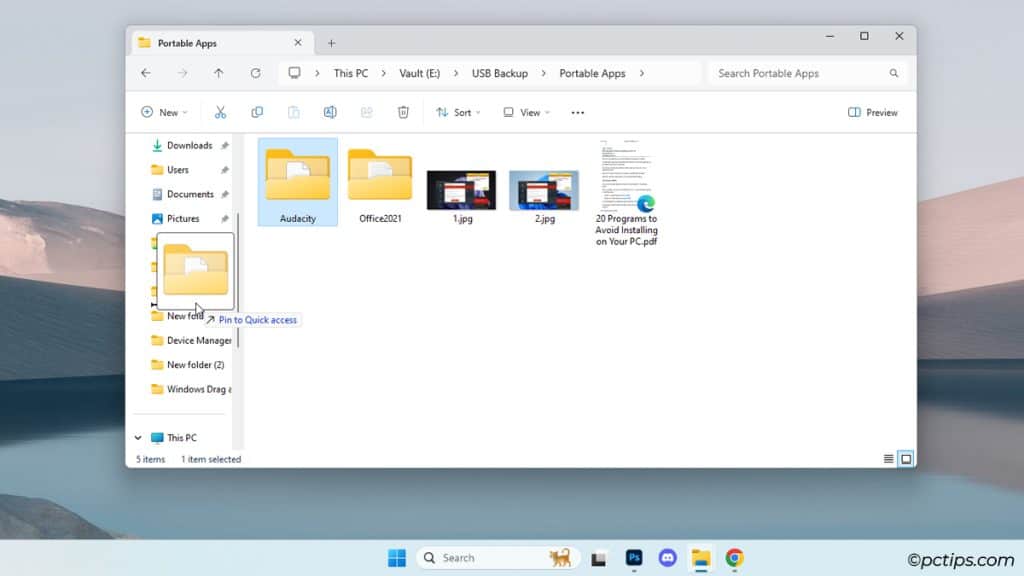
But you can also drag the folder and place it there.
Move Items via the Navigation Pane
I have a few work folders that I access multiple times a day every day.
Take my word for it – combining the last two tricks has made my workflow so much smoother!
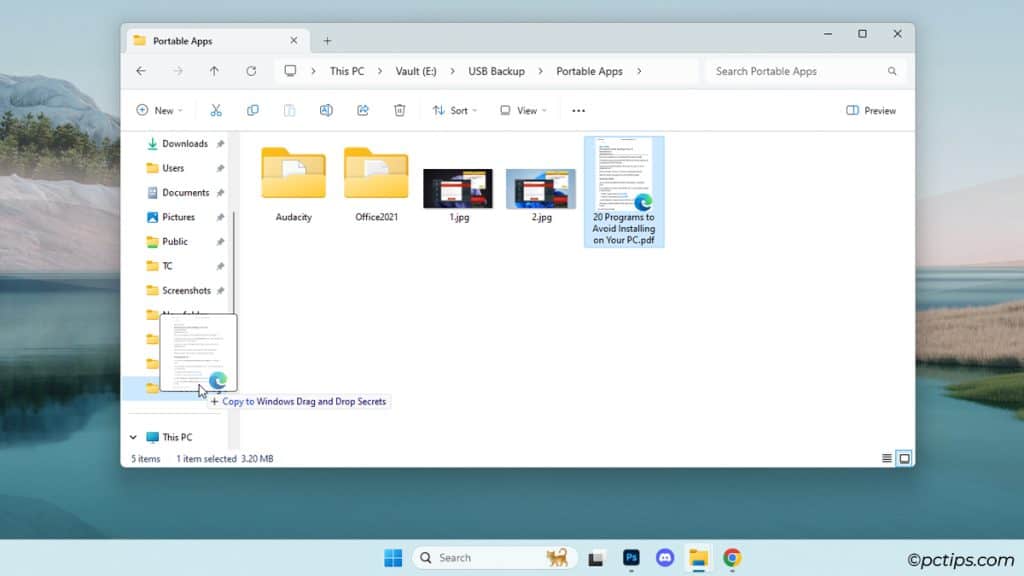
Pin frequently accessed folders to the navigation pane. Then, drop screenshots and downloaded files to those folders. Use Ctrl/Shift to choose to copy or move as needed.
It’s a genuine timesaver!
Drop Using Explorer Address Bar
Windows 24H2 is due to be released next month, but most of us are still on 22H2 or older versions.
In those versions, you can move files using the address bar.

If you’re deep inside Explorer and you want to move an item up a few directories, this can help.
No need to copy, go back, paste, and go back again. Simply drag and drop.
Snap Windows by Dragging
Drag a window to the left, right, or top edge of your screen and it’ll snap in place.
You can use this to maximize windows or to open two windows side-by-side (useful for moving or comparing items).
If you have an advanced layout app like FancyZones installed, this gets even better.
You’ll get to predefine custom layouts and drag Windows to those locations easily.
Doesn’t matter that you have 10 different apps open, you can create a custom layout for them the way you see fit.
Check out this quick Window Snapping tutorial if that interests you.
Drag and Drop to the Taskbar
In Windows 10 and older versions, you could drag and drop files to minimized windows on the taskbar (e.g., an Explorer window or apps like Chrome or Discord).
When you hovered over a window, it would automatically come forward and you could upload files/folders.
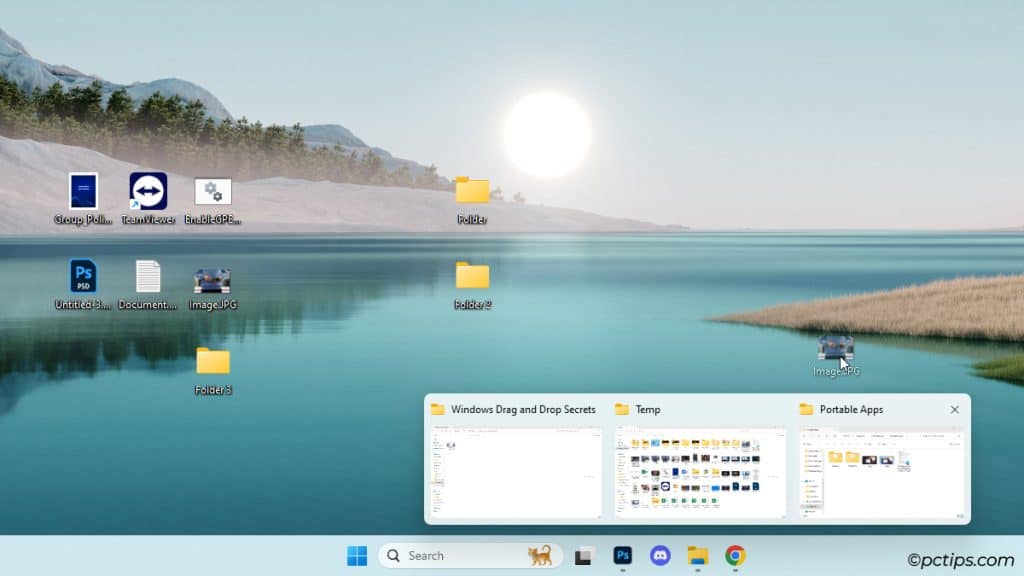
Windows 11 started out without this feature, but version 22H2 brought it back by popular demand.
So, if you have a compatible version, feel free to try it out.
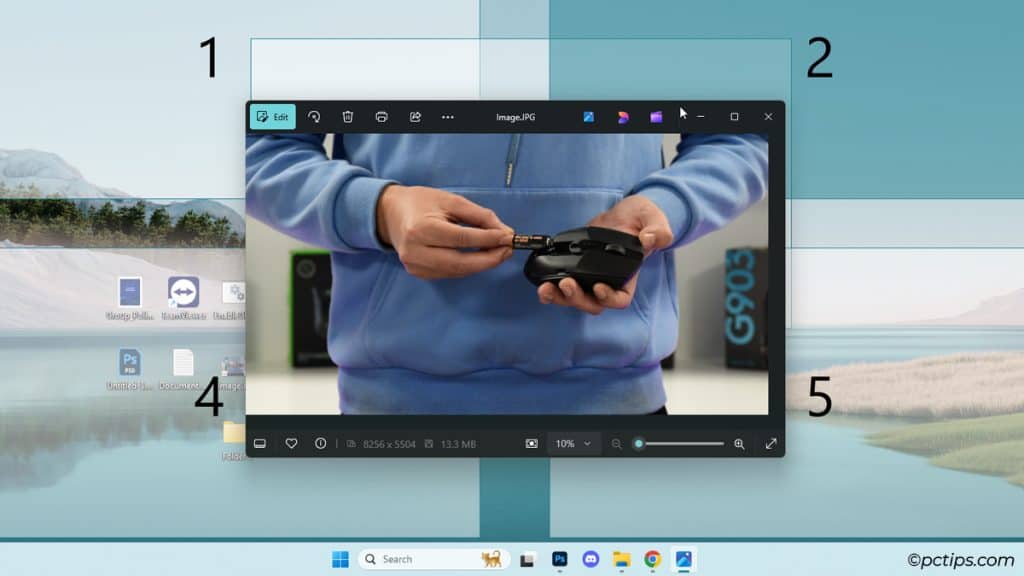
Drop While Cycling Windows
What if you’re on a version that doesn’t support drag and drop to the taskbar?
There’s an easy workaround.
Drag a file and press Alt + Tab. Cycle, select, and open the appropriate window. Drop the file there.
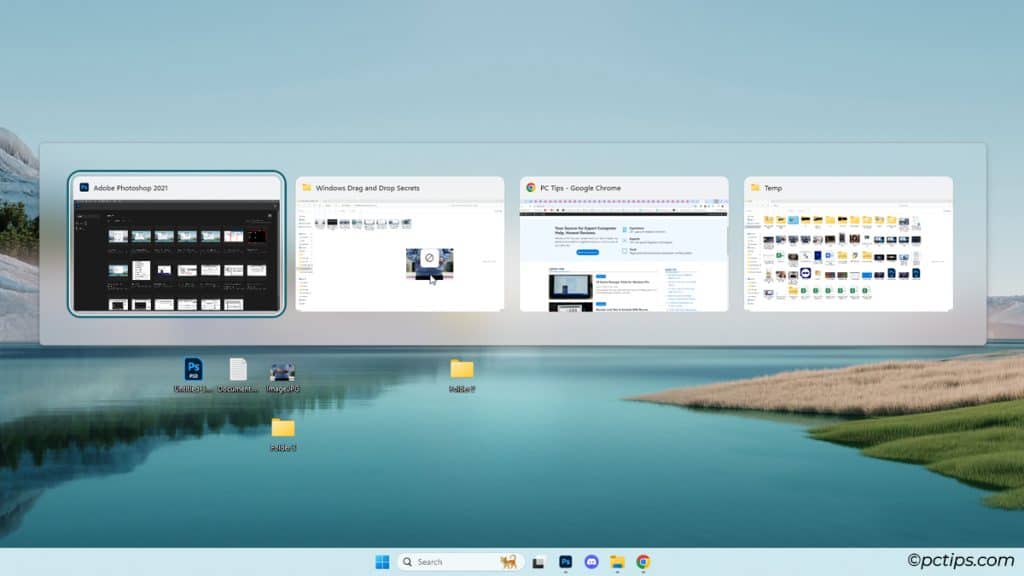
Trying to drop to the desktop? Drag and press Win + D instead.
Related: 100 Most Useful Keyboard Shortcuts Everyone Should Know
Upload Files Online
Drag and drop is often the easiest way to upload files online. Here’s how I most often use it:
- Google: Drag an image onto google.com to bring up Google Lens search.
- Discord: Drag files to Discord chat to share with my friends.
- Send-Anywhere: Share files across all devices (no signup or download needed).
- Canva: Upload images for quick edits.
- Outlook: Drag files to Outlook via the Taskbar to attach them to emails.
- Meta: Send files via Facebook, Instagram, Threads, or WhatsApp.
Drag and Drop with Touchpad
For laptop users, touchpads typically support multiple ways to drag and drop files and windows.
- Hold left-click on a file/window and move the cursor around for default drag and drop.
- Hold right-click and move for extra options (copy, move, shortcut).
- Double-tap the touchpad without lifting your finger on the second tap. Move the finger around to drag the file/window.
Get Creative with Your Desktop Icons
Enter ‘creative desktop wallpaper’ into Google and you’ll find a bunch of cool ideas.
If you want to make your desktop look like those, these four simple steps usually do the trick:
- Download the image you want and set it as the wallpaper.
- On the desktop, use Ctrl + Scroll Wheel to make your icons the right size.
- If needed, right-click and select View > Align icons to grid. Disabling this will allow freer placement and icon overlapping.
- Finally, drag and drop the icons to the places you want.
Declutter the Start Menu & Taskbar
I have a lot of programs installed and running in the background on my PC. If I just leave them as they are, my start menu and taskbar get very cluttered.
Fortunately, decluttering them doesn’t take much effort.
Just drag and drop the icons to organize them into groups.
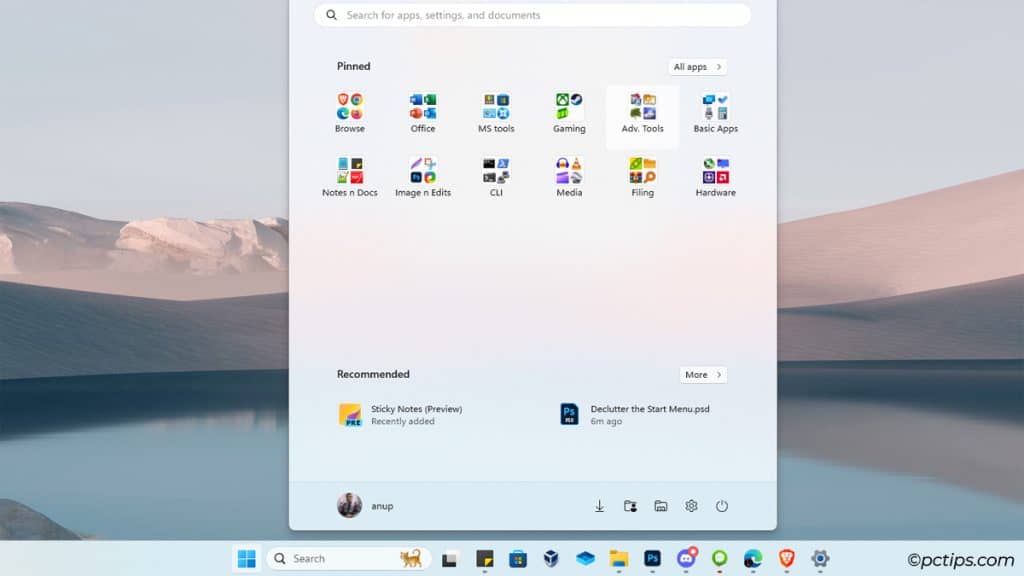
As for the taskbar icons next to the notification area, just drag them into the hidden icons arrow.
Drag and Drop Text
Drag and drop isn’t just for files; you can move text as well. This can be useful if Ctrl+C/Ctrl+V doesn’t work on your keyboard or you prefer the mouse.
Just highlight the text, drag it, and drop it to another window.
Drag & Drop Across Devices
One of the most handy ways to use drag and drop is to move files across different devices.
Here’s how I use it in my day-to-day:
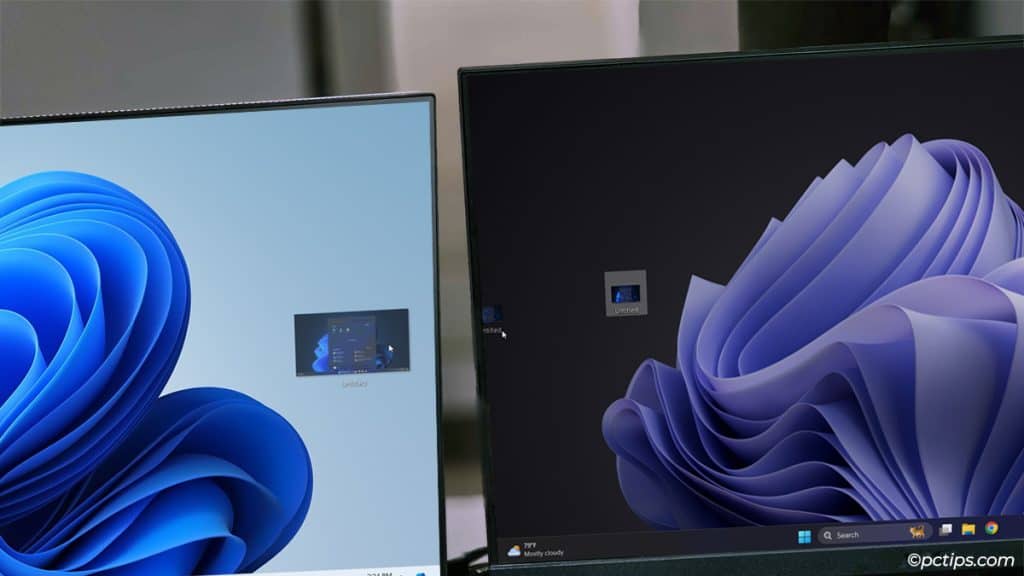
- Multi-Monitor: In a multi-monitor setup, you can drag and drop windows across screens. I use this to set up screens for specific tasks (one for research/reading, one for writing, one for music and messaging).
- Network Share: If you’ve shared files with your network, you can drag and drop files in/out of the shared folders.
- Remote Connection: With apps like TeamViewer, you can access PCs across the world. Sharing files between connected PCs is as simple as dragging and dropping.
- Virtual Machine (VM): Assuming Drag and Drop is enabled via your hypervisor settings, you can drag and drop files between your PC and VM.
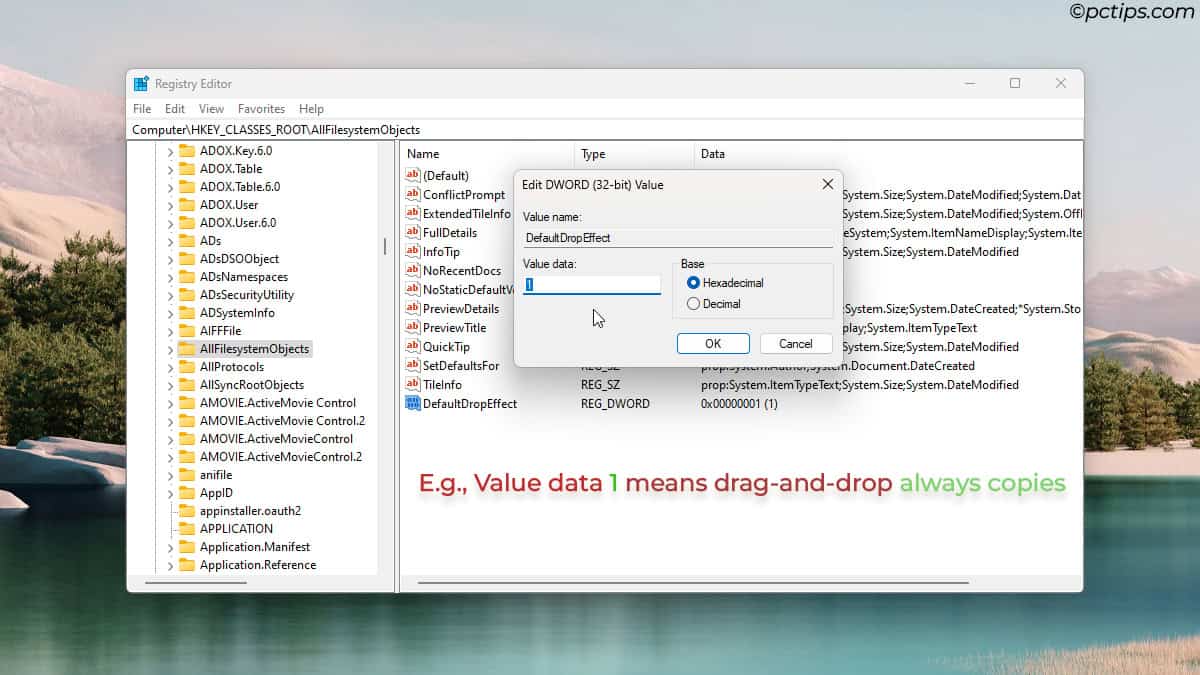
Change Default Drag and Drop Behavior
Some people like to always copy with drag-and-drop, no matter the conditions. Windows doesn’t let you do that by default, but it’s possible to change it with some simple registry tweaks.
- Press Win + R and enter
regedit. - Go to
HKEY_CLASSES_ROOT. - Right-click and export the
*andAllFileSystemObjectskeys to create backups.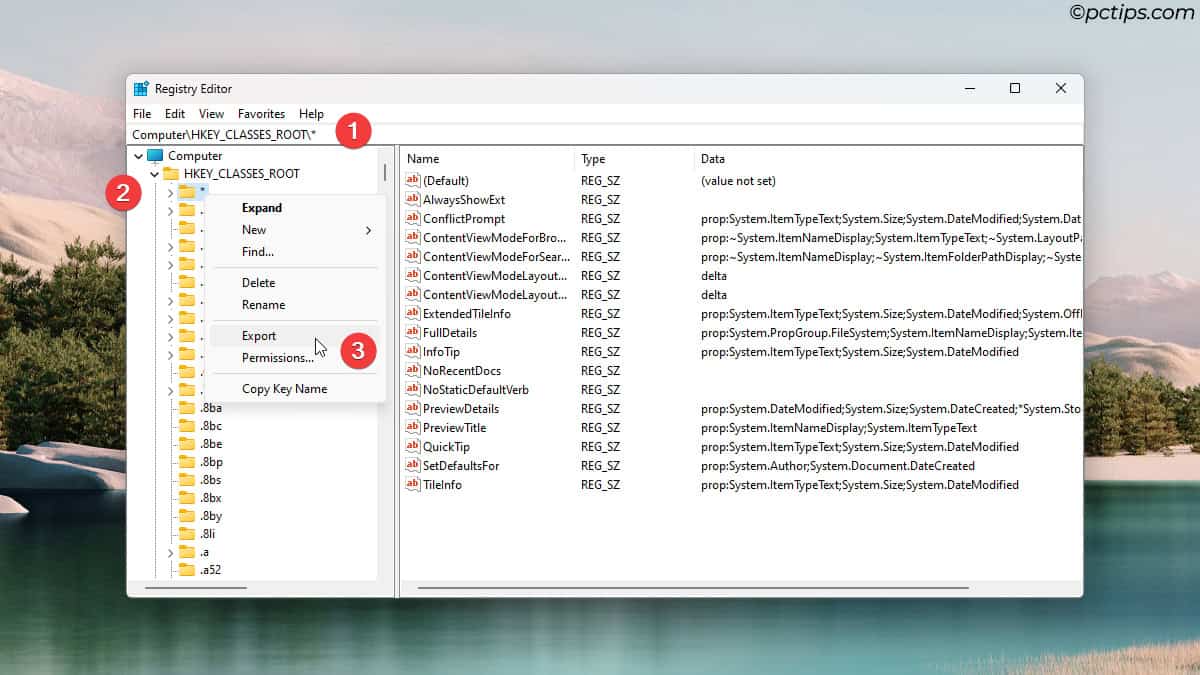
- Open the
*key. - Create a DWORD value named
DefaultDropEffect.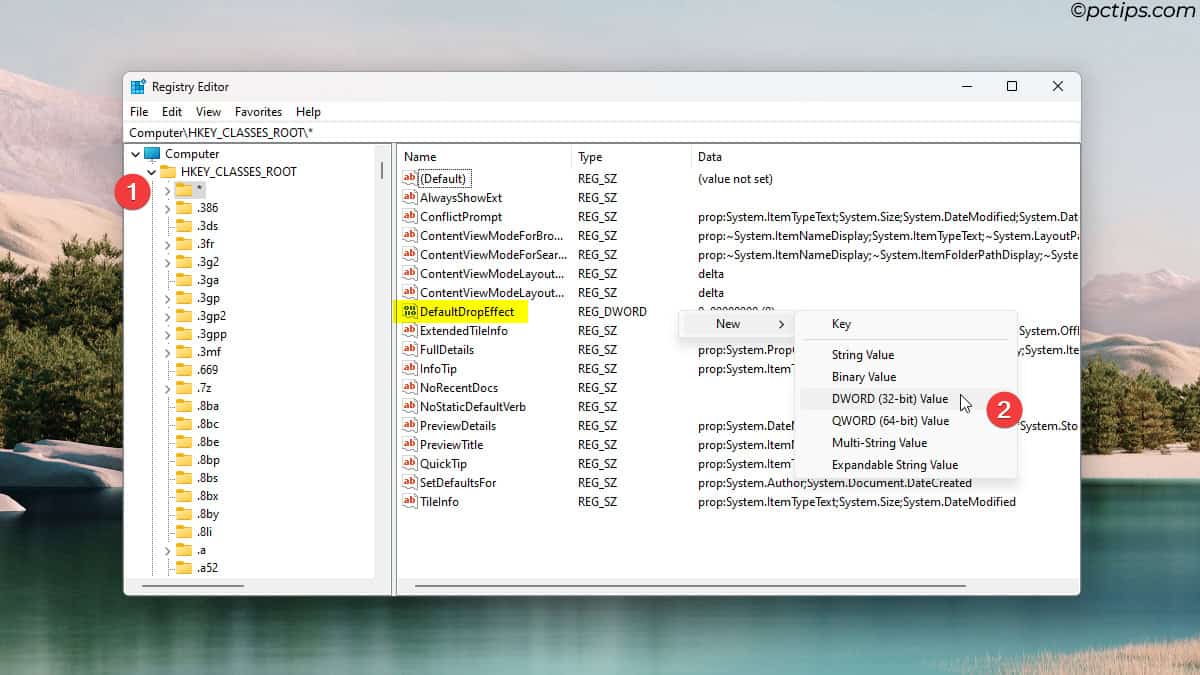
- Scroll down and open the
AllFileSystemObjectskey. Repeat Step 5 here.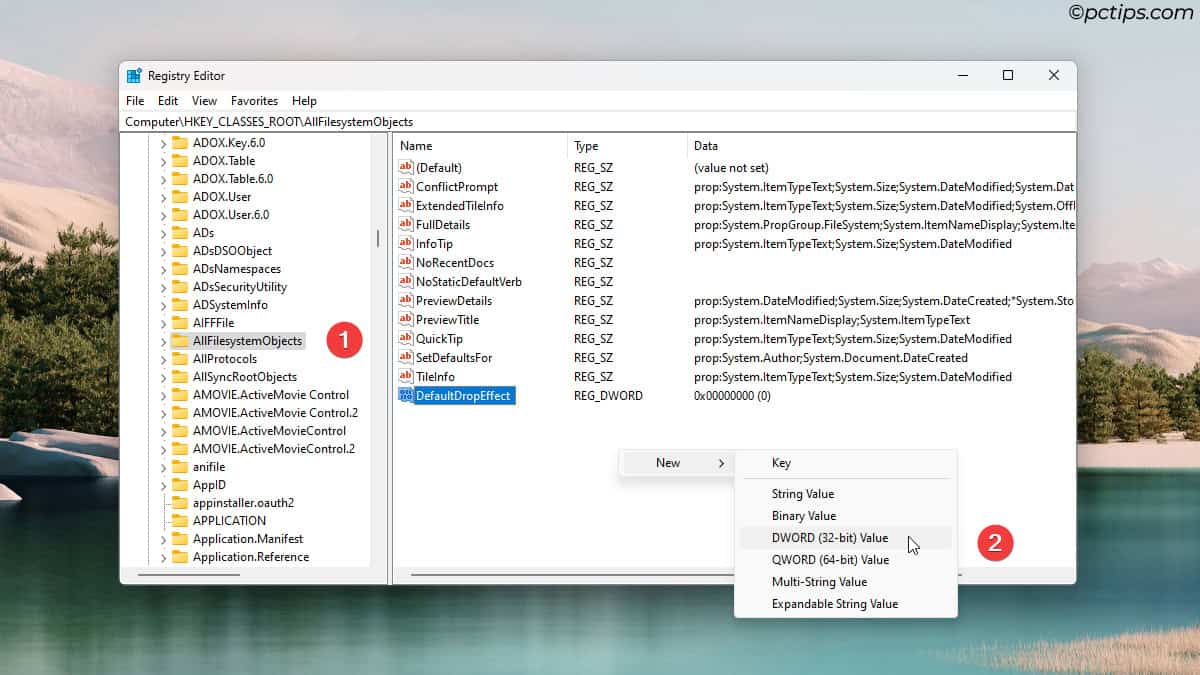
- Double-click the value. Set their value data according to the result you want:
- 1 – Set Copy as Default Action
- 2 – Set Move as Default Action
- 4 – Set Create Shortcut as Default Action
- 0 – Restore Default Settings
When needed, you can use Ctrl, Shift, or Alt to pick a specific action. Or, you can run the backup file from Step 3 to reset the configs.
Drag and Drop Not Working? Here’s How to Fix It
In my experience, this mainly happens when File Explorer or other apps aren’t responding. Here’s what usually helps:
- Use Task Manager to restart File Explorer or the relevant app. Restarting your PC should help too.
- Press Esc to cancel the last drag-and-drop action. Try again now.
- Try other types of drag and drop. It could be that the exact trick you’re attempting isn’t supported for your Windows version (e.g., the taskbar or address bar tricks only work on certain versions).
- Try a different mouse. Your current one could be malfunctioning.
- Check and repair system corruption with DISM and SFC.
Get Even More Out Of Windows
As you just saw, even a simple feature like drag-and-drop has more uses than most people realize.
The same holds true for many other parts of Windows.
Check out these guides to keep leveling up:
There's one useful Drag & Drop operation that you missed. I have PhotoShop installed on my PC and a Photoshop shortcut on my desktop. I can drag and drop an image I want to edit onto the PS shortcut, and the image opens in PS and is ready to edit. This also works with Word or Excel documents. It's very handy and saves me the time to load images or documents after opening the needed app. It works with lots of apps, try it!
Great point Walter! Allow me to return the favor. You might find BulkFileChanger from NirSoft useful. With this tool, you can open files in bulk (e.g., open 15 images at once in Photoshop instead of dropping and opening them individually).