The Beginner’s Guide to Setting Up Your First Virtual Machine
Last Updated:
Virtual machine lets you run a whole separate computer INSIDE your main computer.
It’s like Inception, but for operating systems.
You’ve got your main OS (Windows, macOS, Linux, whatever) as the “host“.
Then inside of that, you create a “guest” OS that runs in a window, just like any other app.
Here’s how it works:
- Your physical computer has hardware resources like CPU, RAM, storage, GPU, etc.
- You install a hypervisor, which is just a fancy word for the VM software (like VirtualBox, which we’ll use later).
- The hypervisor carves out some of your physical hardware resources and creates a virtual hardware environment.
- You install an operating system (OS) in this virtual environment, and boom – you’ve got a fully functional computer inside your computer.
The VM thinks it’s a real, physical machine.
It has no idea it’s sharing resources with your main computer (the “host“).
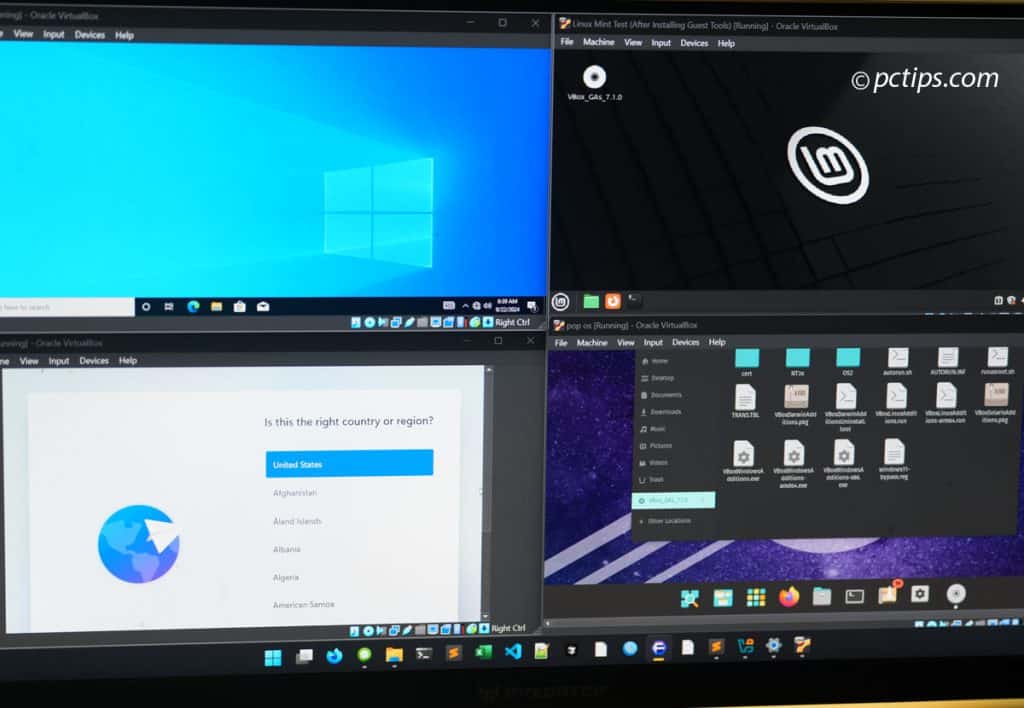
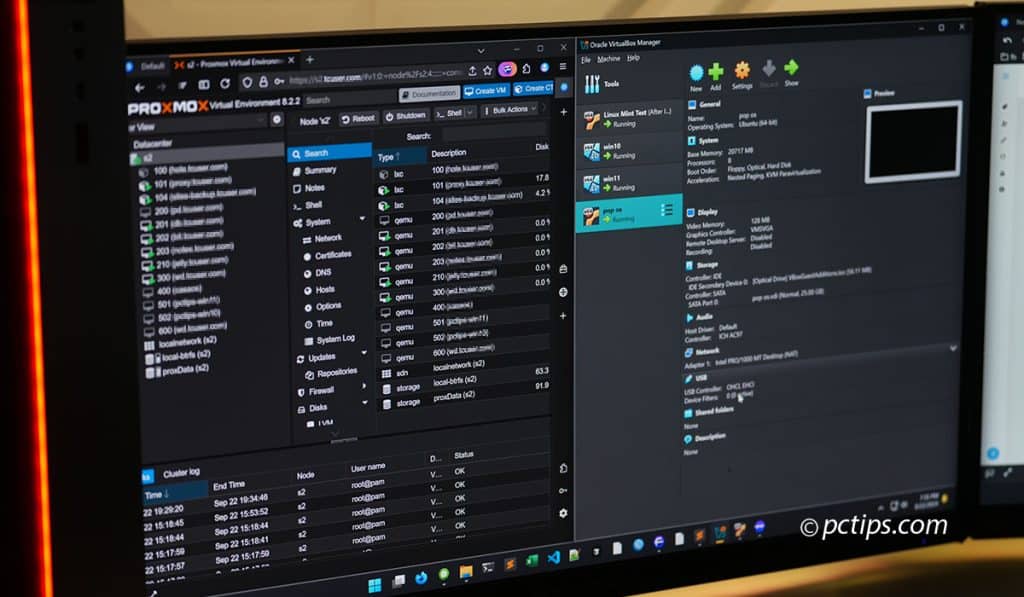
And you can create multiple VMs on one host, each running different operating systems!
Why You NEED to Learn Virtual Machines
At this point you might be thinking…umm okay, virtual machines sound neat.
But why would I need one?
Seems like a lot of extra work!
Well, my friend, VMs are one of the most useful tools EVER for a whole bunch of reasons:
- Testing out a new operating system without risking your main computer
- Running multiple operating systems side-by-side without rebooting
- Self-hosting apps and services like media servers, password managers, etc.
- Spinning up fresh environments for development and testing
- Easily moving an entire OS + apps between computers or sharing it with others
- Trying out potentially dangerous stuff (like malware) in a safe environment
- Isolating dodgy programs so they can’t mess up your real system
Basically, VMs give you a TON of flexibility to experiment and isolate things without putting your main computer at risk.
They’re a key part of my toolkit, and they should be part of yours too.
VMs are used EVERYWHERE in the IT world – by developers, system administrators, cybersecurity professionals, data scientists, you name it.
Learning how to use them is an essential skill that will serve you well no matter what your tech interests are.
Hardware Requirements
Creating a VM means you’re essentially running a second (or third, or fourth) computer on your existing machine.
It’s gonna take some resources, so let’s talk bare minimum specs:
- Processor: Most modern CPUs support virtualization. You might need to enable a setting in BIOS called “Intel VT-x” or “AMD-V“.
- RAM: I recommend at least 8GB of RAM, preferably more if you want to run more than one VM at a time.
- Storage: VMs take up space, so make sure you have enough room on your hard drive. An SSD will give you the best performance.
The beefier your hardware, the snappier your VMs will run.
But those are good starting guidelines for getting your feet wet.
Choosing Virtualization Software
There are two main types of virtualization software, or “hypervisors“:
- Type 1 hypervisors run directly on your hardware (think Proxmox, VMware ESXi or Microsoft Hyper-V)
- Type 2 hypervisors run on top of your existing operating system
Since we’re just getting started, we’ll focus on Type 2.
Some of the most popular Type 2 hypervisors are:
- VirtualBox (free, open source, runs on Windows, Mac, Linux)
- VMware Workstation Player (free for non-commercial use, paid version has more features, Windows & Linux)
- Parallels Desktop (paid, Mac only, super sleek integration with macOS)
And my top pick for beginners is VirtualBox.
It’s free, open source, and runs on all major operating systems.
I’ll be using it for the rest of this guide.
Getting Started with VirtualBox
First things first – download and install VirtualBox from the official site: https://www.virtualbox.org/wiki/Downloads
Here’s a pro tip: If you’re on Windows, you can use the winget package manager to install it from the command line:
winget install Oracle.VirtualBox
Once it’s installed, fire it up.
The interface might look a little intimidating at first, but don’t worry – we’ll walk through it step by step.
One thing I highly recommend is installing the VirtualBox Extension Pack.
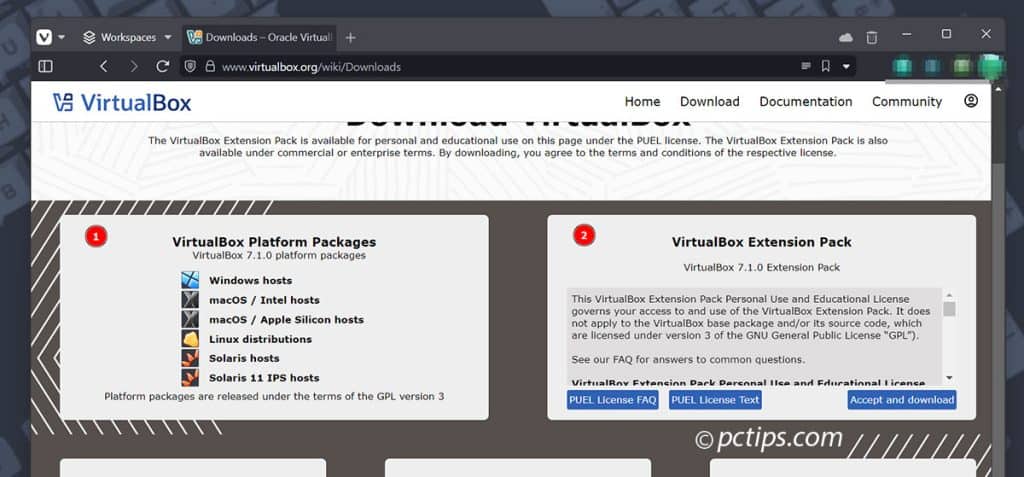
It adds support for USB devices, remote desktop protocol, and some other handy features.
You can download it from the same page as the main VirtualBox installer.
To install the extension pack, just double click on the downloaded file and it will open in VirtualBox.
Click “Install” and agree to the license terms, and you’re good to go!
Creating Your First VM
Now for the fun part—let’s create a VM!
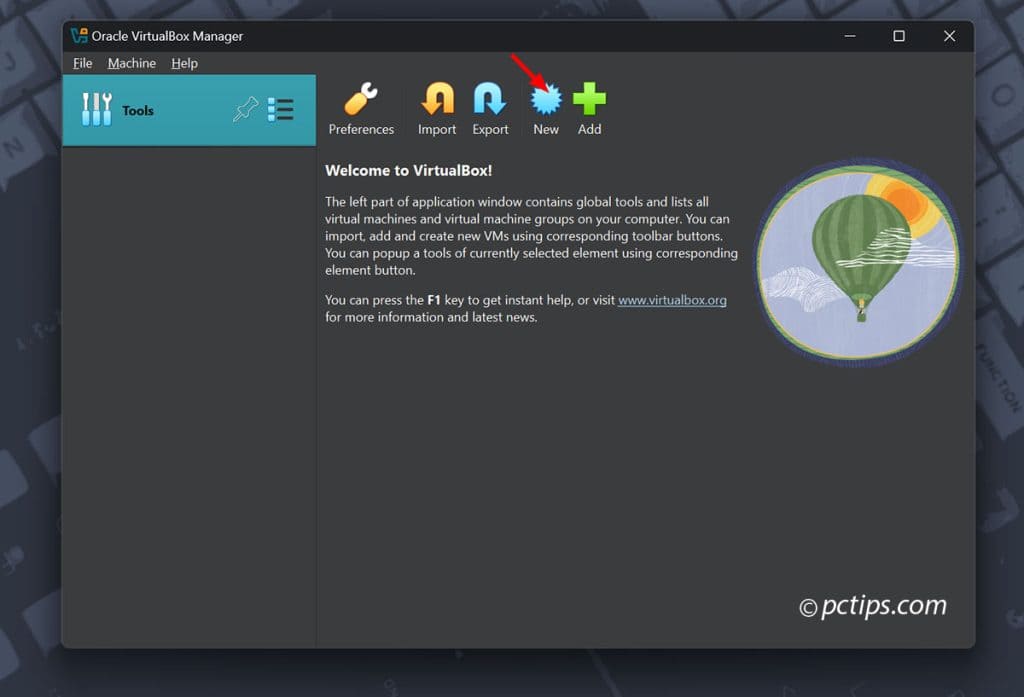
- In VirtualBox, click the “New” button.
- Choose a name like “Linux Mint Test” for your VM (VirtualBox will automatically detect the type/version based on this, but you can adjust if needed)
- Verify the type (Linux) and version (Ubuntu 64-bit) of OS you want to install. VirtualBox has built-in profiles for tons of operating systems to make setup easier. Click Next.
- Allocate RAM for the VM (I’m giving it 2GB which is plenty for Linux Mint, if you have the resources, feel free to allocate more!) Just don’t go too nuts – your host OS still needs RAM too!
- Time to choose CPU allocation – 2 cores should be okay for this example, but you can go higher if needed then click Next
- Create a virtual hard disk (25GB is good for now, and I prefer the Dynamically Allocated option so it only uses space as needed) then click Next
- Review the summary and click Finish
At this point, you’ll see your new VM show up in the list on the left side of VirtualBox Manager.
However, we’re not quite done yet!
The VM is created, but it doesn’t have an operating system installed.
That’s our next step.
Installing an Operating System
For this guide, we’ll use Linux Mint, but the process is similar for other OSes.
- Download the Linux Mint ISO file from the official website: https://linuxmint.com/download.php
- In VirtualBox, select your VM and click “Settings“.
- Go to the “Storage” tab, click the “Empty” CD icon, and choose the Linux Mint ISO you downloaded.
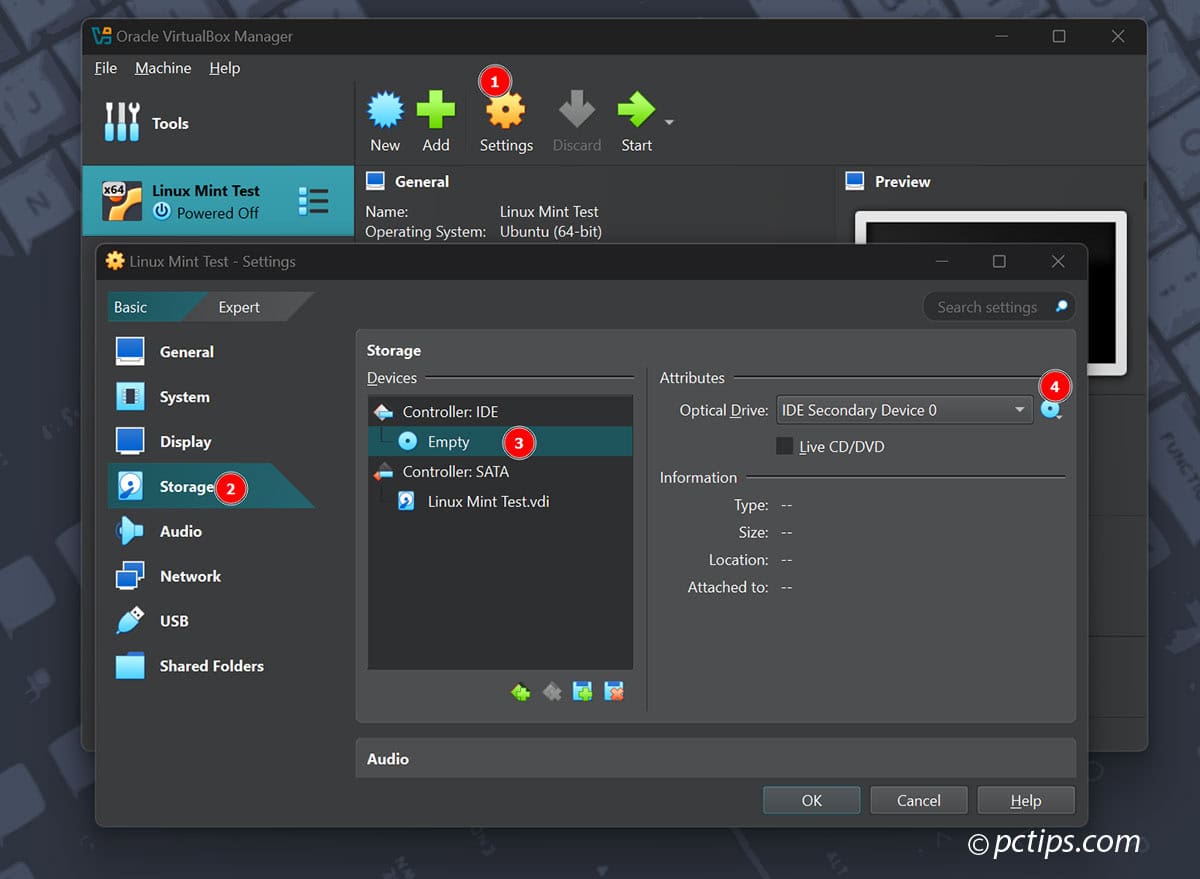
- Click OK, then click “Start” to boot up your VM!
The Linux Mint installer will walk you through the setup process. It’s pretty self-explanatory, but here are the key steps:
- When the Linux Mint live environment boots, feel free to click around and explore a bit. This is a great way to test hardware compatibility and get a feel for the system before committing to an install.
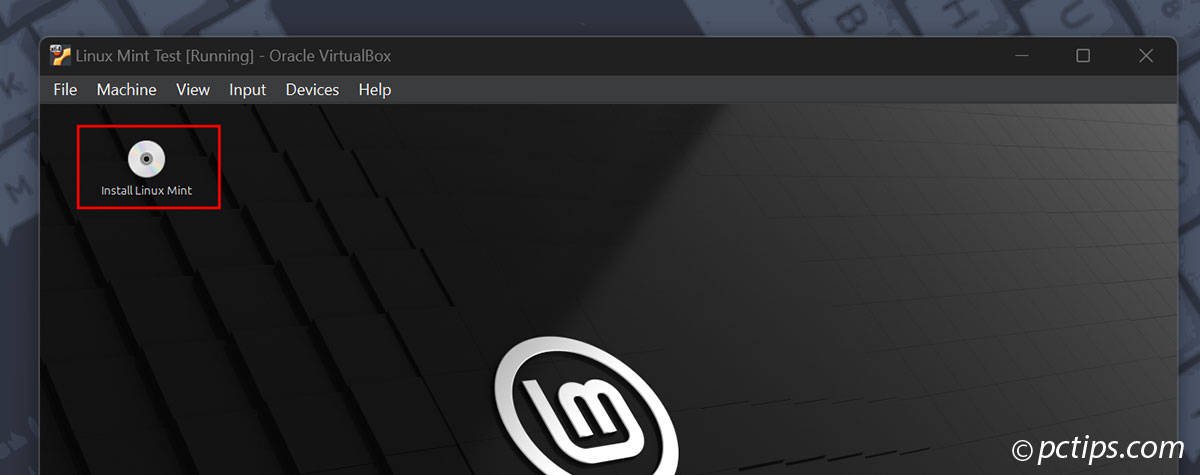
- Double-click the “Install Linux Mint” icon on the desktop.
- Choose your language, then click Continue.
- Select your keyboard layout, then click Continue.
- Choose whether to install multimedia codecs (I recommend doing this to ensure maximum compatibility with audio and video files). Click Continue.
- Select “Erase disk and install Linux Mint” (don’t worry, this only affects the virtual disk – your host machine is safe!). Click Continue.
- Choose your time zone, then click Continue.
- Create a user account and set a password, then click Continue.
The installation can take a while (especially if it’s downloading updates), so grab a coffee and relax.
Once it’s finished, you’ll get prompted to restart the VM.
- Remove the ISO from the virtual drive (Devices > Optical Drives > Remove Disk from Virtual Drive) so your VM doesn’t try to reinstall Linux Mint
- Log into your new Linux desktop
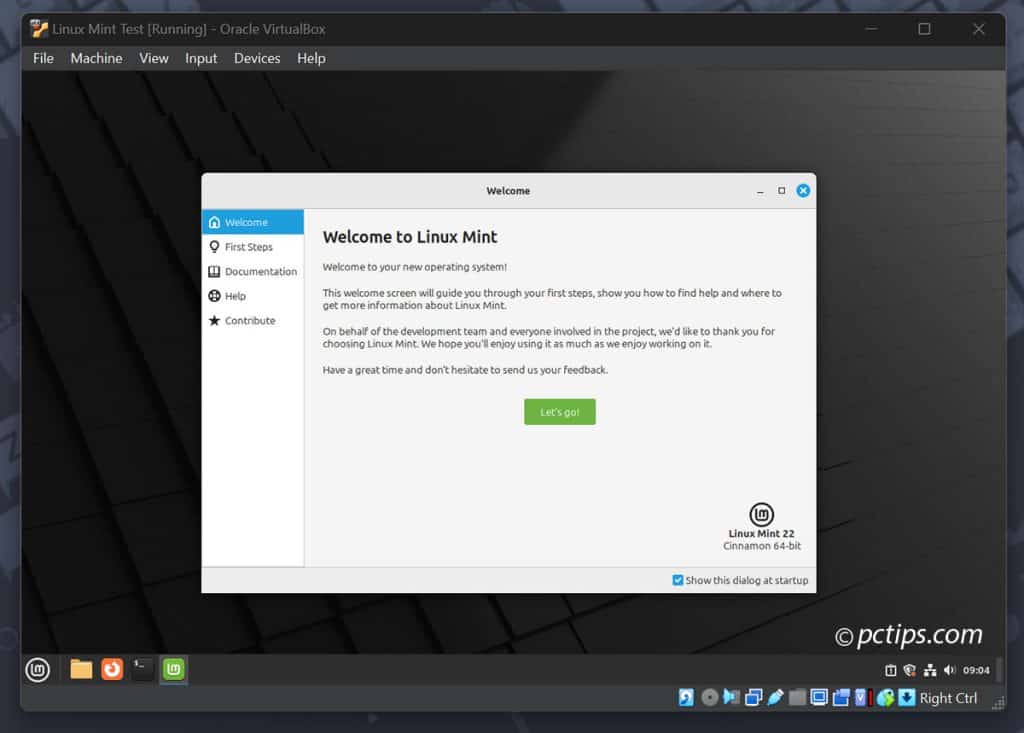
- The Welcome app will guide you through post-install setup and introduce you to Linux Mint
…and that’s it—you’ve got a fully functional Linux machine INSIDE your main computer.
How cool is that?!
You can interact with it just like any other computer – install software, customize settings, break things, and fix them.
VirtualBox Guest Additions
One last thing I recommend installing is the VirtualBox Guest Additions.
This is a set of drivers and utilities that optimize the VM for better performance and usability. It enables things like:
- Smooth window resizing
- Seamless mouse pointer integration
- Shared clipboard for copying and pasting between the host and guest
- Shared folders for easily transferring files between the host and guest
- Better video support and optional 2D/3D acceleration
To install the Guest Additions:
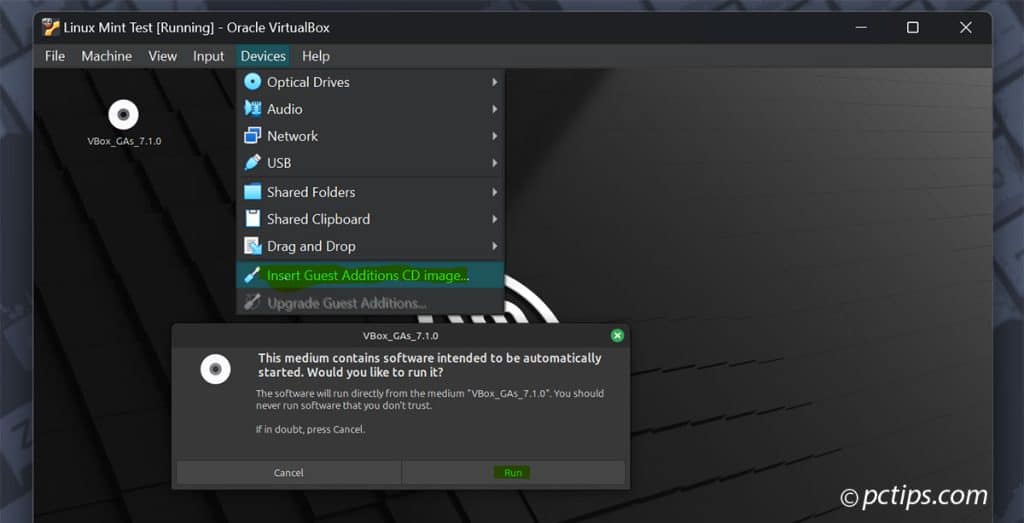
- In the VM window, go to Devices > “Insert Guest Additions CD Image”. This will mount the Guest Additions ISO inside the VM.
- A popup should appear asking if you want to run the installer. Click Run.
- Follow the prompts to complete the installation. You may need to enter your password to authorize the installer.
- Reboot the VM when prompted.
The Guest Additions make a big difference in day-to-day usability, so I highly recommend installing them on any VM you plan to use regularly.
Taking Snapshots
One of the coolest features of VMs is the ability to take “snapshots“.
A snapshot saves the exact state of your VM at a moment in time.
You can then revert back to that snapshot anytime to undo changes!
Snapshots are great for:
- Saving a “base” VM setup you can roll back to
- Evaluating dicey software or tweaks without committing
- Trying out OS upgrades in case something breaks
- Taking a snapshot of the project directory before making big changes
To take a snapshot:
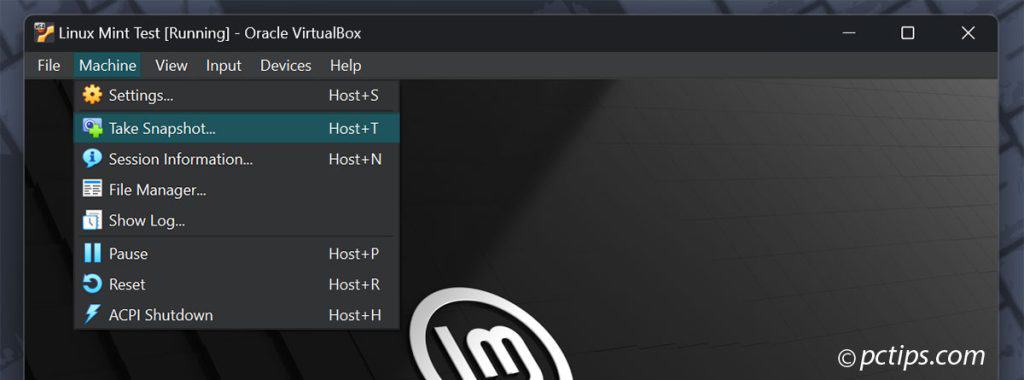
- In VirtualBox Manager, select your VM.
- In the menu, go to Machine -> Take Snapshot.
- Give the snapshot a descriptive name and add a comment if desired.
- Click OK to create the snapshot.
Your VM’s current state is now preserved.
If you mess something up down the line, you can always restore this snapshot and be right back where you started.
To revert to a snapshot:
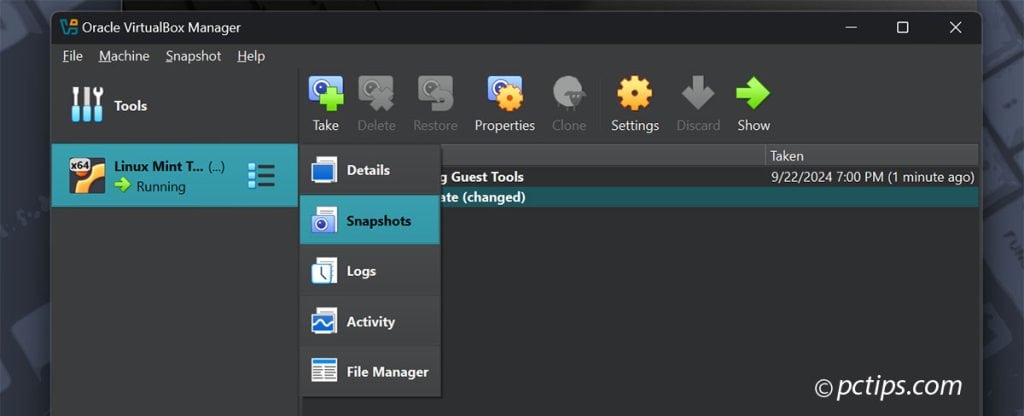
- Go to the Snapshots view for your VM.
- Select the snapshot you want to restore in the tree view on the left.
- Click the “Restore” button (the round arrow icon in the top toolbar).
- Click “Restore” in the confirmation dialog.
I recommend taking snapshots before doing anything major (like OS updates or installing new software).
Basically, any time you’re about to do something experimental or potentially risky, take a snapshot first.
Cloning VMs
Let’s say you’ve got a VM all set up just the way you like it, and you want to create an exact copy.
Maybe you want to share it with a friend, or maybe you want to use it as a template for spinning up new VMs quickly.
That’s where cloning comes in.
To clone a VM:
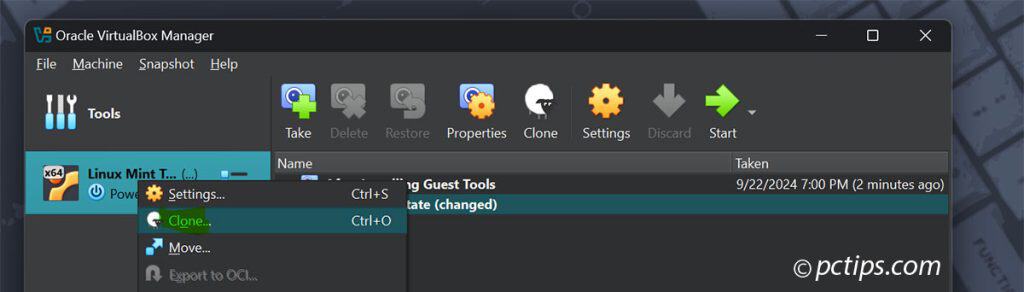
- Make sure the VM you want to clone is powered off.
- In the VirtualBox Manager window, right-click the VM and select “Clone”.
- Give the clone a name and choose a location to save it.
- Choose either “Full Clone” or “Linked Clone”:
- A full clone is a completely independent copy of the VM. It takes up as much space as the original, but the two VMs are totally separate.
- A linked clone is more like a reference to the original VM. It takes up much less space, but it relies on the original VM’s virtual disk. If you delete the original, the clone won’t work.
- Click “Clone” and wait for the process to finish.
I tend to use full clones for archival purposes or for sharing with others, and linked clones for quickly spinning up variations of a base VM for testing. But both have their uses!
Importing and Exporting VMs
VirtualBox lets you import and export VMs as single files, which is awesome for backing up your VMs or moving them between computers.
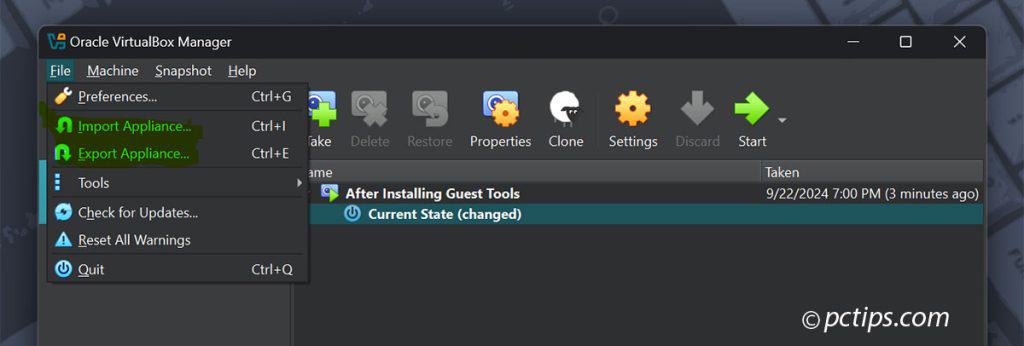
To export a VM:
- In the VirtualBox Manager window, select the VM you want to export.
- Go to File > Export Appliance.
- Choose a location and name for the exported file (it will be a .ova file).
- Optionally, you can change the appliance settings, like the OS type and version.
- Click “Export” and wait for the process to finish.
Now you have a single .ova file that contains all the data for your VM.
You can share this file however you like – email, cloud storage, usb drives, whatever.
To import a VM:
- In the VirtualBox Manager window, go to File > Import Appliance.
- Select the
.ovafile you want to import. - Review the appliance settings. You can change things like the VM name, CPU and RAM allocation, etc.
- Choose a location for the imported VM’s files.
- Click “Import” and wait for the process to finish.
And that’s it!
You now have an exact copy of the exported VM, ready to run on any computer with VirtualBox installed.
This is incredibly handy for sharing preconfigured development environments, testing setups, or just backing up your VMs.
Why VMs Are Awesome
I hope by now you’re starting to see why I think VMs are so awesome.
To recap:
- They let you run ANY operating system without ever rebooting your computer
- They keep things on your main OS squeaky clean and only install to the VM
- Snapshots mean you can mess up a VM with ZERO risk – it’s an instant undo button
- They’re incredible for testing things out in a totally sandboxed environment
- There’s no better way to learn a new OS inside and out
VMs are an essential tool for developers, system administrators, security researchers, and really anyone who wants to get the most out of their computer.
A Few Pro Tips Before I Go…
Before I wrap up, here are a few my favorite tips to take your VM game to the next level:
- Shared folders let you access files on your host computer inside the VM. Set them up in the VM settings under Shared Folders.
- Enable drag-n-drop and shared clipboard in the VM settings under General -> Advanced for smooth transfer between host & guest.
- Enable 3D acceleration in the Display settings for better graphics performance.
- Use Host-only networking to create a private subnet for VMs to talk to each other (and the host) without being exposed to the public internet.
- Running multiple VMs at once is totally doable, but keep an eye on your RAM usage. Fire up the Activity Monitor or Task Manager on your host to monitor resources.
- For maximum performance, run VMs from an SSD, allocate plenty of RAM, and enable hardware virtualization in your BIOS if it isn’t already.
- Try other hypervisors: While VirtualBox is great, it’s not the only game in town. Give VMware or Hyper-V a spin and see which one you like best.
- Set up port forwarding: This lets you access services running in your VM (like a web server) from your host machine.
There’s so much more to learn about VirtualBox and virtualization in general, but I think this guide has given you a solid foundation.
Remember, the best way to learn is by doing.
Spin up some VMs, break things, fix them, and have fun!
If you found this guide helpful, please share it with your friends and colleagues.