12 USB Boot Drives EVERYONE Should Make
Last Updated:
Crash. Ugh, not again!
Whether it’s a borked Windows update, a nasty virus, failing hardware, or the dreaded BSOD, your computer will bite the dust eventually.
And you know what sucks even more than troubleshooting? Realizing you don’t have the tools to fix the dang thing!
That’s why, my friends, I’m here to share the gospel of the bootable USB drive.
Over years of wrenching on PCs, I’ve amassed a trusty collection of ISOs that have saved my bacon more times than I can count.
And today, I’m gonna walk you through the 10 most essential boot disks that everyone should have on hand.
Windows Installer
If there’s one USB boot drive that’s a non-negotiable it’s a Windows installer.
Why? Three words: clean install, baby.
When Windows gets janky (and it will), sometimes starting fresh is the only way to go.
I always keep ISOs for the latest Windows 10 and 11 on deck.
Use the Media Creation Tool to download the most recent iso.
Once you’ve got your ISO, fire up Rufus to create your bootable USB drive.
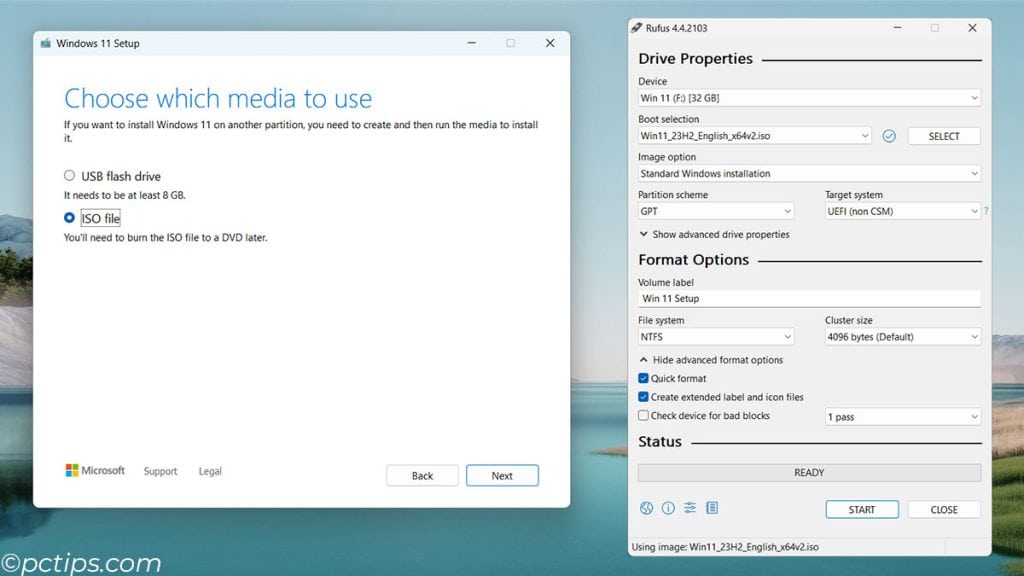
Always go for the latest version.
Microsoft is constantly patching holes and squashing bugs, so you want your install media as fresh as possible.
Pro tip: Slipstream your drivers and favorite apps right into the installer. That way, you don’t have to waste time hunting them down later. Just make sure they’re compatible with the Windows version you’re using.
Windows Recovery
Alright, but what if you don’t want to nuke everything and start over? That’s where recovery media comes in.
This puppy can resurrect your existing Windows install and bring it back to a working state.
I’ve used recovery drives to troubleshoot all sorts of wonky Windows problems.
Corrupted files? No problem. Boot loops? Piece of cake. And if all else fails, you can use it to pull your files off before doing a clean install.
One thing to note: recovery media is machine-specific. So you’ll need to create one for each of your PCs.
Creating a recovery drive is a breeze, though.
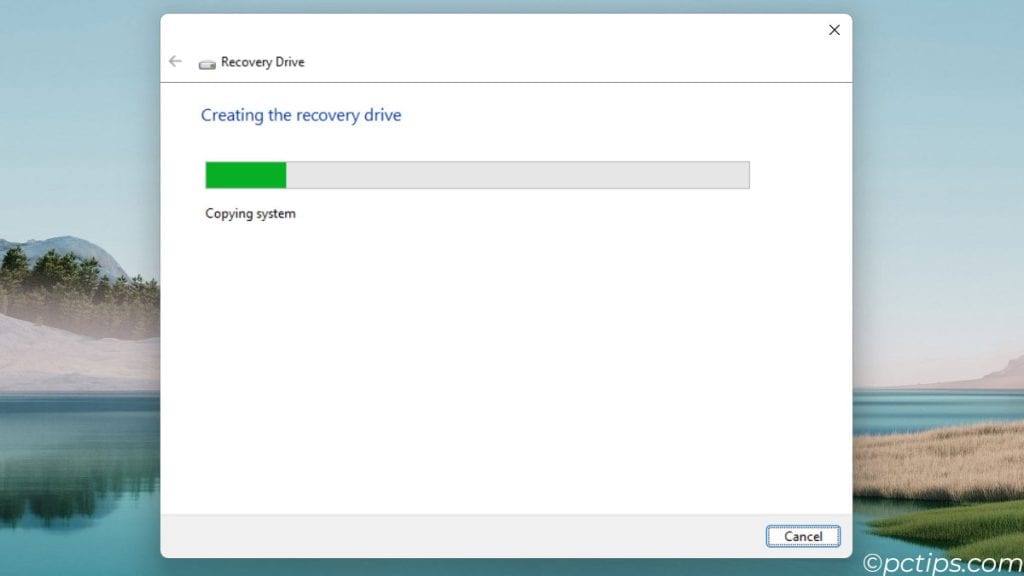
Just grab a USB stick with at least 16GB of space and follow these steps:
- Press the Windows key and type “recovery drive” into the search bar.
- Click on “Create a recovery drive” and let the tool scan your PC for the necessary files.
- Select the option to back up system files to the recovery drive.
- Choose your USB drive from the list and click “Next.”
- Wait for the process to finish, then label the drive and store it somewhere safe.
Just make sure you create this drive before disaster strikes!
Hiren’s BootCD PE
Where to even begin with Hirens?
This utility is STACKED. When I’m working on a PC that’s really messed up, this is always my first stop.
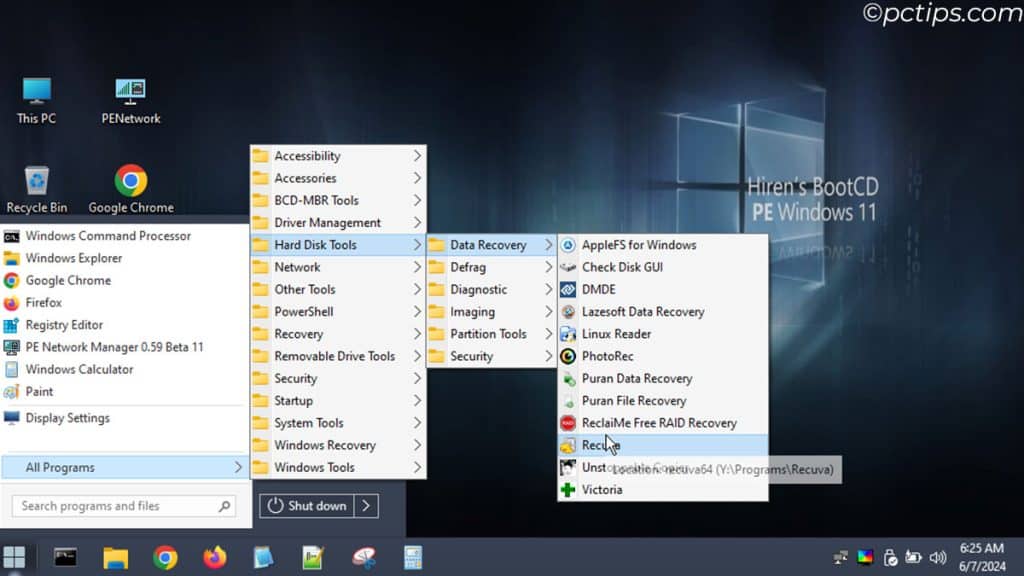
It’s based on Windows 11 PE x64 and is tailored for modern computers.
- It requires at least 4 GB of RAM and supports UEFI booting.
- Boots into a Windows-like environment, complete with a Start menu, taskbar, and even a file explorer. It’s like having a mini Windows 11 right on your USB stick!
- It’s packed with the best free tools, including:
- Hard disk tools for data recovery, defragging, diagnostics, imaging, partitioning, and security
- Windows recovery tools
- Removable drive tools
- Antivirus and password recovery tools
- System information and tweaking tools
- Network utilities
Seriously, if you only have one USB boot drive in your kit, make it Hiren’s.
Medicat USB
Medicat is similar to Hiren’s but it’s built on top of Ventoy, which means you can boot multiple ISOs from a single USB drive.
This thing is absolutely STUFFED with useful tools.

I’m talking:
- Antivirus scanners like Malwarebytes to nuke any nasty malware
- Backup utilities like Acronis, AOMEI Backupper, Macrium Reflect, and Rescuezilla to save your bacon when things go south
- Boot repair wizards like Boot-Repair-Disk and Super Grub2 Disk to get your system up and running again
- Password crackers to reset those pesky forgotten logins
- Partition managers like AOMEI Partition Assistant, EaseUS Partition Master, and MiniTool Partition Wizard to whip your drives into shape
- And a ton more – seriously, there’s too many to list!
I love that Medicat is based on Ventoy, so you can boot multiple ISOs from the same drive.
Just download the Medicat installer, write it to your USB drive, and you’re set!
Kaspersky Rescue Disk
If you’re dealing with a nasty malware infection that just won’t quit,
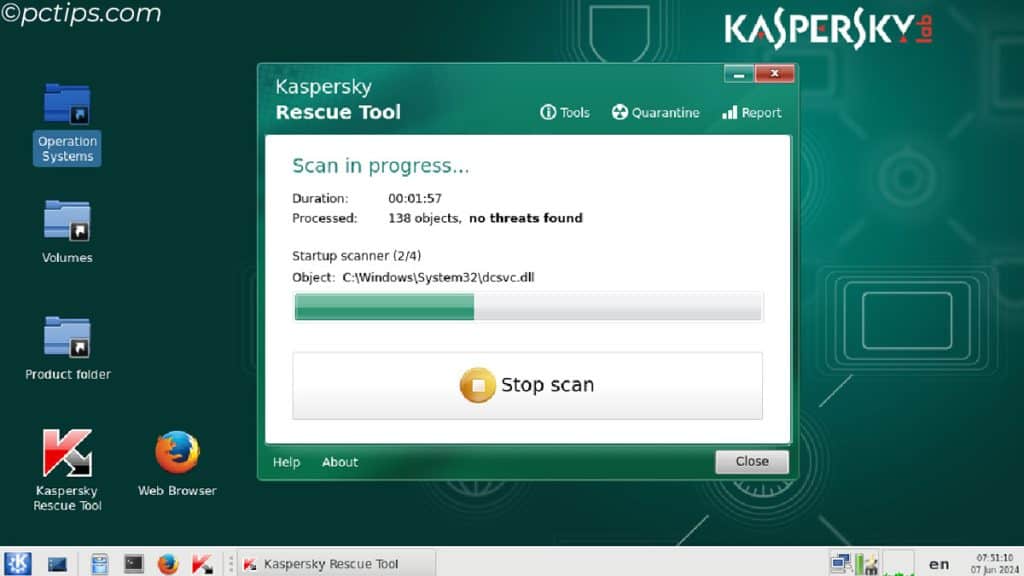
Kaspersky Rescue Disk is another powerful tool to add to your USB toolkit.
- Boots into a clean environment: Kaspersky Rescue Disk loads its own mini operating system, completely isolated from your infected Windows install. This way, sneaky malware can’t interfere with the scanning and removal process.
- Antivirus scanner: Kaspersky’s top-notch virus definitions are baked right in, ready to squash any malicious code it finds. And since the malware isn’t actively running, it can’t hide from the scan!
- Key features:
- Quarantines detected threats
- Cleans up your registry
- Finds and removes rootkits
- Scans archives and compressed files
- Offers both quick and full scan modes
- Easy to create: Just grab the ISO from Kaspersky’s website and use Rufus to burn it to a USB drive.
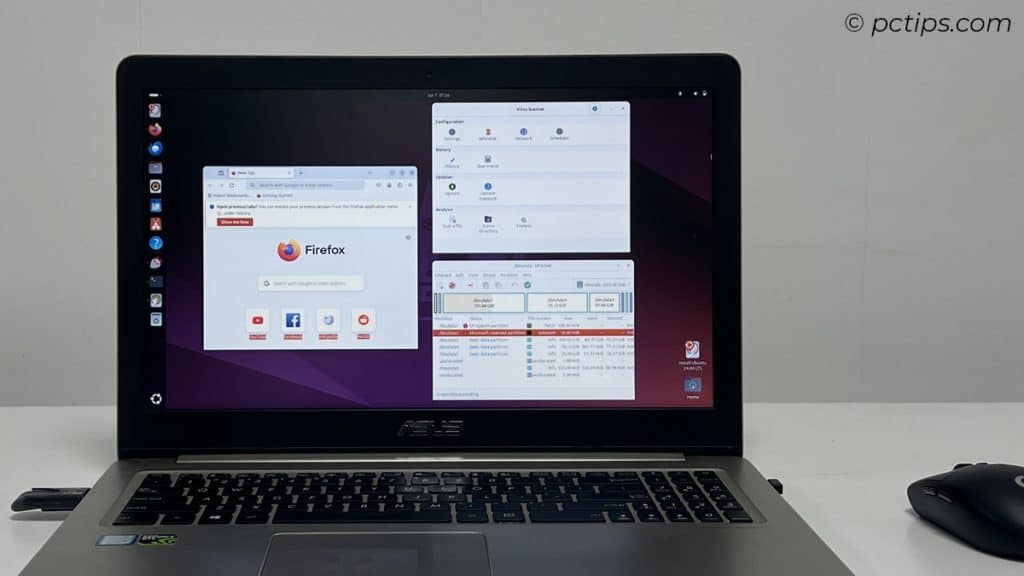
Linux Live (Ubuntu/Mint)
Every technician should be familiar with Linux live environments.
They get you into a computer while totally bypassing the installed OS.
From there you can grab files, run commands, check hardware – all without touching the hard drive!
Ubuntu and Mint are my go-to choices since they’re super user-friendly.
They come bundled with handy tools too:
- GParted: The best GUI app for resizing, reformatting, and otherwise managing partitions.
- Bootable Repair: If you add the “boot-repair” package, it can fix all sorts of boot issues, like reinstalling GRUB.
- ClamAV: A solid open-source antivirus scanner. I always keep it updated on my drive!
- Firefox: Essential for Googling answers and downloading drivers or other utilities while in the live environment.
Pro tip: Give your live USB drive persistence so you can save files and changes across reboots. That way you have your own customized repair environment!
Tails
Tails is a super unique boot drive to have in your back pocket. If you ever need to use a public computer (or let someone borrow yours), boot it up with Tails for complete privacy and security.
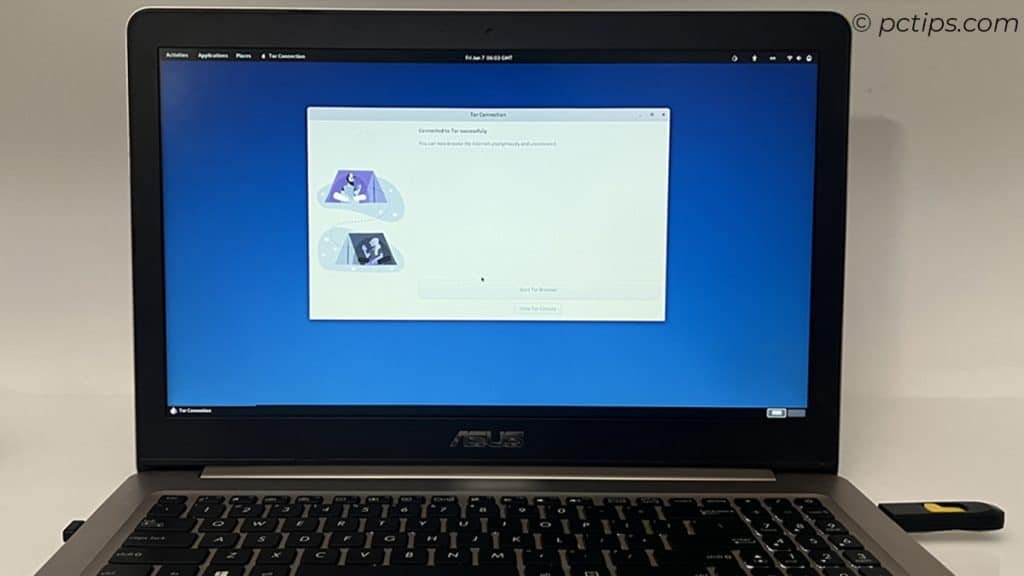
Some key features of Tails:
- Tor encryption: Automatically routes ALL connections through the Tor network. Impossible to track you!
- Secure messaging: Comes with OTR chat and email. So you can communicate safely on the go.
- Virtual keyboard: Foils any hardware keyloggers if you’re using an untrusted PC.
- Leave no trace: Tails runs entirely in RAM, so nothing is ever stored on the computer’s hard drive.
Tails isn’t a repair tool per se, but super handy for protecting yourself and your data when using random PCs while traveling!
GParted Live
Partitioning in Windows always feels like a game of Russian roulette.
One wrong move and bye-bye data! GParted is WAY safer and more powerful for any disk wizardry.
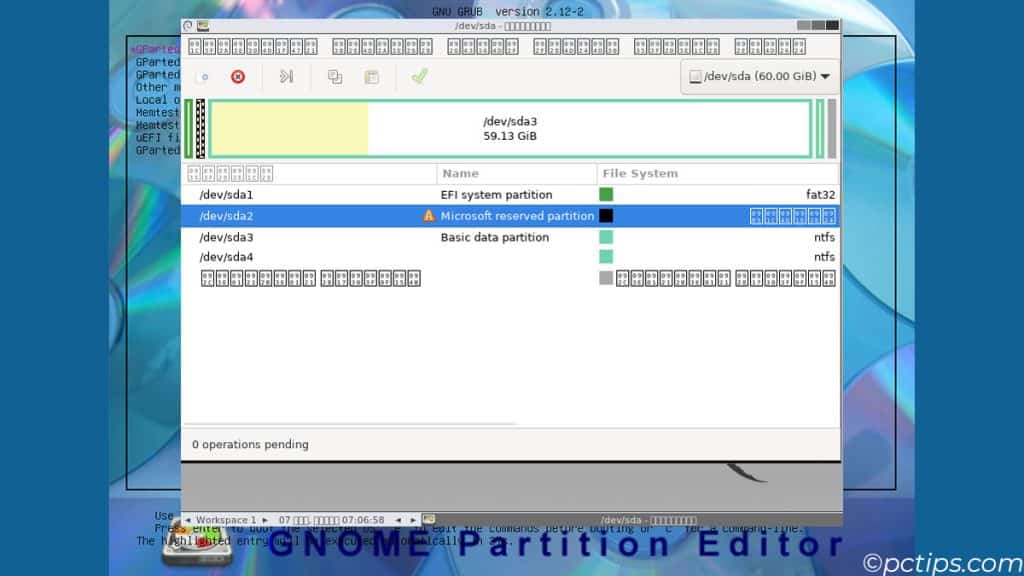
Why I always keep a GParted USB handy:
- Resizing partitions: Need to make room for a new OS? Shrink that old Windows partition down safely!
- Reorganizing: Easily copy, move, and resize partitions without data loss.
- Fixing boot: If your boot sector gets corrupted, GParted can usually save the day.
- Formatting: Wipes partitions cleanly to your filesystem of choice (fat32, ntfs, ext4, etc)
Pop in the GParted drive, make your changes, and rest easy knowing your data is handled with care!
Clonezilla Live
Speaking of data, everyone should make regular backups! But too often it’s a pain, so we put it off until it’s too late. Clonezilla makes it dead simple – just another reason to love Linux!
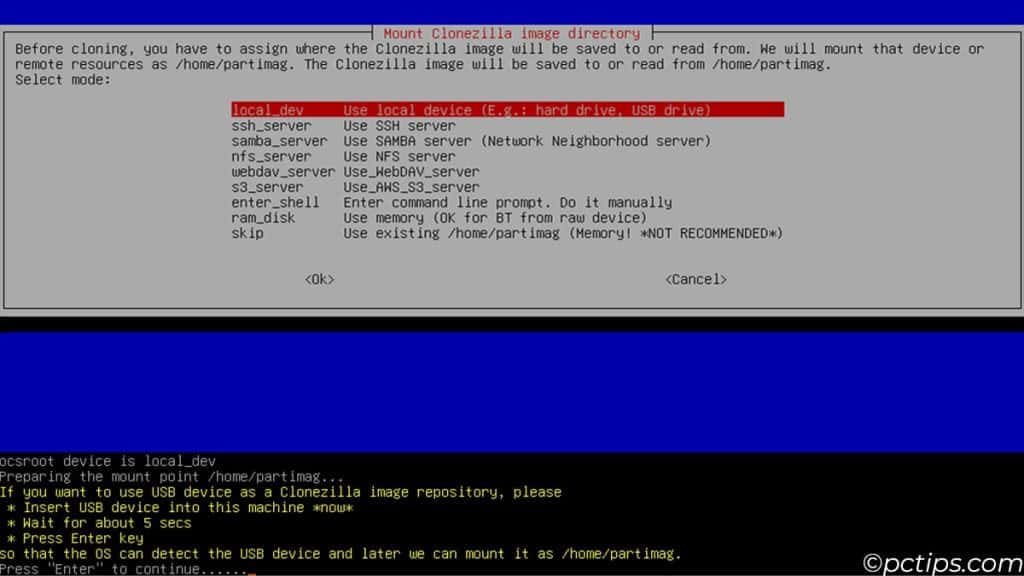
Some slick Clonezilla tricks:
- Full disk cloning: Makes a perfect byte-for-byte replica of a drive. Ideal for upgrading to a bigger disk!
- Partition backup: Easily backup and restore individual partitions. I do this before any big Windows updates.
- Network cloning: This is killer – you can clone over the network to backup or deploy images to many PCs at once!
- Automattion: Write a simple script and Clonezilla can run on a schedule for totally hands-off backups.
With Clonezilla, there’s really no excuse not to have current backups. It’s a major stress reliever!
MemTest86
I learned the hard way to ALWAYS test RAM on a new build or when troubleshooting wonky issues.
Bad memory causes super random, intermittent errors that are maddening to pin down.
MemTest86 is still my gold standard.
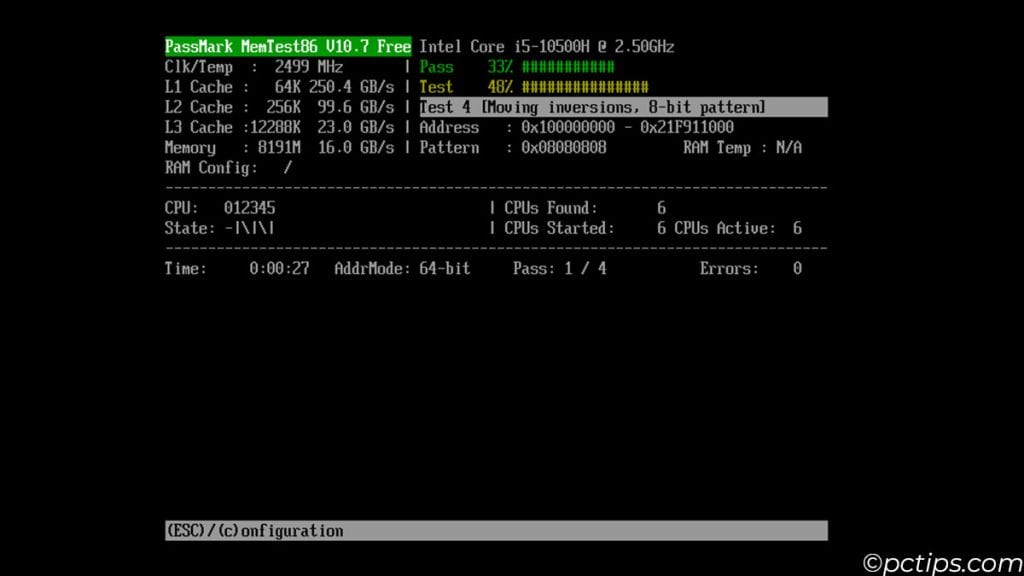
Why I love MemTest:
- Runs outside OS: This is key for getting reliable results. No interference from buggy drivers!
- Multiple test types: Runs super thorough algorithms to suss out even the sneakiest RAM errors.
- Graphical UI: Makes it easy to see the progress and errors at a glance. Way better than no-name DOS apps!
- Bootable or not: You can install it on a USB drive OR run it from inside Windows for quick spot checks.
If a system passes a few hours of MemTest, you can be confident the RAM is solid. It’s a critical step in any build or repair!
DBAN
When a drive has sensitive data that NEEDS to be nuked from orbit, accept no substitutes – DBAN is the way.
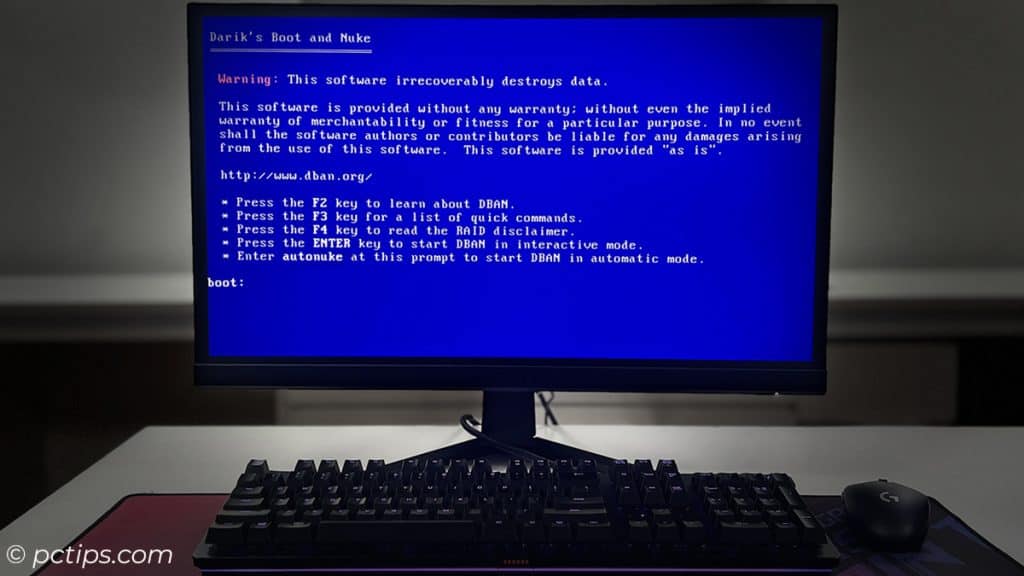
This little gem does what’s called a DOD 5220.22-M wipe, which is geek speak for “even the NSA ain’t recovering this!“
Some important DBAN notes:
- Choose your wipe: Has several sanitation standards to pick from. DOD Short is usually plenty!
- Slow but sure: A thorough DBAN wipe can take HOURS, especially on a big drive. Start it before bed!
- No recovery: I’m gonna say it again – a DBAN’d drive is GONE. Triple-check that it’s the right disk!
- Drives only: DBAN is great for HDDs and SSDs but doesn’t work on USB sticks or RAID arrays. Keep that in mind!
If you resell old PCs or recycle drives, having a DBAN USB on hand is absolutely essential. It’s the only way to securely wipe a drive without physically destroying it!
Prime95!
Prime95 isn’t strictly a repair or backup tool. But I still think every geek should have it in their USB toolkit!
Why Prime95 rocks:
- CPU stress: Absolutely punishes the processor, so you know if it’s stable under max load.
- RAM torture: Also stresses the heck out of RAM, making it a nice complement to MemTest86.
- Power test: If a PSU is borderline, Prime95 will push it over the edge. Great way to expose flaky power!
- Portable: The torture test part is a small EXE file, so you can just plop it on a bootable USB stick.
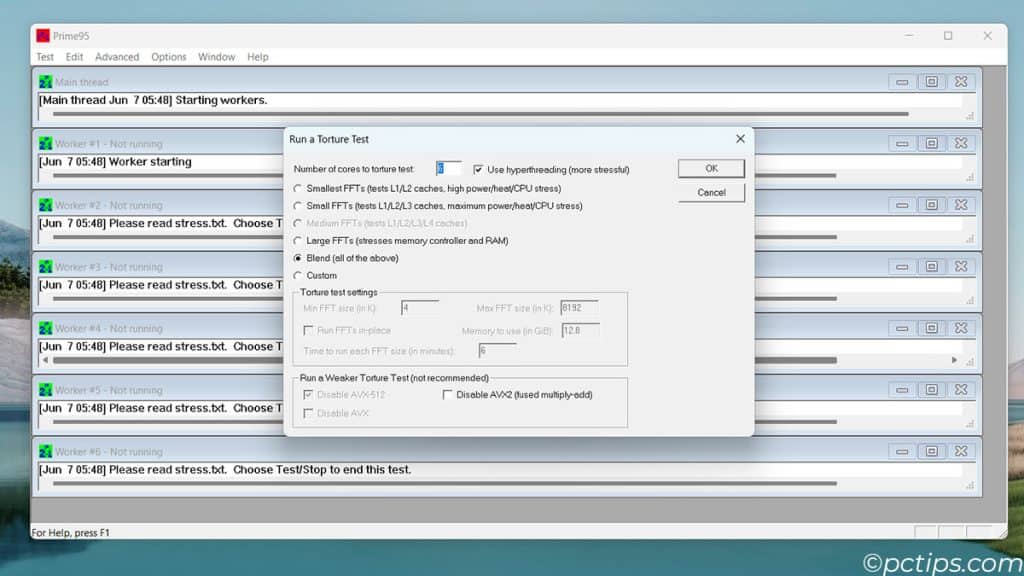
Anytime I build a new PC (for myself or someone else), I run Prime95 ASAP. If it passes a few hours,
I’m confident the core system is rock solid. It’s also my first step if a PC starts getting weird crashes or reboots – a flaky CPU or RAM will reveal itself pretty quickly in Prime95!
Choosing the Right USB Drive
Not all USB drives are equal, and you don’t want to troubleshoot with a low-quality stick.
For your ultimate boot drive, I highly recommend the Samsung BAR series.
They are fast, reliable, and durable.
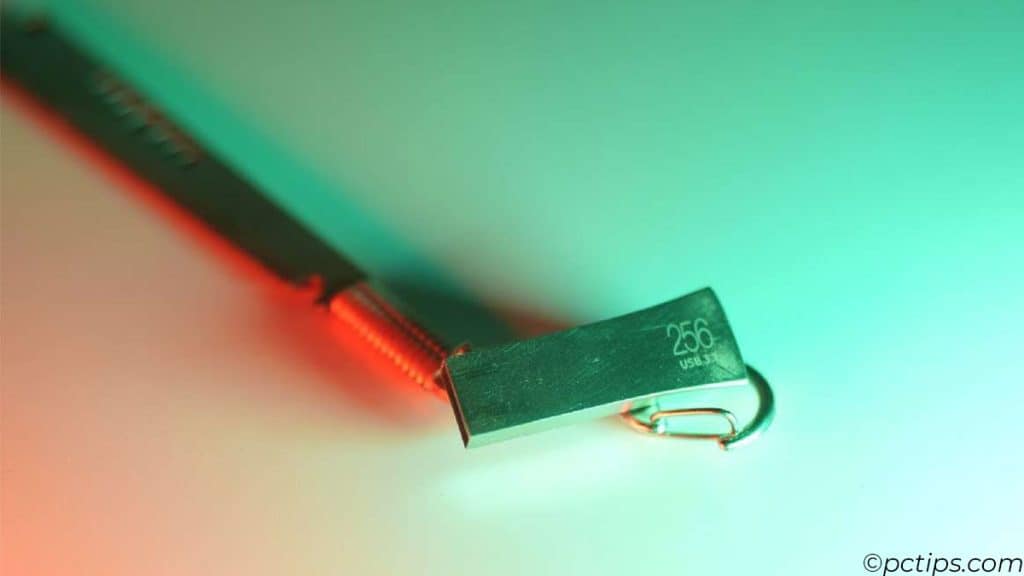
I’ve put mine through tough conditions and it’s never failed.
The aluminum casing helps dissipate heat, which is important during heavy read/write operations.
The BAR series is also great for setting up a dedicated Ventoy drive.
Ventoy allows you to load a drive with multiple ISOs and boot from any of them on the fly.
If you just need to store a few lightweight ISO tools, any reputable drive will suffice.
I like SanDisk’s Ultra Fit line for this.
They’re affordable, compact, and fast enough for basic boot/rescue tasks.
Remember: For bootable drives, use USB 3.1 whenever possible. USB 3.0 will work, but you’ll wait longer for things to load.
When trying to fix a broken system, every second matters!
Related: 20 Genius Ways to Use a USB Drive Like a Pro
Are You Ready For Anything?
At the end of the day, being prepared is what it’s all about.
By taking the time to assemble a solid set of USB boot disks BEFORE disaster strikes, you’re saving yourself a world of headaches down the road.
It’s like carrying a spare tire in your car – you hope you never need it, but when you do, you’ll be damn glad it’s there.
And if you found this guide helpful, do me a favor and spread the word.
Excellent article very well done and easy to understand .
Your information is invaluable. You truly know what you're discussing. I'm an ordinary, regular person. When I get involved into something, I dive right through it and want to know as much as I can. Sometimes you've technical terms & I find it hard to digest it. Anyway can you simplify some of those typed in caps? That'd be a great help. Please keep doing the great community service you're doing. God Bless You!
Thank you for your kind words and feedback! I'm glad you find the information helpful. I understand that technical jargon can be overwhelming. I'll work on making the content more beginner-friendly by simplifying technical terms and providing clear explanations. Please don't hesitate to reach out if you need further clarification or guidance!