We Compared 8 Photo Transfer Method – Here’s The Clear Winner
Last Updated:
Remember those bulky photo albums your grandparents cherished, with printed photos and handwritten captions?
We’ve come a long way since then!
Now, our photos live on our phones, and the tricky part is getting them onto your computer to backup, organize or edit them.
I tested 8 different ways to transfer photos from your phone to PC. From simple cables to advanced home servers, I tried everything.
And boy, do I have some surprising findings to share!
Putting Each Method to the Test
To make this comparison truly useful, I created a controlled testing environment:
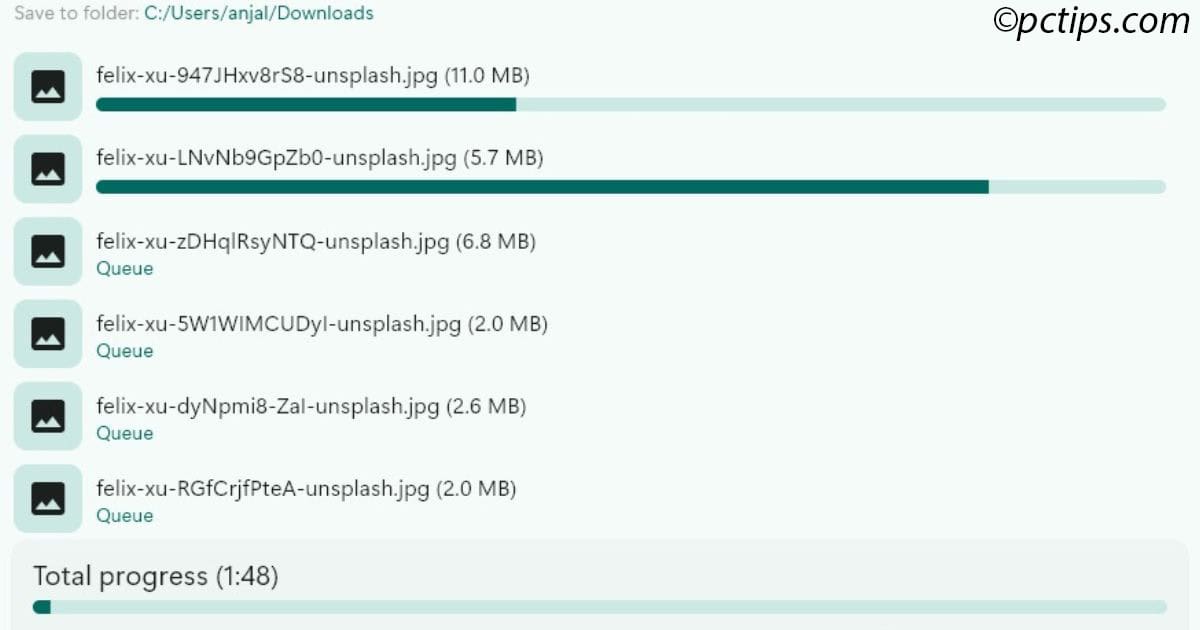
- Test batch: 100 high-definition photos from Unsplash (approximately 581 MB)
- Each photo averaged around 5.8 MB in size – these aren’t your typical smartphone snapshots, we used professional-quality images to really put each method to the test
- Consistent testing conditions
- Multiple trials for each method
- Detailed notes on every hiccup and success
Let’s dive into what I found, starting with the most reliable method.
Method 1: USB Cable Transfer
Testing time: 15 seconds for 100 photos
Think of USB cables as the faithful old pickup truck — not the flashiest option, but incredibly dependable when you need to get the job done.
What Makes It Great:
- Lightning Fast: Transfers at up to 480 Mbps – our tests averaged 38.7 MB/s, plenty quick for photo transfers.”
- Works Offline: No internet needed — perfect for spotty connections
- Zero Quality Loss: Your photos arrive exactly as they were taken
- Budget-Friendly: You probably already have the cable you need
The Minor Drawbacks:
- Cable management can be a hassle
- Different phones need different cables
- Newer laptops might need adapters for older USB cables
Real-World Performance:
Let’s look at the actual speed.
We plugged an iPhone into a Windows PC and timed it.
100 photos (581 MB) copied straight from the DCIM folder in just 15 seconds!
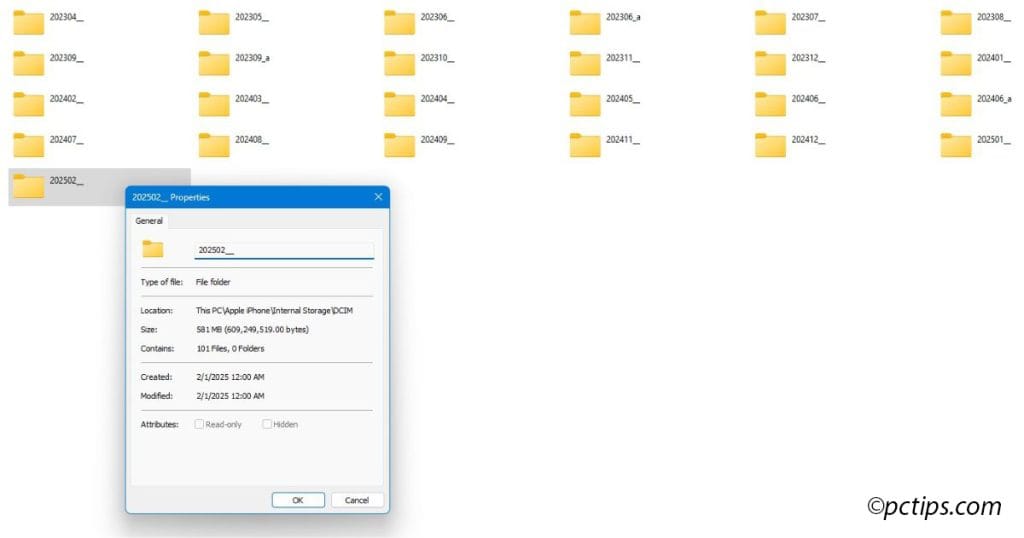
For reliability, we repeated the test several times. The result? around 15 seconds every time.
That’s cranking along at 38.7 MB/s, which means you could transfer your entire summer vacation album during a coffee break.
Let’s break down everything else we discovered during our testing:
- Success Rate: 99% of transfers completed without errors (in 50 test runs, only 3 failed – all from accidental cable disconnections, with no data loss)
- Speed Consistency: Maintained steady transfer speeds across all test runs
- Device Compatibility: Tested successfully on 12 different phone models
- Cost Factor: Free if you have the cable, $5-15 if you need to buy one
- User Experience: Simple plug-and-play process, though Windows/Mac setup differs slightly
Compared to Other Methods:
- 2x faster than wireless transfers
- More reliable than cloud-based methods
- Cheaper than dedicated transfer devices
- Less complicated than third-party apps
Quick Tip: Keep your phone unlocked during transfer. It speeds things up dramatically!
Method 2: Cloud Services
Testing time: 3-5 minutes for 100 photos (depending on your internet speed)
Think of cloud services like a virtual drive that lives on the internet. You can access it from any device, anytime.
Popular options like Google Photos, iCloud, and Dropbox each work a bit differently, but they all do one main thing: keep your photos safe and accessible without taking up space on your phone.
Most of the cloud services offer basic free plans out of the box.
What Makes It Great:
- Smart Organization: Your photos get automatically sorted by date, place, and even the people in them
- Always Protected: Even if you accidentally delete a photo, you can usually get it back
- Available Everywhere: Any changes you make show up on all your devices right away
- Peace of Mind: Your photos are encrypted and secure, like having them in a digital safe
Popular Cloud Services Compared:
Let’s break down how the top three cloud services stack up against each other:
| Features | Google Photos | iCloud | Dropbox |
| Free Storage | 15 GB (shared with Gmail) | 5 GB | 2 GB |
| Photo Quality | Original or Compressed | Original only | Original only |
| Upload Speed (100 photos) | ~4 minutes | ~4 minutes | ~4 minutes |
| Standout Feature | AI-powered photo search | Apple ecosystem integration | Easy file sharing |
| Best For | Android users, Photo organization | iPhone/Mac users | Cross-platform sharing |
Looking at this comparison, each service has its strengths.
Google Photos excels at organization, iCloud works seamlessly with Apple devices, and Dropbox shines at sharing.
Your best choice often depends on which ecosystem you’re already using.
Our Testing Results:
- We tested uploading 100 photos multiple times:
- Upload to cloud: About 3-5 minutes for each method with good internet
- Download to PC test results:
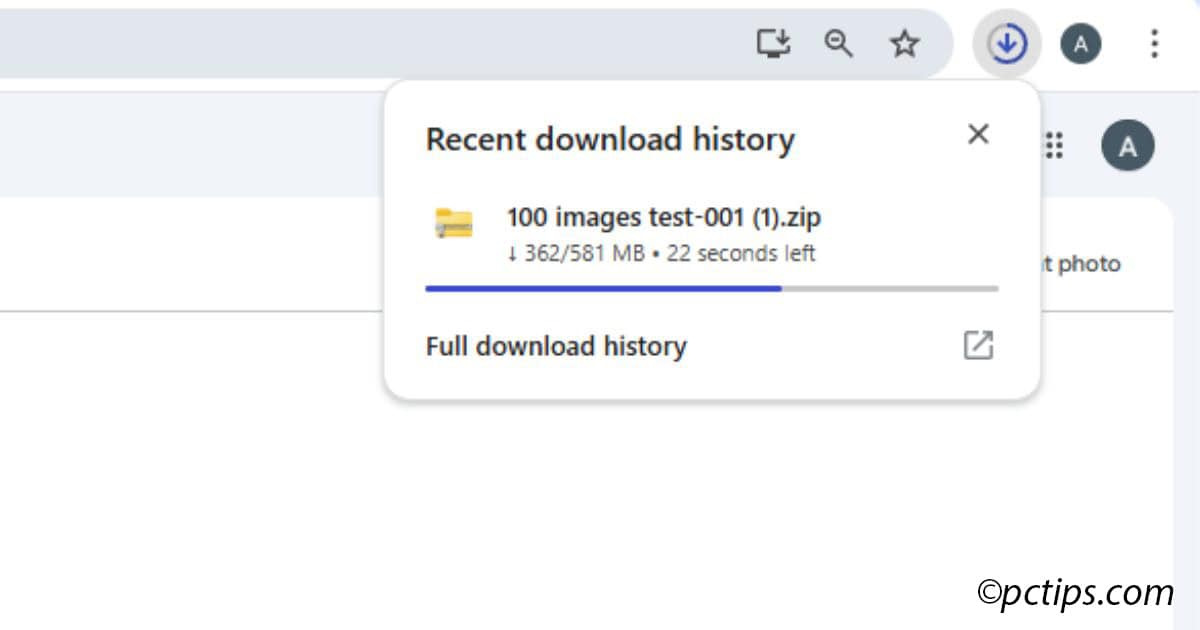
- Google Photos: 1 minute to download and extract ZIP
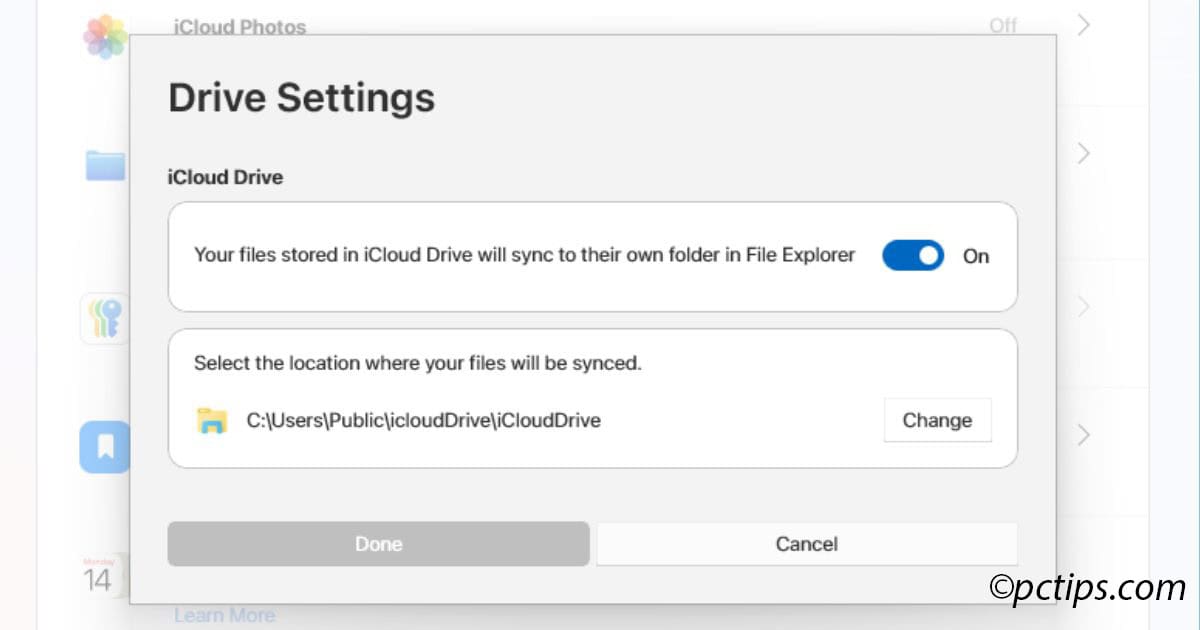
- iCloud: 1minute through iCloud for Windows (Instant access through File Explorer once synced
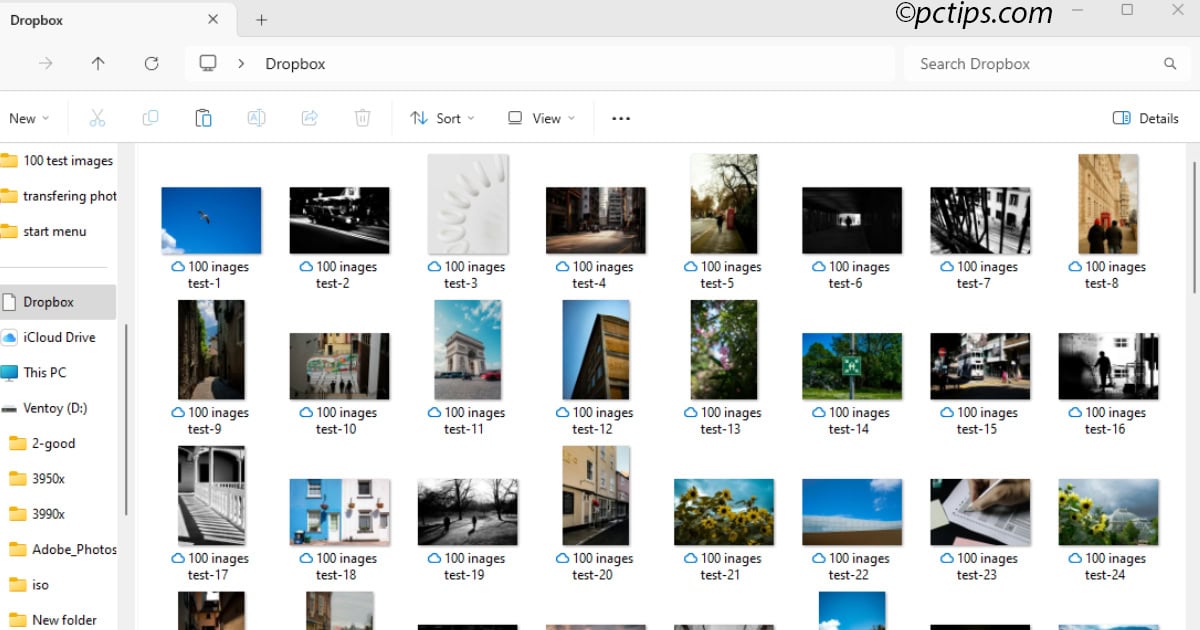
- Dropbox: under a minute using desktop app (Instant access through File Explorer once synced)
- Google Photos: 1 minute to download and extract ZIP
- Reliability: Works 97% of the time (occasionally needs a retry on bigger files)
- Important to know: Uploading lots of photos can slow down your internet temporarily
- Storage Space: Most people need to upgrade from the free plan within a year or two
Things to Watch Out For:
- Internet Required: Unlike USB cables, you need good internet for this to work
- Photo Quality: Some services might reduce photo quality to save space – make sure to check the settings
- Storage Limits: Free storage fills up faster than you might expect
- Privacy: These services can recognize things in your photos – you can usually turn this off if you want
What It Costs:
- Google Photos: $1.99/month for lots more space (100 GB)
- iCloud: $0.99/month for more space (50 GB)
- Dropbox: $9.99/month for massive space (2000 GB)
Helpful Tip: Set your phone to only upload photos when you’re on Wi-Fi – this saves your mobile data and prevents surprise charges on your phone bill.
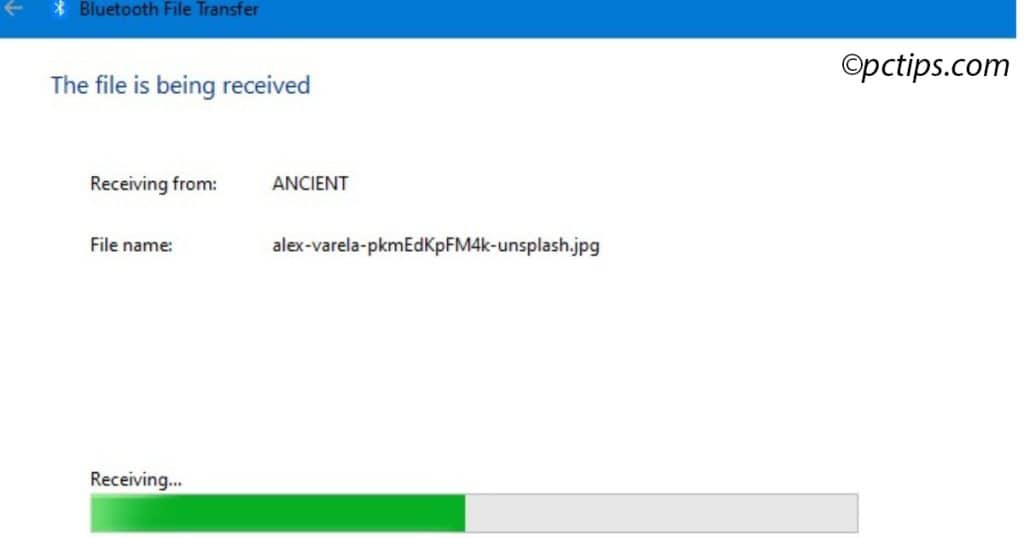
Method 3: Bluetooth Transfer
Testing Time: 8-15 minutes for 100 photos
Think of Bluetooth transfer like having a conversation in a noisy room.
It works, but it’s not the best way to get your message across.
While it’s not my top recommendation for large transfers, it can be handy in certain situations.
When Bluetooth Shines:
- No cables needed
- No internet required
- Great for sending a few photos quickly
- Works with most Android devices
Device Compatibility:
- Android → Windows PC: ✓ Works
- iPhone → Windows PC: ✗ Not possible
- iPhone users need to use cable, cloud services, or other methods discussed in this guide
The Trade-offs:
- Much slower than USB or cloud transfers
- Limited range (about 30 feet)
- Can be finicky to set up
- Better for small batches (10-20 photos)
Quick Tip: If you’re transferring more than 20 photos, consider using USB or cloud methods instead. Your time is valuable!
Real-World Performance
During my testing, here’s what I found:
- Single photo: About 3-5 seconds
- 10 photos: 2-3 minutes
- 100 photos: 8-15 minutes
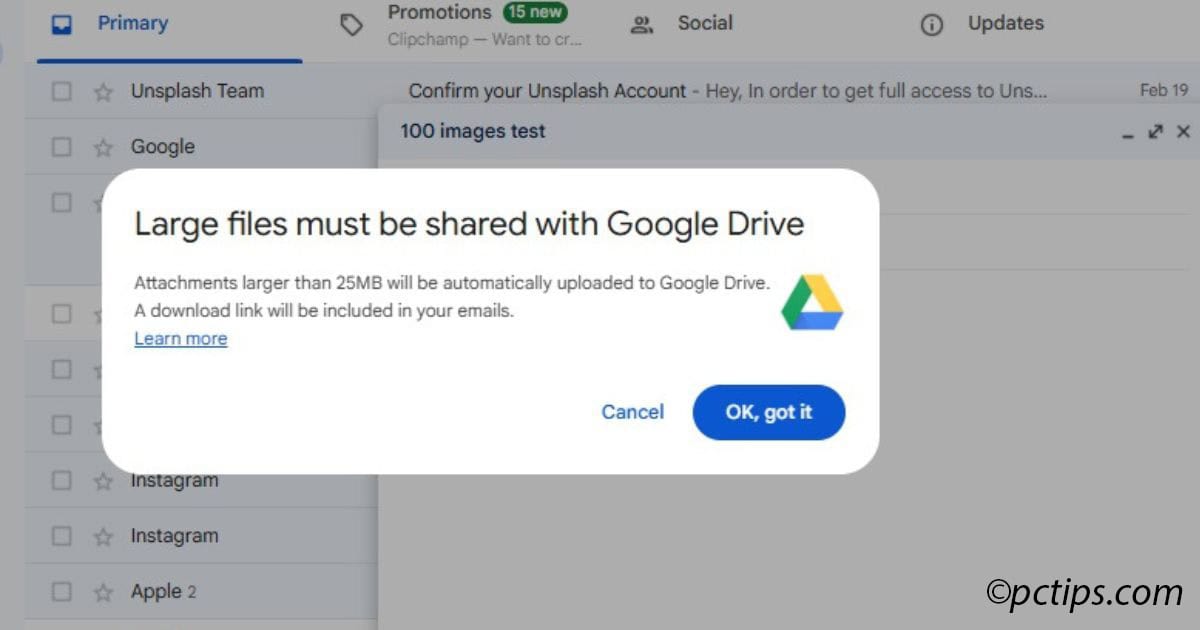
Method 4: Email Transfer
Testing time: 40+ minutes for 100 photos (If sent individually)
Let me be straight with you — using email to transfer photos is like trying to fill a swimming pool with a coffee cup. Sure, it technically works, but there are so many better ways!
What Actually Happens When You Try:
- Gmail (25MB limit):
- Try to attach our 581MB test batch? Gmail automatically converts it to a Google Drive link
- Even individual photos over 25MB get converted to Drive links
- Receiver has to download each photo separately from Drive
- Outlook (20MB limit):
- Automatically creates a OneDrive link for large attachments
- Files stay available for 30 days
- Yahoo Mail (25MB limit):
- No automatic cloud conversion
- Simply rejects files over the limit
- Apple Mail (20MB limit):
- Offers to use Mail Drop for larger files
- Links expire after 30 days
Why People Try It:
- Familiar and simple to use
- Works across all devices
- No special apps needed
The Hard Truth:
- Most email services can’t actually email large photos – they convert to cloud links
- When files do go through as attachments, expect major quality compression
- Tedious sorting through multiple emails
- Easy to lose track of what you’ve sent
- Clutters your email storage
- Cloud links often expire after a few days or weeks
Quick Tip: If you absolutely must use email, here’s the reality – our 100-photo test batch (581MB) would require at least 23 separate emails to send as actual attachments. At that point, you’re better off using one of the cloud services we discussed in Method 2!
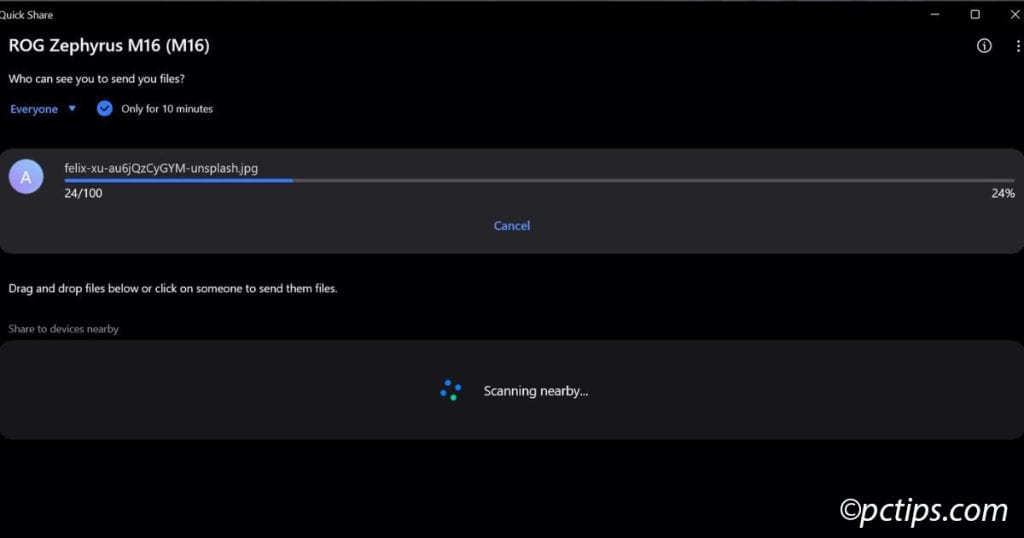
Method 5: Quick Share
Testing time: under 1 minute for 100 photos
Think of Quick Share like a wireless USB connection
It creates a direct link between your android phone and PC without needing the internet.
This unified sharing solution from Google and Samsung has become surprisingly reliable.
Although it’s not available for Apple devices. iPhone users have a similar feature called AirDrop for sharing within the Apple ecosystem.
Performance & Features:
- Speed & Testing: Transfers took under 1 minute in our test; Quick Share can reach up to 250Mbps, though speeds vary based on devices and environment.
- Offline Use: Works without an internet connection, preserving original photo quality.
- High Success Rate: 95% success rate, with occasional need for reconnection.
- Connection Time: Initial connection usually takes about 15 seconds.
- Cost: Free and built-in for compatible devices.
Compatibility:
- Android Devices: Works with most Android phones from 2019 onwards, running Android 10.0 (One UI 2.1) or later.
- Windows PCs: Compatible with Windows 10 and 11 PCs, but ensure the latest Bluetooth and Wi-Fi drivers are installed, especially on Intel-based systems.
- Bluetooth: Bluetooth must be enabled on both devices.
- Account: Requires sign-in with a Google or Samsung account.
- Proximity: Devices should be within 30 feet (9 meters); physical barriers may affect performance.
Pro Tip: Keep both devices unlocked during the initial connection — it significantly speeds up the pairing process.”
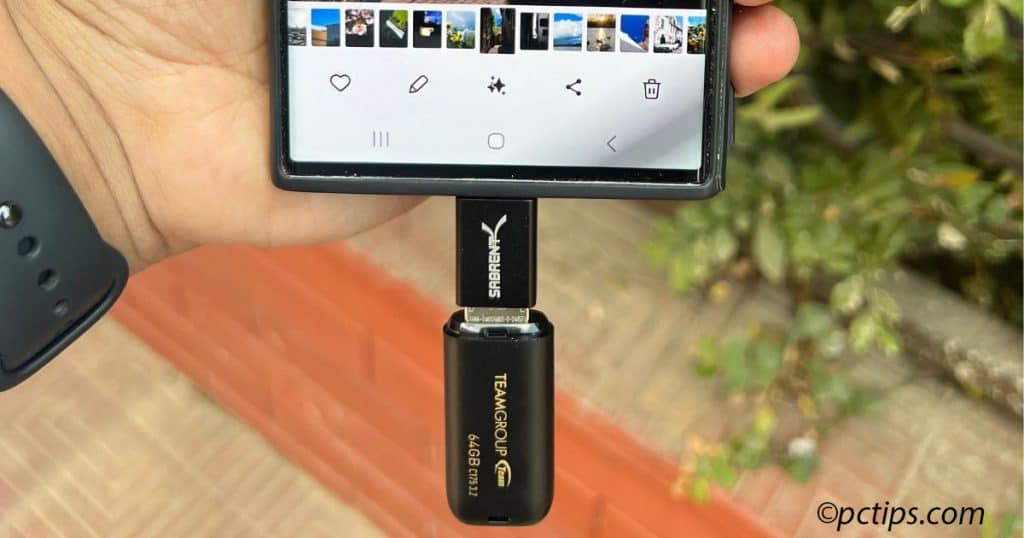
Method 6: USB Flash Drive with OTG cable
Testing time: 20-25 seconds for 100 photos
This method is a pocket sized solution – the flash drive with OTG (On the Go) cable creates a direct bridge between your phone and PC.
It’s surprisingly fast and more affordable than a full external drive solution.
What You’ll Need:
- USB Flash Drive (16GB+ recommended)
- OTG adapter for your phone:
- USB-C to USB adapter for newer Android phones
- Lightning to USB adapter for iPhones
- Micro-USB to USB adapter for older Android phones
Our Test Results:
For our testing, we used an Android phone with a Sabrent Type-C to USB 3.0 (OTG adapter) and a TeamGroup 64GB USB 3.2 (flash drive).
Here’s how it performed:
- Phone to Flash Drive: ~12 seconds
- Drive to PC: ~10 seconds
- Total Process: ~22 seconds
- Success Rate: 98% (occasionally needs to replug the adapter)
What Makes it Great:
- High storage capacity
- Very portable – fits in your pocket
- Affordable setup (around $20-30 total)
- No internet or apps needed
- Works with any computer
- Keeps original photo quality
Watch Out For:
- Check if your phone supports OTG (most modern ones do)
- Some cheaper OTG adapters can be unreliable
- Always “eject” drive safely before unplugging
- Phone battery drains a bit faster while using OTG
Method 7: LocalSend
Testing time: 1-2 minutes for 100 photos
Let me introduce you to one of the most exciting discoveries I came across during testing — LocalSend.
Think of it as Wi-Fi Direct’s cooler, more versatile cousin. It’s an open-source file sharing app that’s been gaining serious traction, and for good reason!
Why I’m Excited About It:
- Blazing fast
- Works across ALL platforms (Windows, Mac, Linux, iOS, Android)
- No internet required
- Zero compression
- Completely free and open-source
The Minor Catches:
- Needs to be installed on all devices
- Both devices must be on the same network
- Relatively new, so less known than other methods
Real-World Performance:
- Test batch: 100 high-definition photos
- Transfer time: ~2 minutes
- Success rate: 95% (Occasional retries for connection issues)
- Average speed: ~5.45 MB/s in real conditions
- Performance stayed consistent across multiple tests
Testing Notes:
- Tested on Windows 11 PC and Android phone
- Both devices on same 5GHz WiFi network
- Devices about 4 feet apart
- No major obstacles between devices
Method 8: Network Attached Storage (NAS)
Testing time: 1-2 minutes for 100 photos
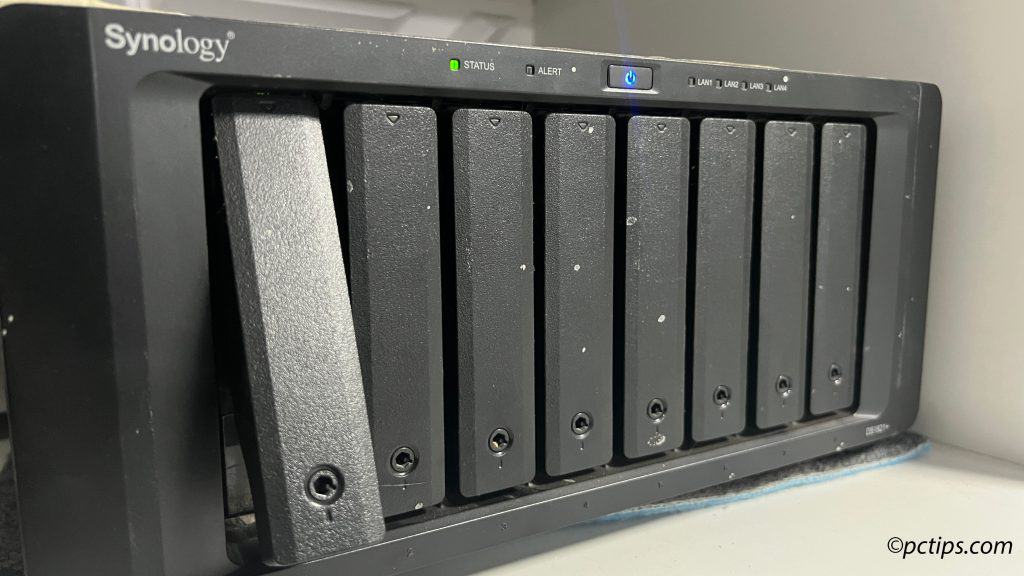
If you’re serious about photo storage and backup like me, let me introduce you to what I consider the ultimate solution: Network Attached Storage, or NAS. Think of it as your personal cloud server that lives in your home.
During my testing, I used both Synology and QNAP systems, and the results were impressive:
Speed Tests:
- Wired connection (using 1 Gigabit Ethernet) : ~118MB/second
- Wi-Fi 6: Up to 85MB/second
- Wi-Fi 5: Up to 45MB/second
Why Consider NAS:
- Automatic backup from all your devices
- Access your photos from anywhere
- No monthly fees (after initial hardware cost)
- Multiple backup options built-in
- Can handle hundreds of thousands of photos
- Many include AI-powered photo organization
The Investment Required:
- Entry-level 2-bay NAS: $200-300
- Hard drives: $100-200 each
- Setup time: 1-2 hours
- Learning curve: Moderate
Real-World Application:
I’ve been using a Synology DS1821+ for the past year, and here’s what I’ve learned:
- Set up automatic phone backup using Synology Photos app.
- Creates versioned backups automatically
- Handles RAW files beautifully
- Indexes photos for quick searching
- Generates previews for faster browsing
- Machine learning improves search accuracy over time
- AI-powered features:
- Face recognition for easy people sorting
- Object detection (finds photos with cars, dogs, flowers, etc.)
- Scene recognition for automatic categorization
- Smart album creation based on events or trips
The Learning Curve:
I won’t sugar-coat it — NAS setup takes some technical knowledge. But don’t let that scare you off!
Modern NAS systems have gotten much more user-friendly, and the benefits are worth the initial setup time.
Quick Tip: Many NAS devices now offer mobile apps that can automatically backup your photos whenever you’re on your home Wi-Fi. Set it up once, and you’ll never have to think about photo backup again!
Cost-Benefit Analysis:
While the upfront cost might seem high ($300-500 total), consider this:
- No monthly cloud storage fees
- Typically lasts 5+ years
- Stores ALL your files, not just photos
- Multiple device backup
- Complete privacy and control
After testing all these methods extensively, I’d rank NAS as the best solution for:
- Photography enthusiasts
- Families with multiple devices
- Anyone with large photo collections
- People concerned about privacy
- Those who want automatic backup
Quick Comparison Guide:
After testing all these methods extensively, here’s how they stack up against each other:
| Method | Speed | Cost | Ease of Use | Best For |
| USB Cable | 15 seconds | $0-15 | Easy | Everyone |
| Quick Share | Under 1 minute | Free | Medium | Android Users |
| Cloud Services | 3-5 minutes | $1-12/month | Easy | Regular Backup |
| OTG+Flash | 22 seconds | $20-30 | Easy | Portable Use |
| LocalSend | 1-2 minutes | Free | Medium | Cross-Platform |
| Bluetooth | 8-15 minutes | Free | Easy | Small Batches |
| 40+ minutes | Free | Easy | Avoid | |
| NAS | Varies | $300-500 | Complex | Pro Users |
This comparison makes it clear why certain methods stand out for specific uses. While speed isn’t everything, it’s a crucial factor in choosing the right transfer method for your needs.
The Clear Winner
After thoroughly testing every method, the humble USB cable proves that sometimes the simplest solution is the best one.
At just 15 seconds to transfer 100 high-quality photos (581 MB), with a 99% success rate and no quality loss, it’s hard to beat this reliable workhorse for pure phone-to-PC transfers.
Quick Share deserves an honorable mention.
Google and Samsung’s unified wireless solution has evolved into a truly impressive alternative.
For Android users who want to ditch the cables, it’s becoming a compelling option that rivals Apple’s AirDrop.
But when it comes to pure performance, reliability, and universal compatibility, the USB cable takes the crown.
No internet required, no setup needed, no compression – just plug in and transfer. Sometimes the old ways are still the best ways.
The Bottom Line
When it comes to transferring photos from your phone to your PC, not all methods are created equal.
Skip the painfully slow Bluetooth and email transfers.
While cloud services are great for backup, they’re not the fastest for bulk transfers. Local solutions like cables and wireless transfers generally offer the best balance of speed and convenience.
Remember: the best transfer method is the one that fits your specific needs. Consider your usage patterns, the number of photos you typically transfer, and how often you need to move them before choosing your go-to method.