How to Automatically Clean Your Hard Drive with Storage Sense
Last Updated:
Getting notified with low disk space or trying to prevent your drive from reaching its full capacity?
In our last guide, we provided some handy tips to freeing up 100+ GB of disk space.
But most of these involved manual steps. What if I tell you there’s a way for your PC to automatically manage disk space?
Yup! It’s Storage Sense everybody. An in-built Windows feature that I’ve been using since it was introduced with Windows 10.
And my today’s motive is to help you learn Storage Sense from scratch.
What is Storage Sense?
Let’s be honest. There are a plethora of files lingering in our computer that we’re never gonna use!
Some examples include temporary files and Recycle Bin items.
Well, there’s certainly the option to delete these manually. But if you’re going to enable Storage Sense and configure it to run every week, you don’t have to sweat on this anymore.
So, if I have to define Storage Sense, I’d say:
It’s a special Windows feature that identifies files that you don’t need and even eradicates them.
Is It Better Than Disk Cleanup?
I’m pretty sure we all have used Disk Cleanup at some point in our life.
But ever since Storage Sense was introduced, I’ve heavily leaned more towards this.
Let me tell you why:
- Disk cleanup has to be run manually while Storage Sense does the cleanup automatically.
- Storage Sense is easier to configure (directly from Windows Settings) but for Disk Cleanup, you need to launch its dedicated app and explore options.
- Storage Sense even lets you manage OneDrive files which Disk Cleanup lacks.
- While Disk Cleanup needs to be remembered to be triggered at certain point in time, Storage Sense does this in the background.
- Storage Sense offers more customization options compared to Disk Cleanup.
However, this doesn’t mean you need to completely forget this utility. There are still a handful of features that only Disk Cleanup can do:
- Firstly, Storage Sense doesn’t list categories (file types) that you can choose to delete like Disk Cleanup includes.
- It’s only available in Windows 10 and 11 (so, you’ll have to use Disk Cleanup if you’re using a Windows version prior to these).
- Disk Cleanup lets you clean up system files along with shadow copies and system restore points (which Storage Sense can’t).
So, even though Storage Sense is relatively better than Disk Cleanup, you should still consider utilizing both of them.
Enabling Storage Sense
As I mentioned above, to configure Storage Sense settings, all you need to do is get to the Windows Settings app.
Really, it’s that simple:
Windows 11: Open Settings (Win + I) > System > Storage > Storage Management > Toggle on Storage Sense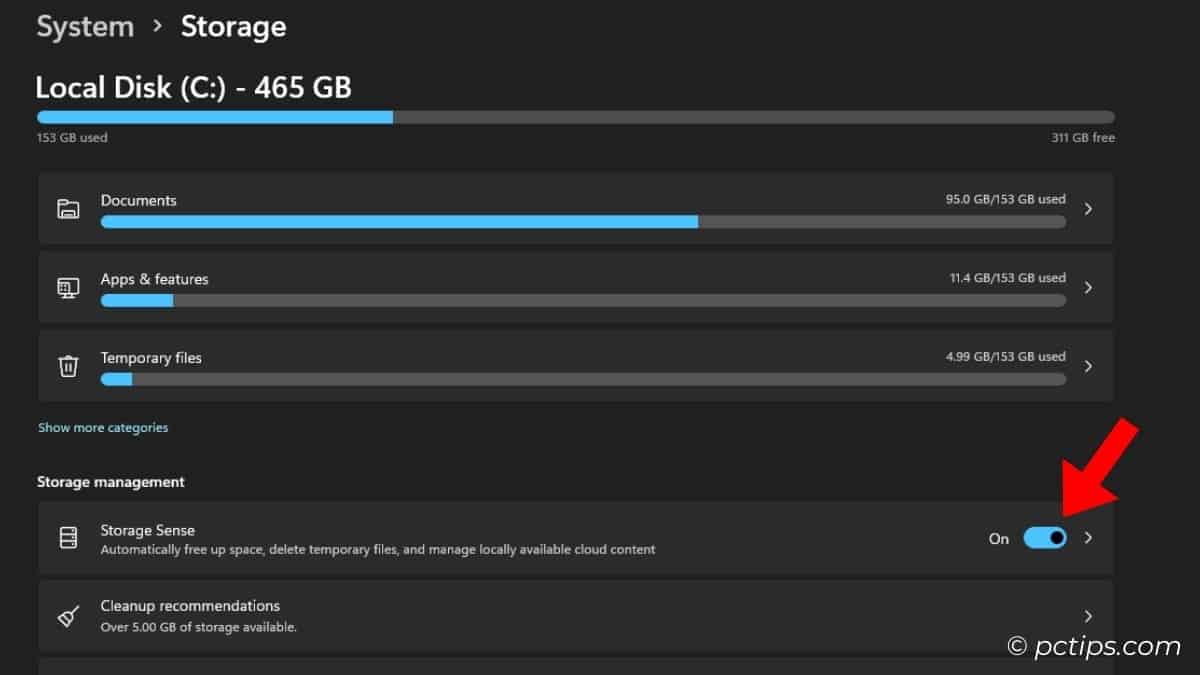
Windows 10: Settings > System > Storage > Toggle on the first switch you see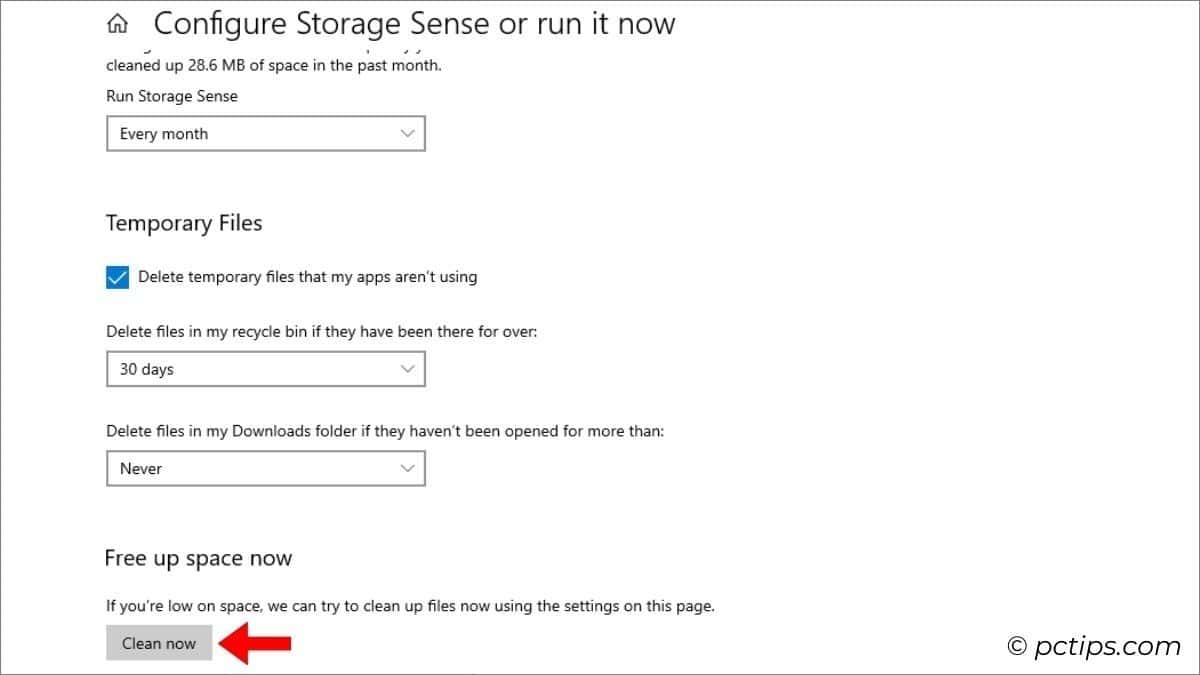
To get to the dedicated settings page, let me help you with a very useful shortcut. You can navigate to there via a Run command, i.e. ms-settings:storagesense7.
Now, toggle on the Storage Sense option just like we did earlier.
Checking Storage Sense Data Cleanup History
Storage Sense keeps running in the background to find files that are unnecessary to your PC.
No, it doesn’t immediately delete them. Why? Because you haven’t configured to work it that way.
By default, Storage Sense removes files once it identifies that your system is running low on disk space.
However, if you set it to run once a week or once a month, it clears up a lot of data than you can imagine!
To know how much data Storage Sense cleaned up in the past,
Windows 11: Navigate to Storage Sense (click on the option from Settings) > Under Automatic User content cleanup, you should see the following message that lists the cleanup history:
“….We cleaned up X KB/MB/GB of space in the past month….”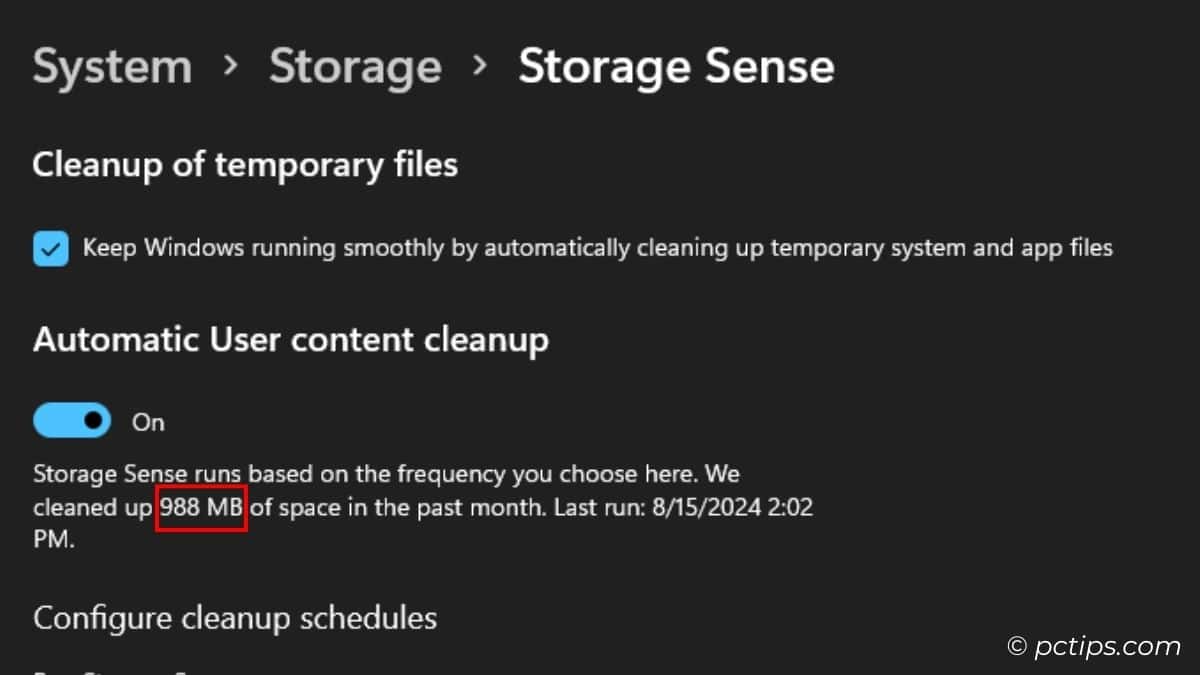
Windows 10: Click on Configure Storage Sense or run it now > Under Storage Sense, you’ll see the same message as in Windows 11.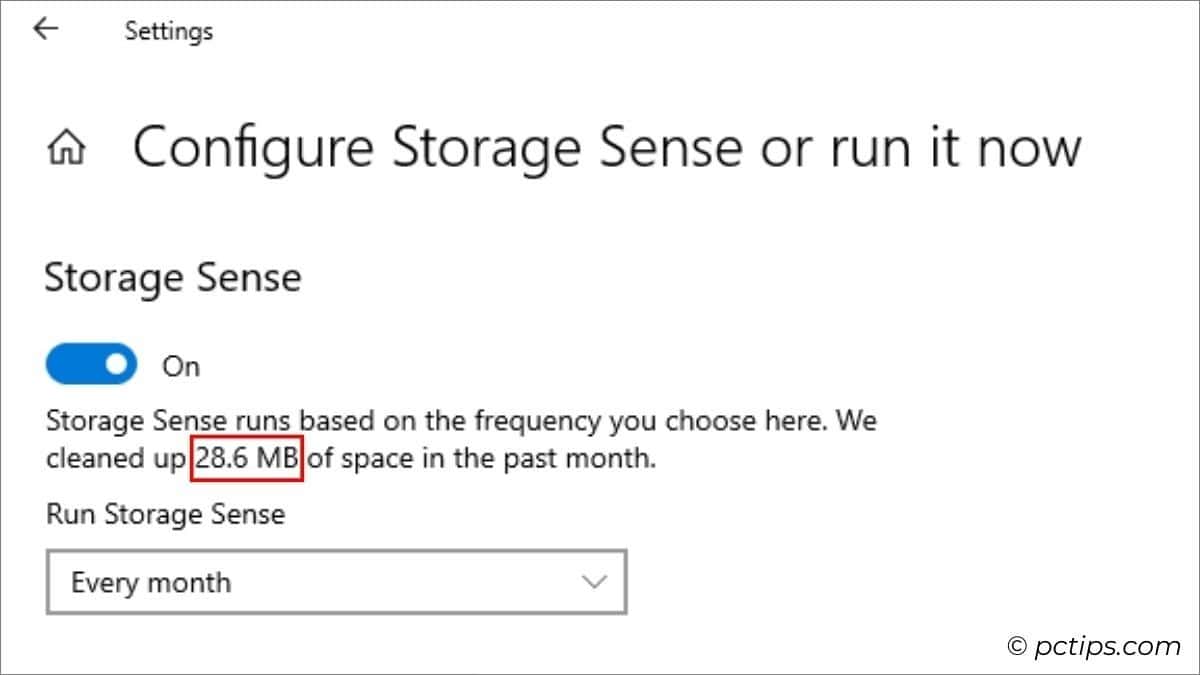
Additional Tip: The ‘Cleanup of temporary files’ option in Windows 11 and ‘Temporary files’ section in Windows 10 are both tick-marked by default. This means that Windows automatically cleans the temporary system and app files. I advise not to disable this setting.
How Often to Run Storage Sense?
So, you might have been asking yourself on how often should Storage Sense really delete the files.
And like in any other case, this answer solely depends on you and your use case scenarios.
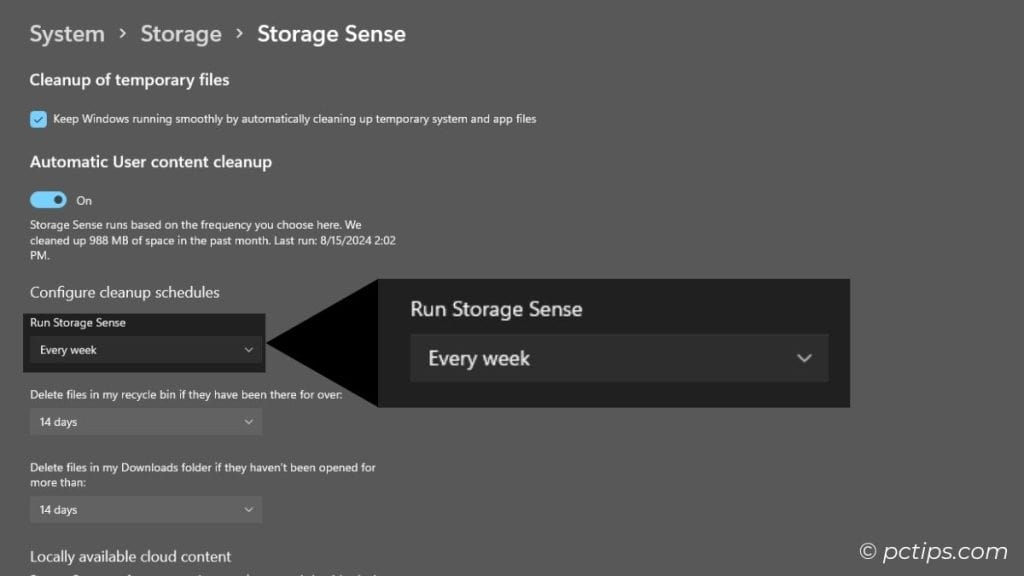
There are four options:
- During low free disk space: This one is enabled by default (so, definitely don’t set this!)
- Every month: Ideal option if you’re not involved with data storage much but still wish to get rid of unwanted items from your PC
- Every week: My personal pick (best option for most users)
- Every day: I won’t recommend this. Especially, if you don’t permanently delete files and may change your mind 2/3 days later, you have the option to bring back items from Recycle Bin.
These were my suggestions. If you’ve been using Storage Sense for a long time, what’s your configuration?
Please don’t hesitate posting your preferred option in the comment section below. Let our readers learn new things. And yes – don’t forget to mention the reason why you do it.
To configure this, all you have to do is expand the Run Storage Sense drop-down and pick your option.
Manage File Deletion From Recycle Bin
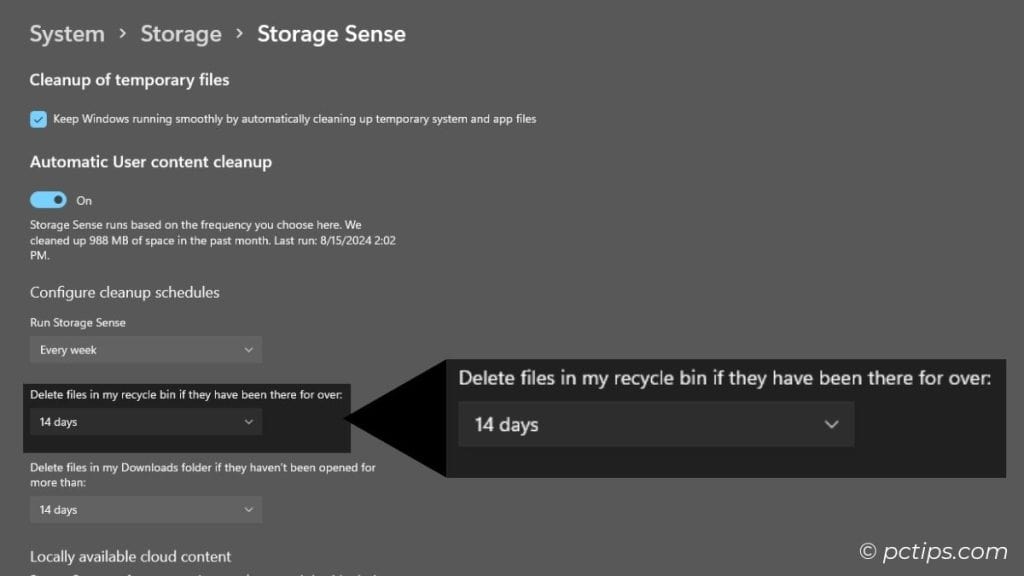
If you wish the files in your Recycle Bin to last longer/shorter, this setting is going to come in handy.
By default, Windows permanently deletes all items from the bin after 30 days.
You can choose not to delete them at all or increase the number. Or even decrease it to 1 day!
How fascinating, right? All you have to do is:
Expand the ‘Delete files in my recycle bin if they have been there for over:’ drop-down and pick your desired option.
Manage File Deletion From Downloads Folder
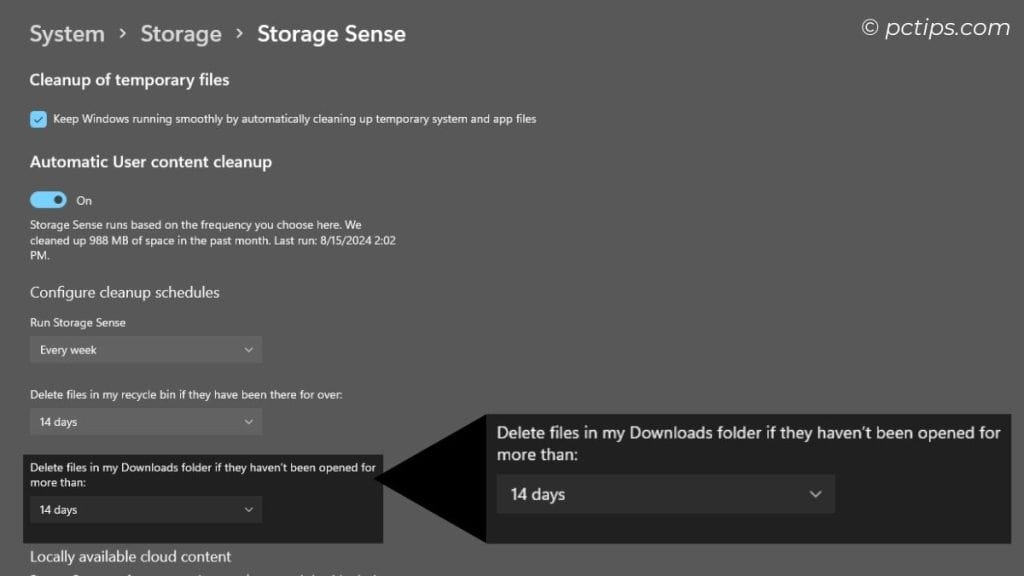
This is a hidden Windows setting that I bet you’re missing out on.
Just as with Recycle Bin, you can opt for automatically deleting the files from your Downloads folder.
Isn’t that great? Now, instead of having to manage those jumbled up files, a better option is to get rid of them as we’re not going to use them anyway.
Expand the ‘Delete files in my Downloads folder if they haven’t been opted for more than:’ and pick your desired number of days.
Personally, I’ve gone for 14 days for both Recycle Bin and the Downloads folder.
Running Storage Sense Manually
If your system is already warning you from low disk space, it’s wise to run Storage Sense immediately.
Yup, no waiting for the next day or week. One click and the job is done.
Windows 11: Hit the Run Storage Sense now button.
Windows 10: Under ‘Free Up Space Now’, click on the Clean now button.
After a few seconds (to even minutes), you’ll get this message:
“Done! We were able to free up X of disk space.”
Managing Locally Available Cloud Content
Important: To make this work, you need to be signed into your cloud account.
Common! I’m not the only one who used to delete the already backed up content from my PC, right?
I mean the same content in the cloud and also in the storage drive. Waste of disk space really!
I know most of you want to keep multiple backups of your important files. But trust me, reliable cloud services (like Google Drive, OneDrive, etc.) should suffice your needs.
In case your documents are truly very precious, I’d suggest the 3-2-1-1-0 backup strategy. For that, it’s best to use a second SSD/HDD. We’ll discuss this in detail in some other article.
Here, the idea is to make your files online-only. Once you’ve logged into your OneDrive account, expand the OneDrive Personal drop-down and pick the preferred number of days.
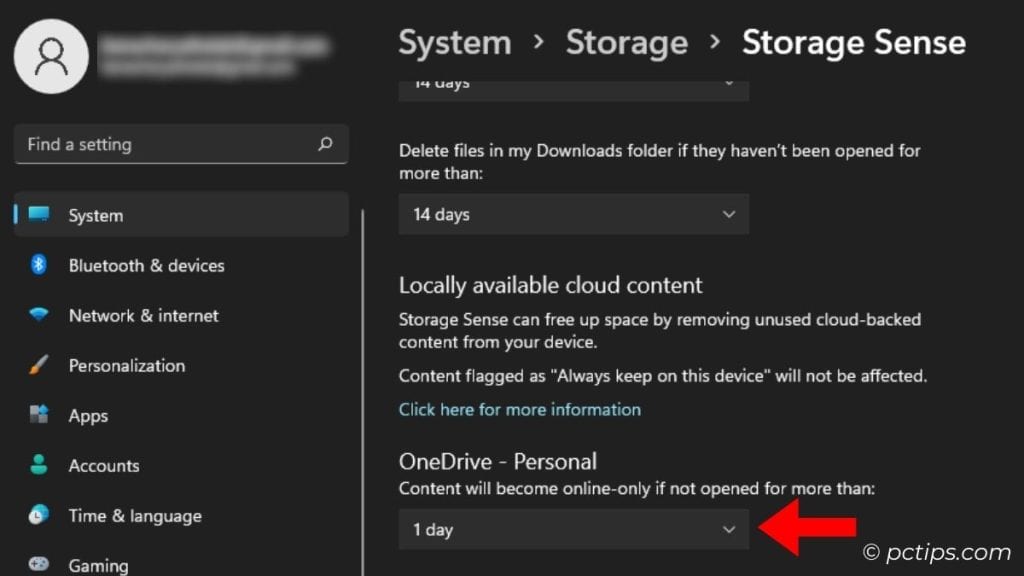
Now, all the backed up contents are going to be online-only if you do not open them for more than the selected days.
Note: This option is only available in Windows 11.
Can I Recover Files After Running Storage Sense?
Once you’ve run Storage Sense, all the files get permanently deleted. So, getting them back isn’t possible, at least naturally.
But if you remember our last guide on recovering deleted files using Recuva, that can definitely help!
However, you have to immediately stop using the drive so that new data doesn’t overwrite in that old file’s location.
Can Storage Sense Free Up Space on All Drives?
How great is Storage Sense! But here’s a drawback that I hate the most.
You guessed it. Storage Sense only works on the drive/partition containing Windows.
You can inspect this manually. In the Settings app, go to System > Storage. Here, you’ll notice that only one disk is identified (even if you’ve installed two or more).

To free up space on all drives, Disk Cleanup would be the better option for sure.
Try Cleanup Recommendations
Here’s one more thing you should try:
In Settings > System > Storage, navigate to Cleanup recommendations under Storage Management.
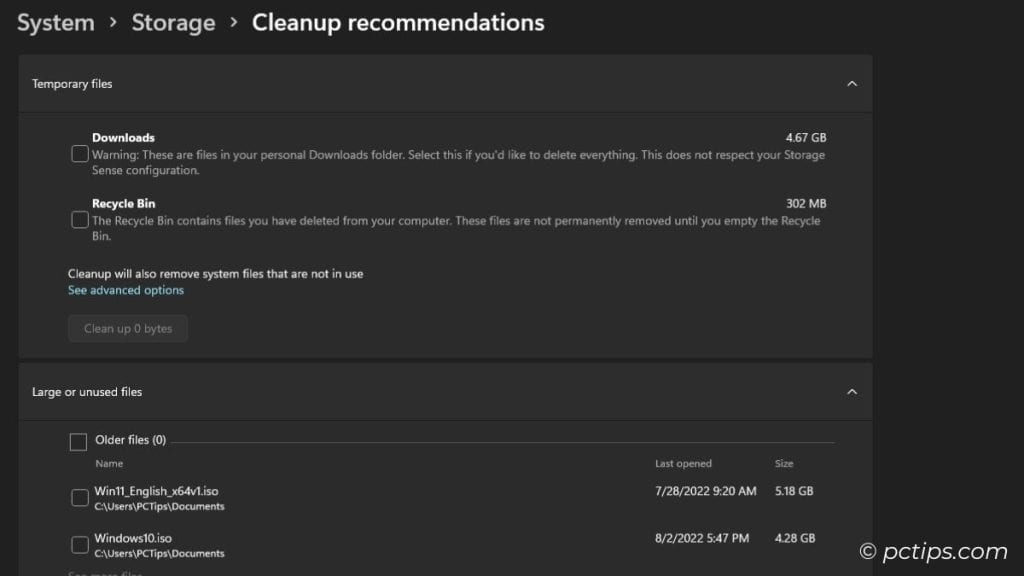
Now, you get to pick all the items that you don’t need (temporary files, large or unused files, files synced to the cloud, and unused apps).
Great way to save GBs of free space!
Wrapping Up
That’s all about Storage Sense you need to know. If you want to learn more about such Windows features, don’t hesitate commenting down below.
And I’m hopeful that you enjoyed reading this article today. Don’t forget to share this with your friends and family.
What to read next: How to visualize disk space
So many great tips from all you folks! Thnx again, I'm learning a lot here, Russ