12 Recycle Bin Secrets Every Windows User Must Know
Last Updated:
The Recycle Bin is one of those Windows features that we all use, but rarely think about.
It’s just there, quietly doing its job, but there’s a lot more to this little trash can than meets the eye.
In this article, I’ve uncovered some genuinely useful Recycle Bin secrets that I’m excited to share with you.
The Recycle Bin Isn’t a Real Folder
Despite appearances, the Recycle Bin isn’t a real folder.
It’s actually a virtual folder – a special view that aggregates the contents of hidden system folders on each of your drives.
These real Recycle Bin directories are hidden system folders at the root of each drive, called $Recycle.Bin.
To view them, you’ll need to uncheck “Hide protected operating system files” in File Explorer options.
Here’s how:
In Windows 10: View tab > Options > View tab.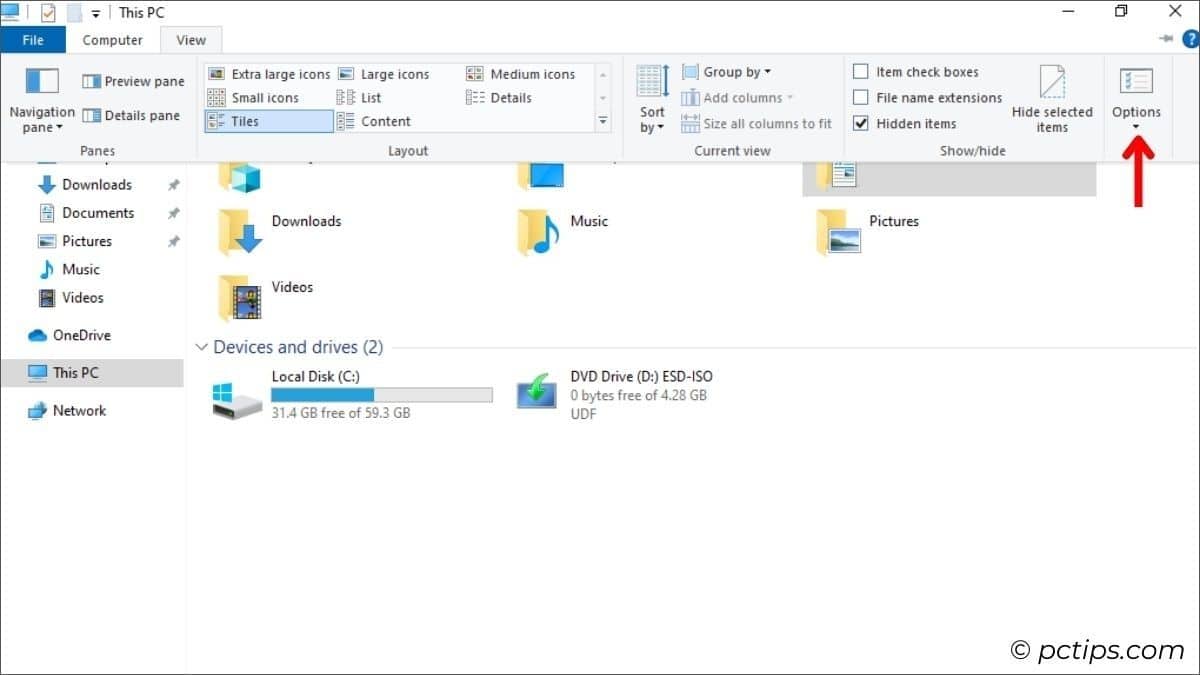
In Windows 11: … (three dots menu) > Options > View tab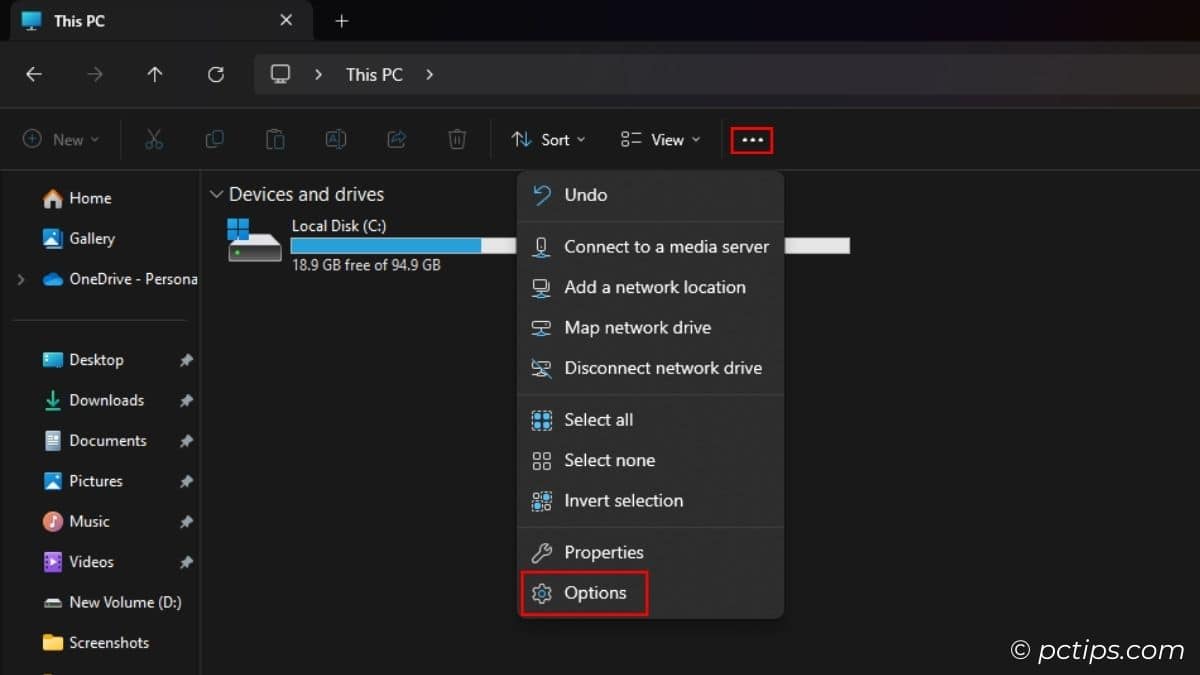
Then,
- Uncheck “Hide protected operating system files (Recommended)“
- Select ‘Show hidden files, folders, and drives’
- Hit OK

You can now see the real $Recycle.Bin folder in File Explorer.
Inside, you’ll find folders with cryptic names like S-1-5-18 and S-1-5-21-….
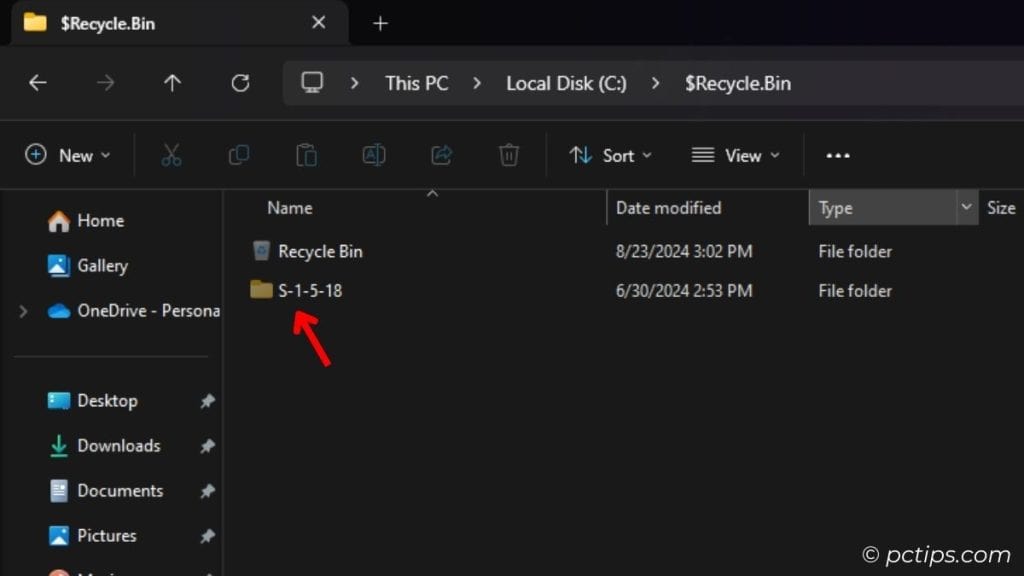
These correspond to different user accounts on your PC. ( requires special permission to access )
For more neat hidden folders, check out my article on Special Windows Folders You Need to Know About.
Recycle Bin on Removable Drives
Remember how I said the Recycle Bin exists at the root of each drive?
By default, Windows doesn’t send deleted files from removable drives to the Recycle Bin.
Instead, they’re permanently deleted right away.
But you can change this behavior with a quick registry edit:
- Press Win+R to open the Run dialog, type
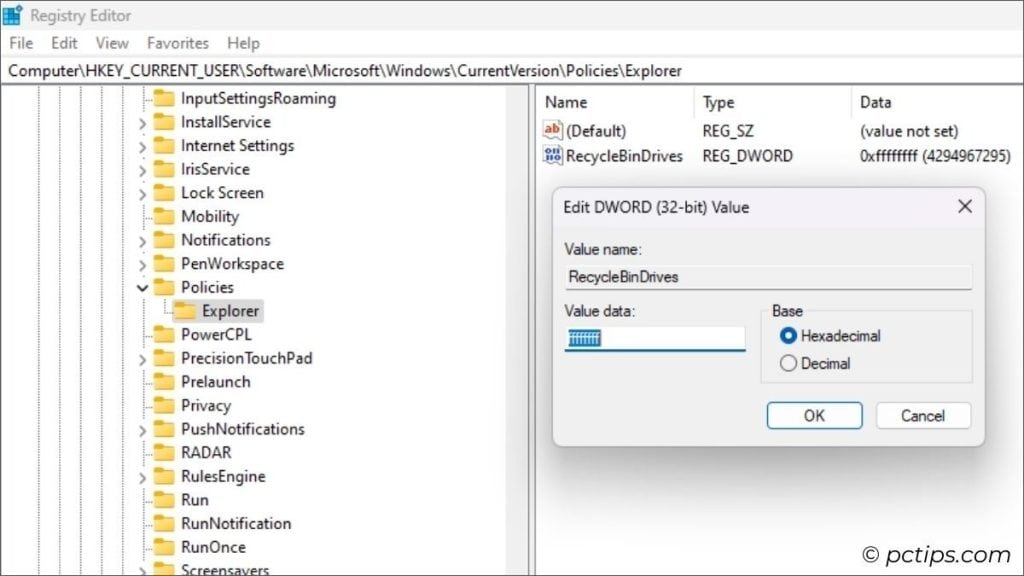
regedit, and hit Enter. - Navigate to:
Computer\HKEY_CURRENT_USER\Software\Microsoft\Windows\CurrentVersion\Policies\ - If you don’t see an Explorer key, right-click the Policies key, select New > Key, and name it
Explorer. - Right-click in the right pane, choose New > DWORD (32-bit) Value, and name it
RecycleBinDrives. - Double-click RecycleBinDrives, set the value to
ffffffff, and click OK. - Reboot your PC.
Warning: Always be careful when editing the registry. One wrong move can cause serious problems.
Want more registry hacks? Don’t miss this article on 17 Must-Know Registry Tweaks for Windows.
And if you’re a USB drive power user, you’ll love these:
- 12 USB Boot Drives EVERYONE Should Make
- 20 Genius Ways to Use a USB Drive Like a Pro
- How to Create the Ultimate Multiboot USB Drive With Ventoy
It Doesn’t Actually Save Space
You might think sending files to the Recycle Bin immediately frees up disk space.
But that’s not quite how it works.
When you delete a file, Windows simply marks it as “deleted” but the file still takes up space until you empty the Recycle Bin.
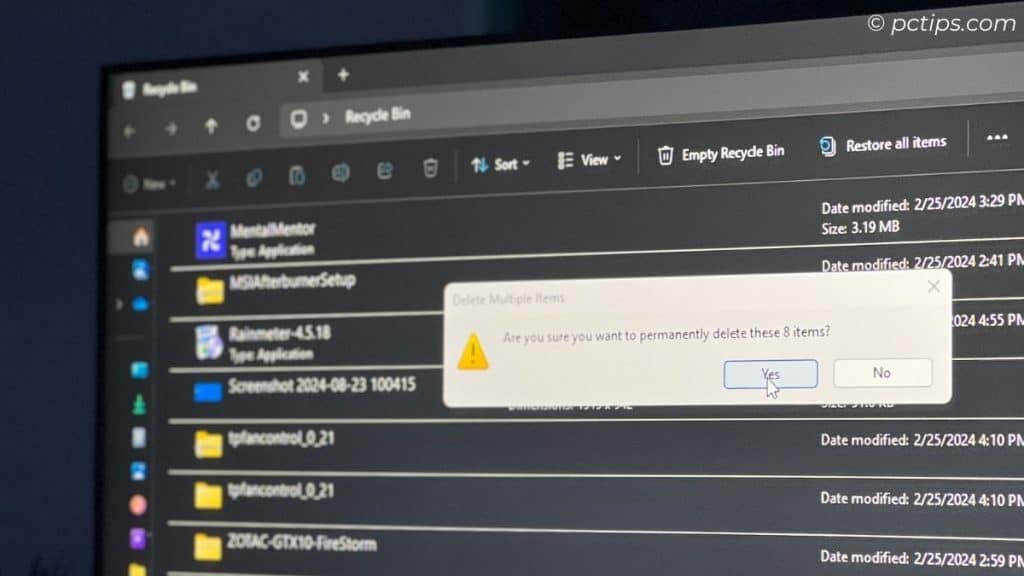
And that’s actually great news!
It means you can almost always get back deleted files.
It’s a safety measure to protect against accidental deletions.
If you change your mind or realize you deleted something important, you can easily restore the file from the Recycle Bin.
To truly reclaim that disk space…
Personally, I like to visualize my drive (you can read all about it in this article “How to Visualize Your Disk Space in Seconds“).
And if you’re looking for even more ways to free up storage, check out my guide on “How to FREE Up More than 100GB+ Of Disk Space.”
The “Maximum Size” Setting is a Lie
You know that “Custom Size, Maximum Size” setting in the Recycle Bin properties?
It’s a lie.
To see what I mean, right-click the Recycle Bin and choose Properties.
You’ll see a “Custom Size, Maximum Size” option.
Most people assume this sets the maximum total size of the Recycle Bin.
If it fills up past this amount, Windows will start deleting the oldest files to make room. Right?
Wrong.
This setting only affects the maximum size of individual files that can go into the bin.
Anything larger will get an “This file is too big to recycle?” warning and skip the Recycle Bin entirely.
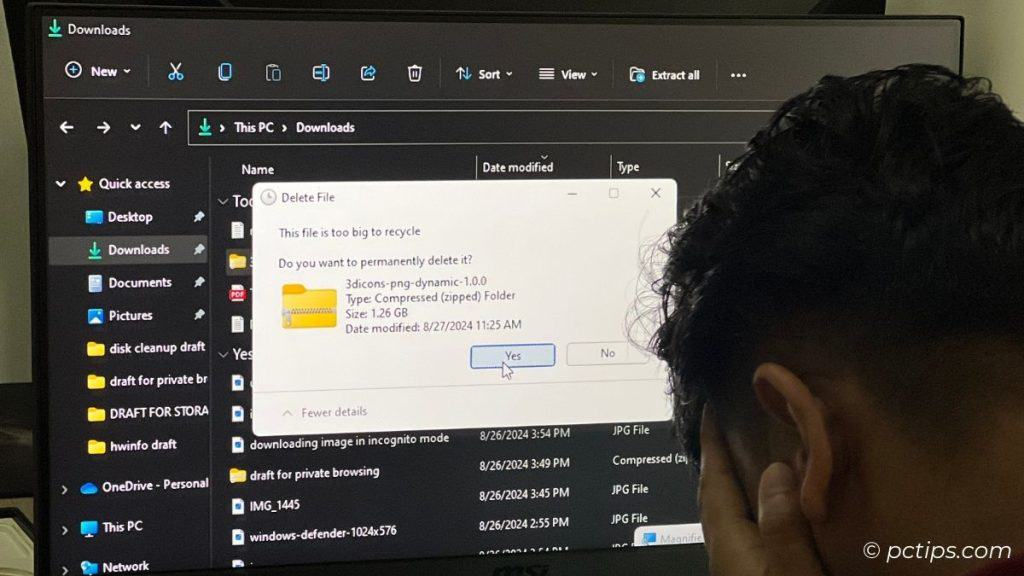
I ran a test to confirm this:
- I set the max size to 1GB
- I deleted a 2GB file
- Windows warned me it was “too big” and immediately deleted it, skipping the bin
The “maximum size” setting is only about individual files, not the total space used.
So, what’s the point of this setting?
It’s mostly there to prevent large files from filling up your Recycle Bin space.
But it won’t actually limit the total size of the bin.
The Recycle Bin Has Its Own Special Columns
Open up the Recycle Bin and you’ll spot two columns you won’t see anywhere else in File Explorer: “Date Deleted” and “Original Location“.
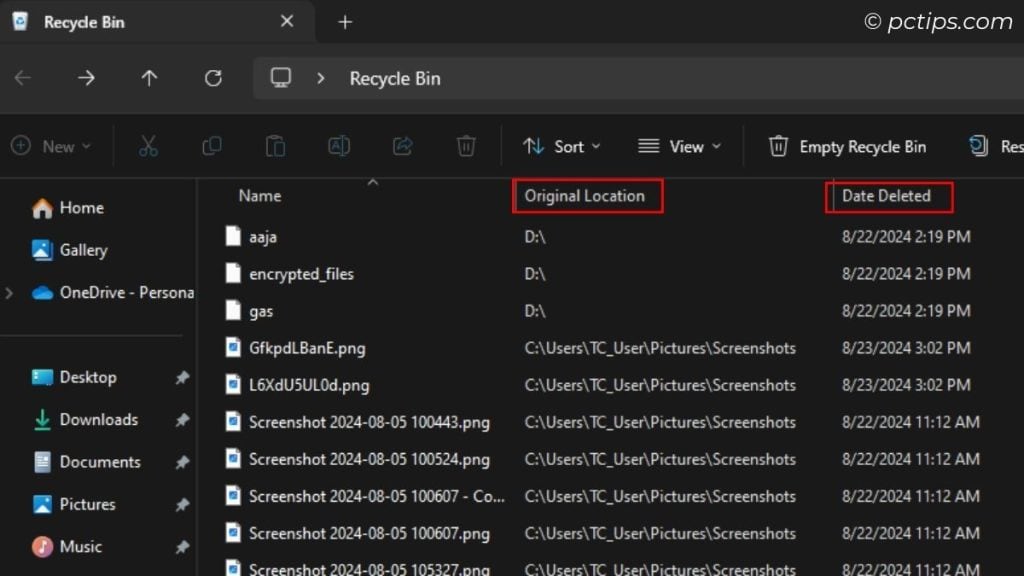
“Date Deleted” is self-explanatory – it’s the date and time you sent the file to the bin.
Super useful for figuring out when you deleted something.
“Original Location“, as the name suggests, shows where the file was located before you deleted it.
This is a lifesaver when you need to restore a file to its original spot.
For even more details, right-click any column header.
You’ll see a pop up menu with more columns like “Date Created“, “Date Accessed“, “Attributes”…
Clicking “More…” at the bottom of the pop-up menu reveals a treasure trove of additional columns.
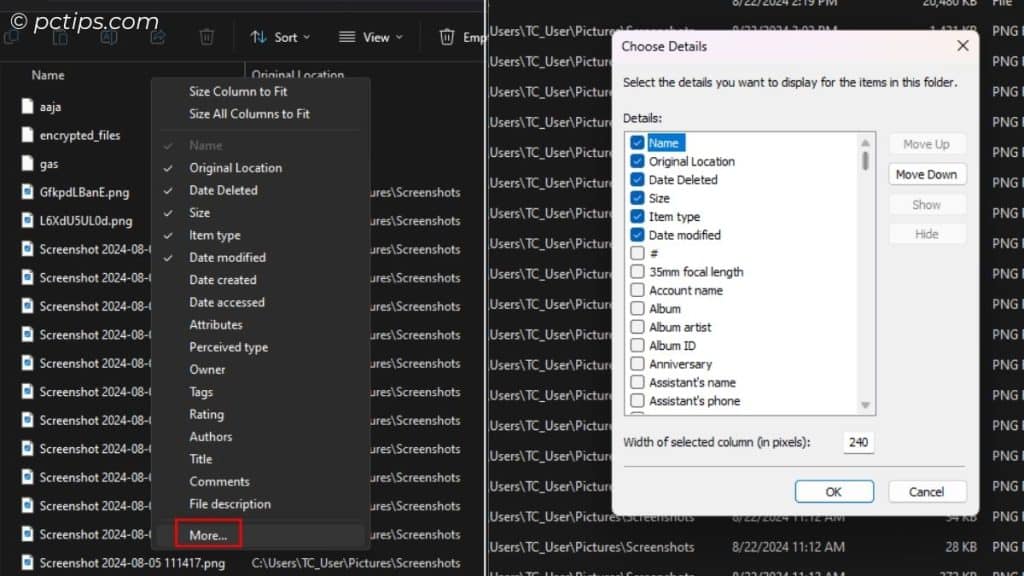
I counted over 260 extra columns available.
If you want to sort by one of these columns, just click the column header. Click it again to reverse the sort order.
Recommended reading: 50 Windows File Explorer Secrets You NEED to Know
Auto-Delete Old Recycle Bin Files
If you’re running Windows 10 or 11, you might not know about the Storage Sense feature.
This handy tool can automatically delete files that have been in your Recycle Bin for more than 30 days.
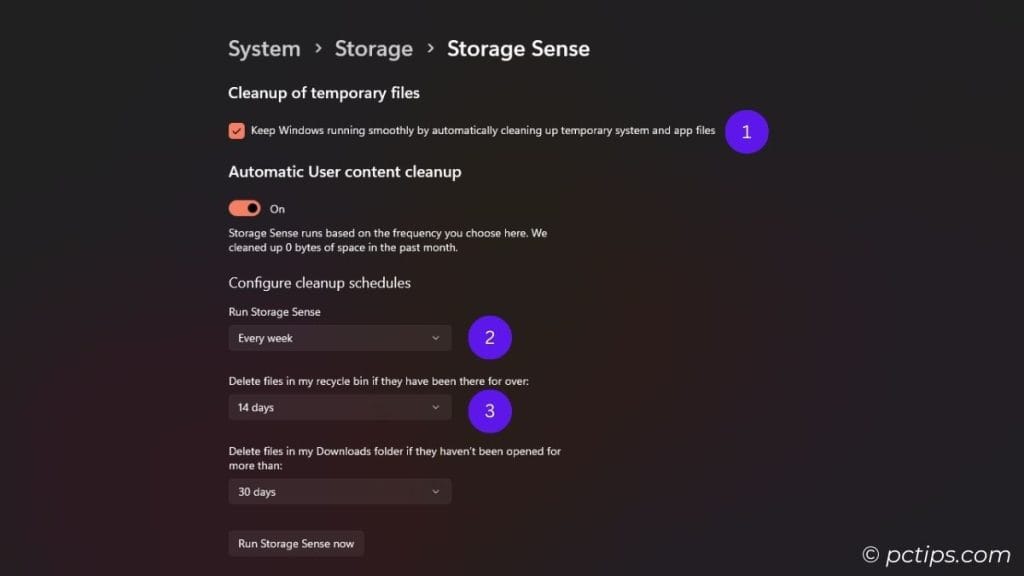
In Windows 11:
- Open Settings
- Click “System” then “Storage“
- Select “Storage Sense“
- Enable “Keep Windows running smoothly by automatically cleaning up temporary system and app files“
- Choose how often to run Storage Sense
- Select “Delete files in my recycle bin if they have been there for over” and pick a time period
For Windows 10, the steps are similar: Open Settings > System > Storage > Configure Storage Sense
Now Windows will clear old Recycle Bin files on a schedule—no more manual emptying!
Just remember, Storage Sense only runs periodically (it’s not constantly monitoring in the background).
So don’t expect files to vanish the moment they hit your chosen time limit.
The Recycle Bin Has Its Own Secret Shortcut
Want to open the Recycle Bin without clicking the desktop icon?
Press Win + R to open the Run dialog, then type shell:RecycleBinFolder and hit Enter.
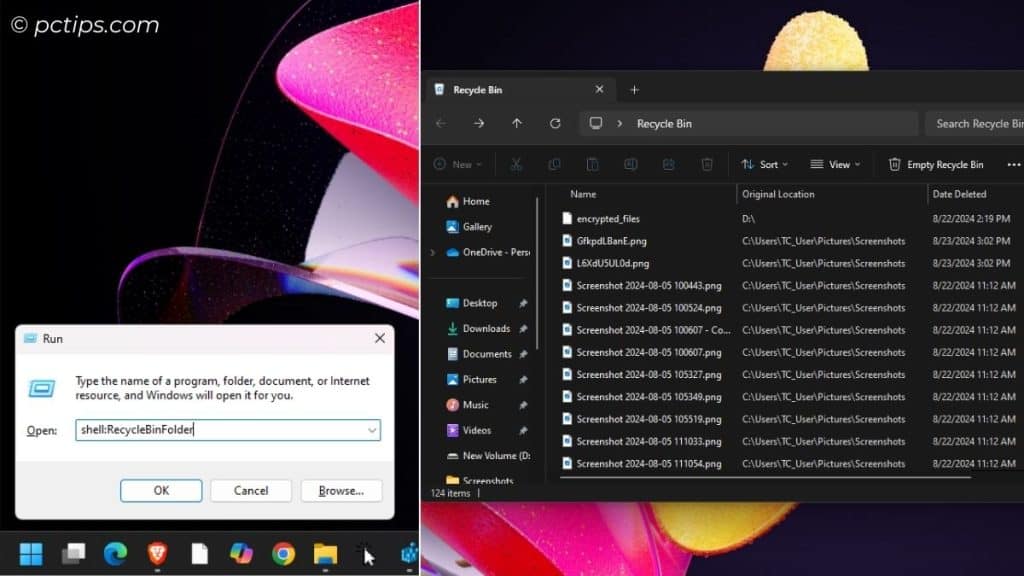
This is way faster than minimizing all your windows and double-clicking on the desktop icon.
You can also use the Recycle Bin’s CLSID (Class Identifier) in the Run dialog.
Try this shell:::{645FF040-5081-101B-9F08-00AA002F954E}.
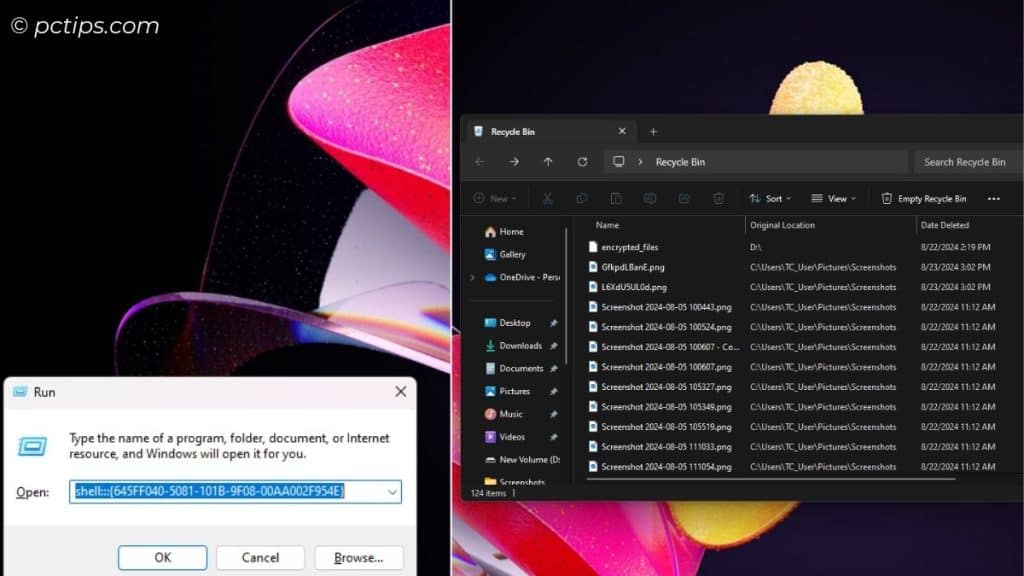
It’s the same Recycle Bin, just a different way to get there.
For more awesome Run commands: 100 Run Commands Every Windows User Should Know.
Create a Desktop Shortcut to the Recycle Bin
I’m not a fan of a cluttered desktop (I discuss this here 10 Clever Ways to Organize Your Desktop Icons).
But the Recycle Bin is one of the few icons I like to keep handy.
If you find yourself opening the Recycle Bin a lot, you might want to create a desktop shortcut for quick access.
Here’s how:
- Right-click on the desktop and select “Personalize“
- Click “Themes” then “Desktop icon settings“
- Check the box next to “Recycle Bin” and click “OK”
You can also create a shortcut to shell:RecycleBinFolder (the secret shortcut we discussed in #7).
Right-click on the desktop, select “New” then “Shortcut“, type explorer.exe shell:RecycleBinFolder, click “Next“, give it a name, and click “Finish“.
Now you’ve got a handy shortcut that takes you straight to the Recycle Bin.
No more minimizing windows or digging through folders!
You Can Undo an Accidental Delete
The whole point of the Recycle Bin is to give you a second chance when you accidentally delete something.
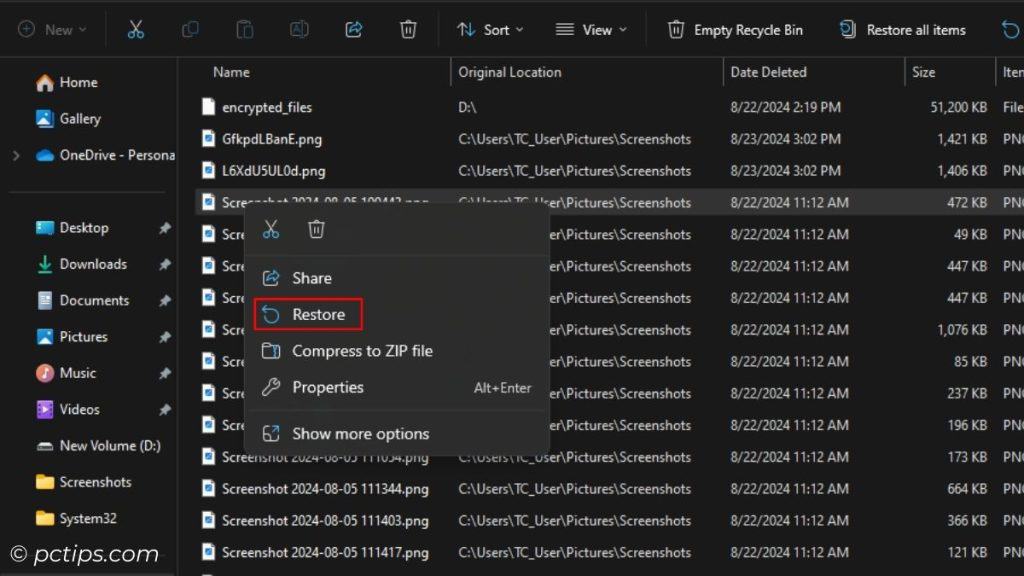
To restore a file you didn’t mean to delete:
- Open the Recycle Bin.
- Right-click on the file you want to restore.
- Select “Restore“.
To restore all deleted files at once:
- Open the Recycle Bin.
- Click “Restore all items” at the top of the window.
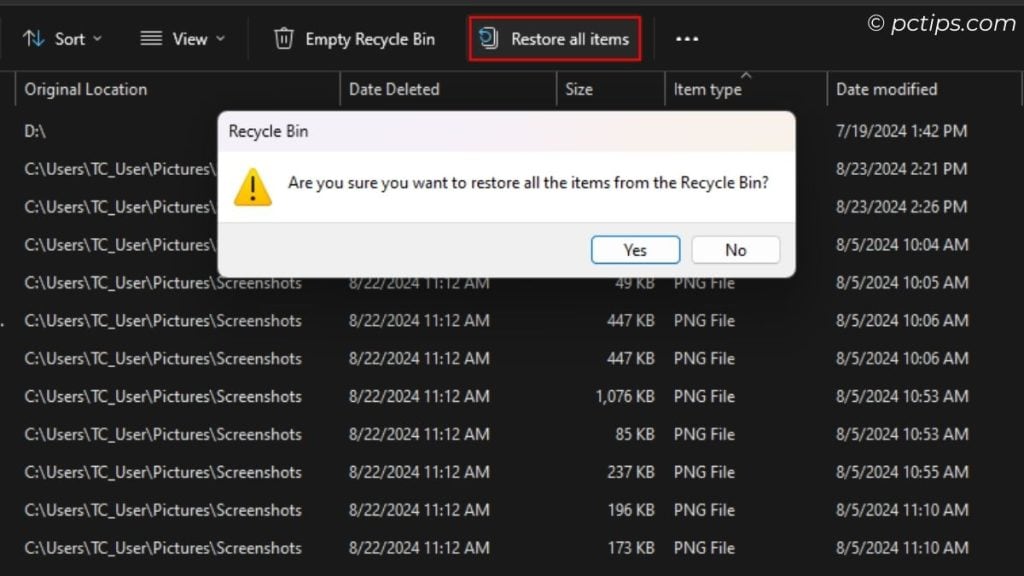
The file will be put back in its original location, as if nothing ever happened.
Tip: If you deleted the file from a USB drive or external drive that’s no longer connected, make sure to plug it back in first. The Recycle Bin can’t restore the file if the original location isn’t available.
Accidentally deleted a file and emptied the bin? There’s still hope! Check out Recover Lost Files In Seconds With Recuva.
You Can Disable the Recycle Bin Entirely
For most users, I don’t recommend disabling the Recycle Bin.
It’s a valuable safety net. But if you’re absolutely sure you never want to use it, you can turn it off:
Here’s how:
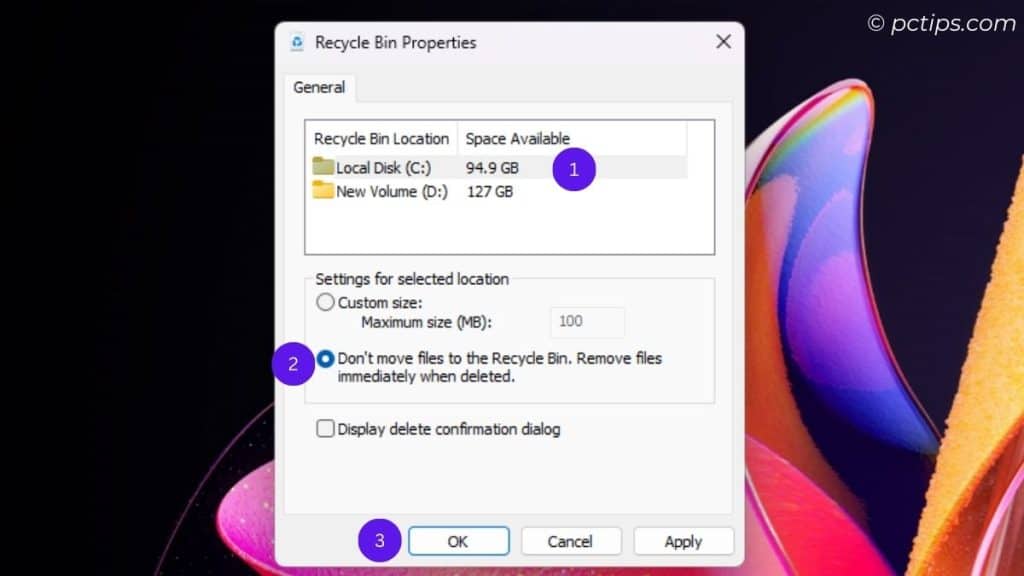
- Right-click the Recycle Bin and select “Properties“
- Select the drive you want to modify
- Choose “Don’t move files to the Recycle Bin. Remove files immediately when deleted.”
- Click “Apply” then “OK“
Now, when you delete a file, it will be permanently erased.
There’s No Recycle Bin in the Command Prompt
Here’s a fun fact – when you delete something from the Command Prompt, it bypasses the Recycle Bin entirely.
For example, try this:
- Open Command Prompt
- Navigate to a test folder (don’t try this with important files!)
- Type
del filename.txtand hit Enter
The file is gone forever, no Recycle Bin pitstop.
In PowerShell land, Remove-Item does the same thing.
So be extra careful when deleting via the command line!
You Can Customize the Recycle Bin Icon
The Recycle Bin has two icons: an empty bin when it’s empty, and a full bin when it contains files.
There are tons of cool Recycle Bin icons available online.
Once you’ve found one you like, here’s how to change it:
- Right-click an empty area on your desktop
- Select “Personalize“
- Click “Themes” on the sidebar
- Scroll down and click “Desktop icon settings“
- In the “Desktop Icon Settings” window, select the Recycle Bin icon
- Click “Change Icon“
- You’ll see options to change the bin’s icon for both the “Empty” and “Full” states
- Select an icon you like, or click “Browse” to use a custom icon
- Click OK when you’re done
Your new icon should now be proudly displayed on your desktop!
For more desktop customization tips, read Customize Your Desktop (Why You Should And How).
If you liked this article, please consider bookmarking it or sharing it with your friends.