Recover Lost Files In Seconds With Recuva
Last Updated:
Did you accidentally format the wrong drive? Or maybe your kid deleted some important photos or documents.
Don’t panic! You can still recover most of your files. Here’s what you should do:
- Immediately stop using the drive. This will minimize the chances of your files being overwritten and lost forever.
- Read this quick guide to learn how to recover those files with a free tool called Recuva.
- I’ve also explained why other recovery methods are better in some scenarios (especially if the lost data was extremely important). So, read till the end before you try anything.
What Is Recuva? Should You Use It?
Recuva is a safe and beginner-friendly undeletion tool for recovering accidentally deleted files.
Even when files are permanently deleted, you can often recover them. Here’s why:
When you delete files, Windows marks them as ‘deleted’ in the Master File Table (MFT).
The sectors they’re occupying are now free to be overwritten. But until new data actually overwrites that space, the deleted files still exist on your drive.
Recuva scans the MFT for files marked as deleted and creates a list of all the files it could potentially recover for you.

So, family photos, videos, work documents, music, archives, game save files, PDFs – Recuva can recover most files that an average user might delete.
Is It The Right Tool For You?
As I said, Recuva is a simple undeletion tool. It’s NOT a full-on suite for advanced recovery operations.
Data loss can happen due to various reasons:
- Accidental deletion or formatting
- Failed SSD due to firmware corruption
- Storage controller might fail due to old age
- HDD parts might be damaged due to physical impact
If you unintentionally deleted some files or formatted a drive, Recuva can help.
But if the data loss happened due to hardware reasons, you’ll want to follow a proper recovery process with a better-suited tool.
Let me explain why this is so important.
How Important Is Your Data
As new files are created on your system, Windows overwrites the MFT entries of the old files that were marked as deleted.
That means the longer you continue using your PC, the lower your chances of recovering deleted files as they could get overwritten.
So, it’s best to immediately stop using the drive and ask yourself how important the lost data was.
If it’s critical and you cannot afford to lose it,
- Go to a data recovery pro. Don’t even bother with DIY recovery.
- The success rate of actual recovery pros compared to DIY recovery or computer repair shops is significant!
- Most reliable pros analyze your drive for free, explain the situation to you, and provide a price quote. They might even refund you if the recovery isn’t successful.
- So, consult them first.
If you want to do it yourself, follow this process:
- Stop using the drive if you haven’t already done so.
- Clone the drive to another drive with Clonezilla or any other method you prefer.
- Multiple recovery efforts can lower the chances of success (e.g., a damaged hard drive head damages the platter more and more with each recovery attempt).
- Or, Windows downloads an update and overwrites the files before you manage to recover them.
- Cloning will ensure you always have a clean backup in case things go wrong.
- Choose the right recovery tool.
- Recuva can’t piece together fragmented files.
- It’s not good at recovering files from FAT-formatted drives (i.e. most USB sticks).
- It can’t do RAW recovery.
- It doesn’t have complex algorithms for reliably reconstructing file systems like UFS Explorer or R-Studio. It’s a simple tool for undeletion – that’s it.
- TLDR; choose the right tool according to your needs. Sometimes a simple tool is enough, other times it’s not.
- Read the file system from the clone and start the recovery process.
Getting Started with Recuva
If you determined that Recuva is the right tool for the job,
- Download Recuva. The free version should suffice for most people.
- Launch the installer and click on Install.
- Then, click on Run Recuva to access the wizard.
Using the Recuva Wizard
The Recuva Wizard will help you narrow down the search to find your lost files quickly.
- First, select the type of files to recover.

- Then, pick the file location.

- In a Deep Scan, Recuva scans the MFT and additionally searches every block for file headers (meaning it’ll find more files but take a LOT longer). You can leave this off, or enable it as you prefer.
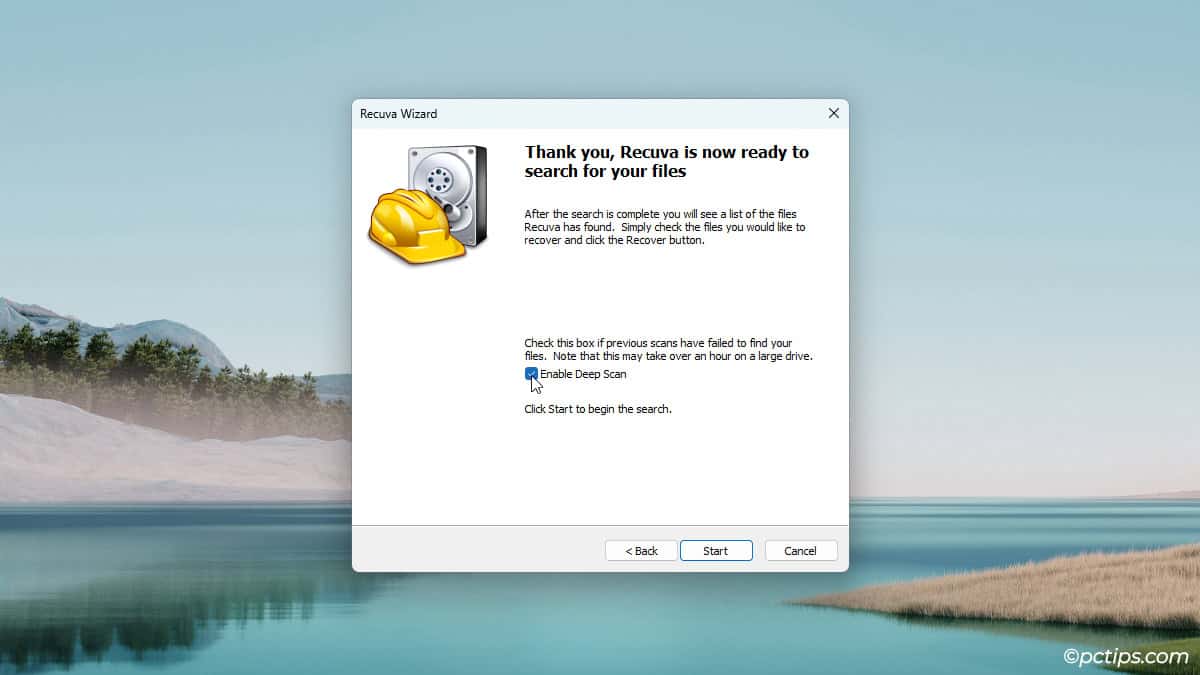
- Click on Start to begin the search.
How Long Does the Scan Take?
Generally speaking, a quick scan for specific files should take a few seconds to a few minutes.
A deep scan for all types of files may take a few minutes to a few hours.
The exact time depends on these factors:
- Your HDD or SSD speed
- The size of the drive
- How much you narrowed down the search (file type and location)
- Quick or deep scan
Recover the Deleted Files
Recuva will eventually complete the scan and list the files it found.
The color coding indicates the chances of successful recovery (green files are excellent, orange is acceptable, and red is unlikely).
- Select the files you want to save and click on Recover.

- Select a location for the files (best to save these on another drive to minimize overwriting chances).
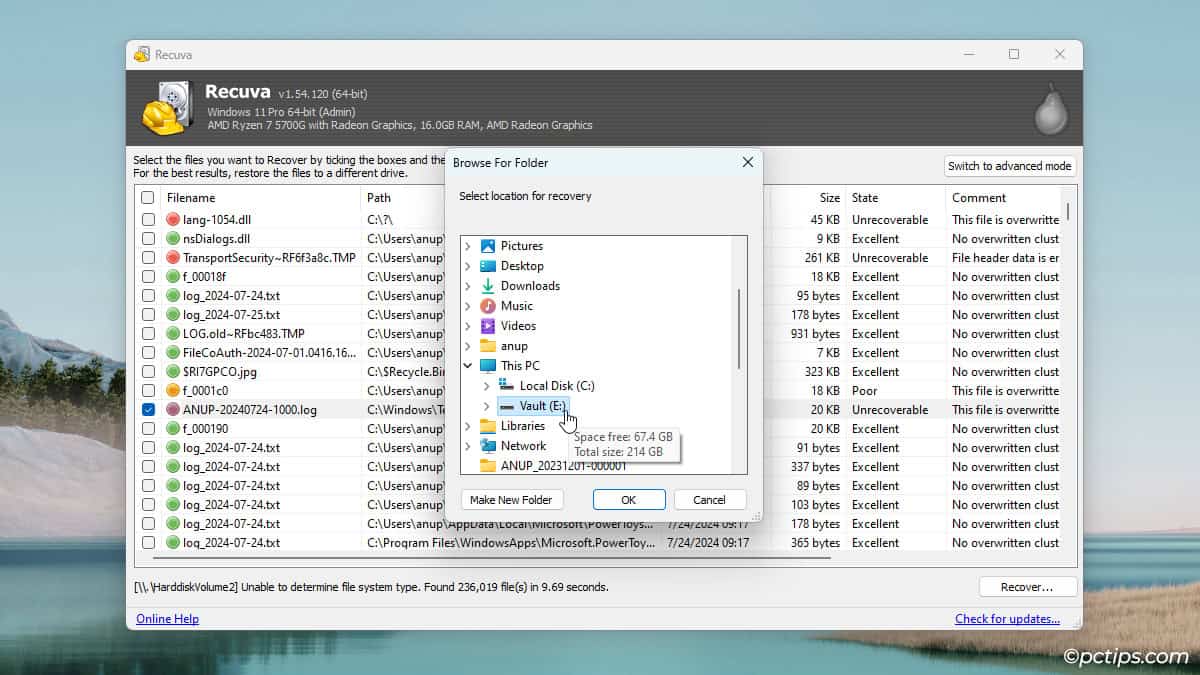
- Open the files to verify whether they work or not.
That’s the basic recovery process with Recuva – super simple!
Now, let’s look into Advanced Mode and its various useful features.
Preserve the Folder Structure
People often lose collections of thousands of photos, videos, documents, etc. It’s a universal experience.
You do NOT want to be stuck sifting through thousands of unorganized files (especially if their file names or thumbnails weren’t recovered properly).
- In the Recuva wizard, click on Cancel. Or, when Recuva lists files after a scan, click on Switch to advanced mode.
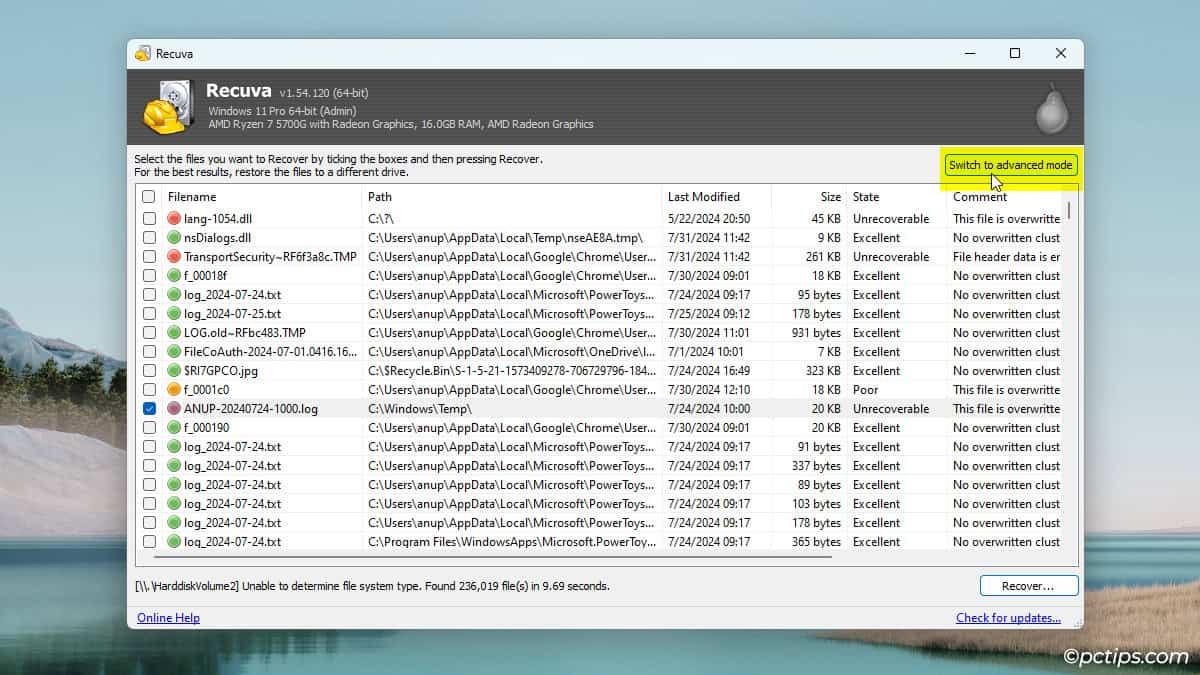
- Click on Options.
- In the Actions tab, enable the Restore folder structure option.

Now, Recuva should recover files to their original folders as best as it can.
Use Thumbnail View For Images
If you’re trying to recover specific images, open Options in Advanced Mode.
Change the View mode to Thumbnails view.
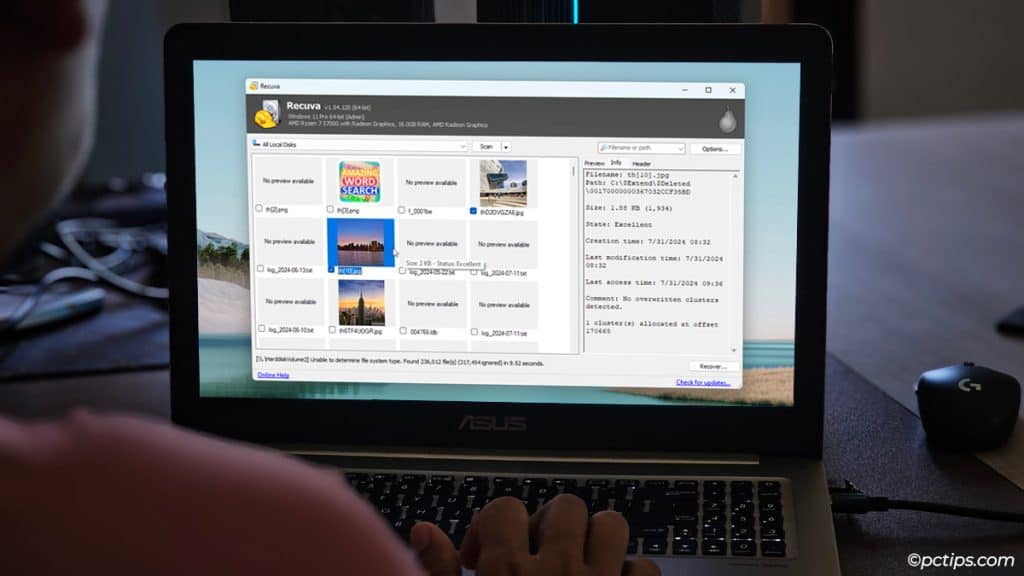
Thanks to the previews, you’ll be able to easily find and select the exact images you want.
Use Tree View to Find Files
In the past, I’ve needed to find documents whose filename I had forgotten but I knew where they were stored (perks of organizing files properly!).
Opening thousands of files individually to search for a specific one is extremely inefficient.
Instead, right-click the results list and select View mode > Tree view.
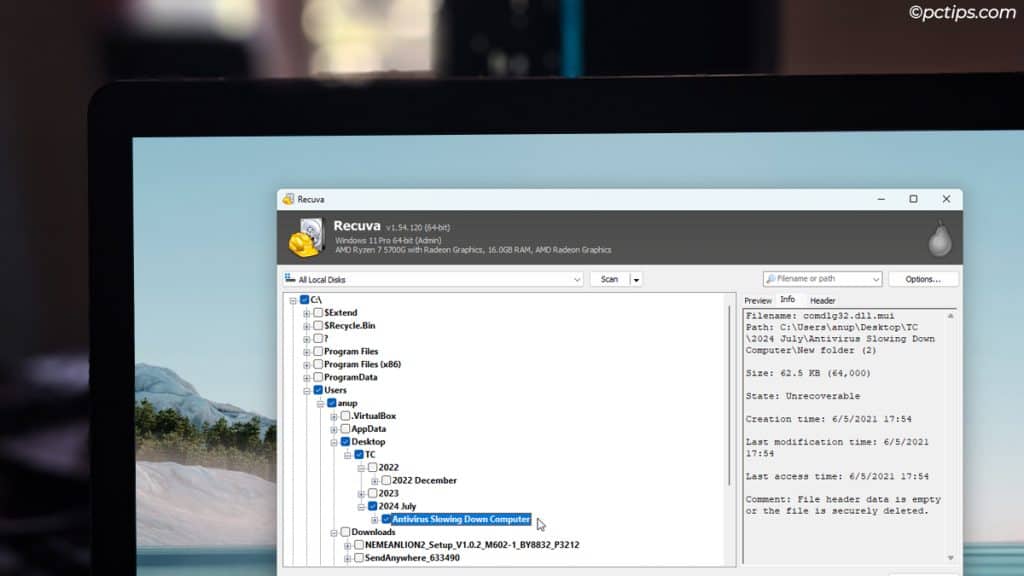
Recuva will list recoverable files according to their original directory structure. So, if the file was originally on your Desktop, for instance, you’ll find it easily.
Search Contents to Recover Documents
Did you delete an important document and you don’t remember the filename or location?
Maybe you remember what the document was about though? Recuva can find documents by searching for some text inside the documents.
- In Advanced Mode, expand the Scan dropdown menu and select Scan contents.
- In the Search String field, enter the text you want to search.

- You can change the File Mask to search for specific types of documents if you want (
.txt,.doc,.eml, etc). - Click Scan.
Related: 36 Windows Search Tricks to Find Any File in Seconds
Find Files Deleted From Recycle Bin
You deleted the wrong files, unknowingly emptied the recycle bin, and only realized it later. It happens.
Narrow down Recuva’s search time by specifically scanning for deleted files in the Recycle Bin.
Right-click the Recycle bin and select Show more options > Scan for deleted files.
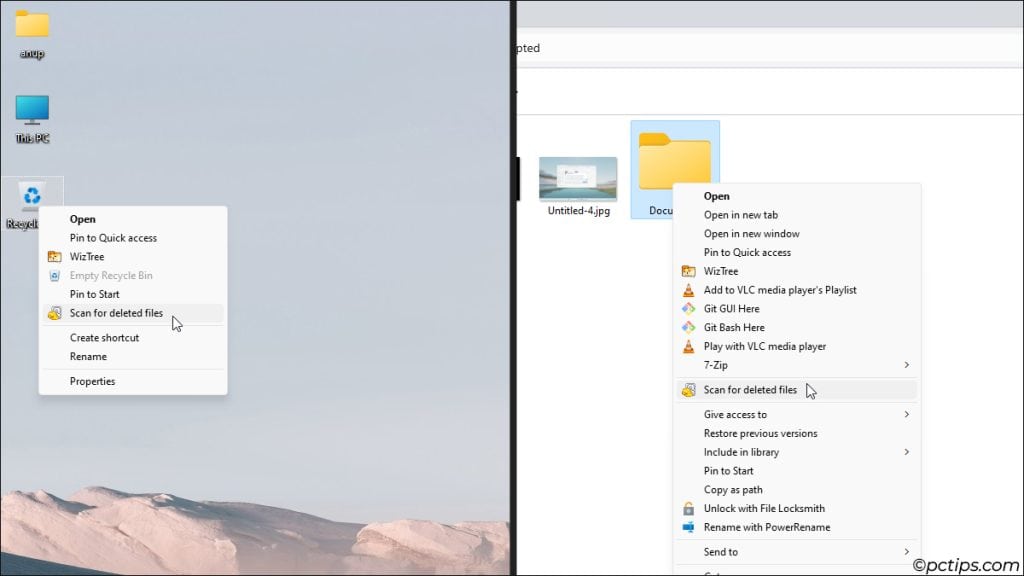
Similarly, you can also scan specific folders in the File Explorer.
Right-click any folder and select Show more options > Scan for deleted files.
Securely Delete Files with Recuva
Some of you might be thinking – if it’s this easy to recover deleted files, how are you supposed to securely erase sensitive data?
It’s simple. You just need to ensure the data gets overwritten.
Recuva has a feature specifically for this called Secure Overwrite.
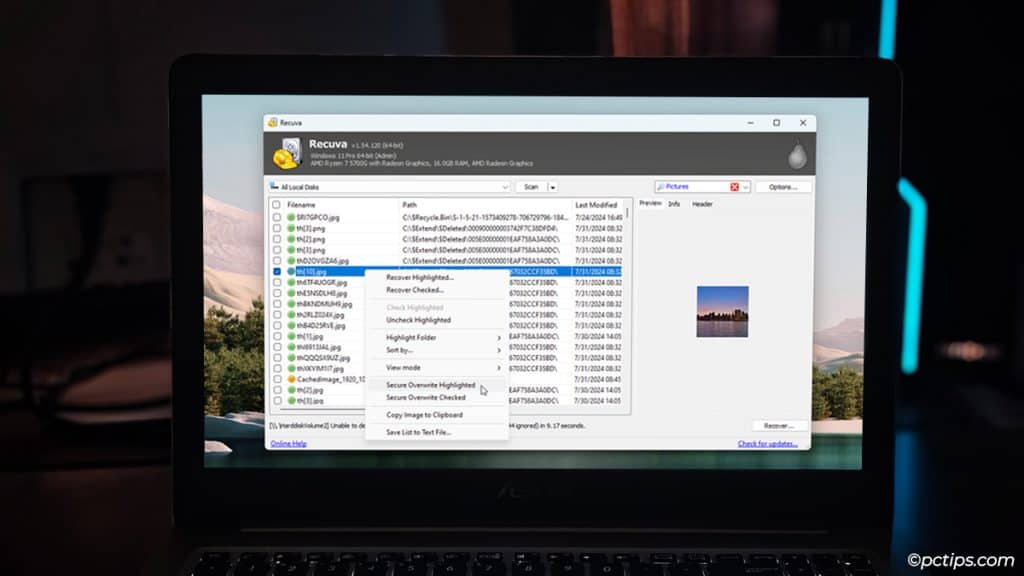
Scan for recoverable files and highlight the files you want to permanently delete.
Then, right-click and select Secure Overwrite Highlighted or Secure Overwrite Checked.
Try Recuva Portable
Here’s a quick tip I don’t want you to miss:
Download rcvPortable from PortableApps. You can extract and copy this version to a USB stick.
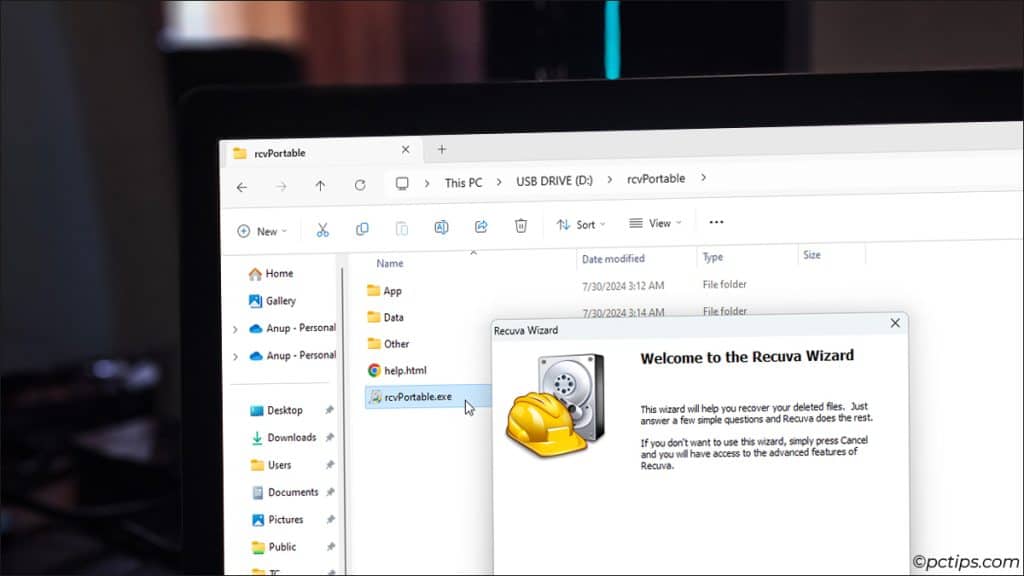
No need for installation, simply carry it around on the USB and recover files on any system you want.
You Might Like: 20 Genius Ways to Use a USB Drive Like a Pro
Why Is Recuva Not Finding My Files
There are a few main reasons for this:
- Recuva doesn’t have a 100% success rate. No recovery program does. Your files might be overwritten or too corrupted to recover.
- The files might’ve been securely deleted (i.e. overwritten from the get-go).
- You might be trying to recover from unsupported Android or iOS devices. Recuva isn’t good with certain supported devices either (USB drives, memory cards, FAT-formatted drives).
- You might be trying to recover a type of file that Recuva doesn’t support. The supported ones are:
- Graphics: BMP, JPG, JPEG, PNG, GIF, TIFF
- Microsoft Office: DOCX, XLSX, PPTX, DOC, XLS, PPT, VSD
- OpenOffice: ODT, ODP, ODS, ODG, ODF
- Audio: MP3, MP2, MP1, AIF, WMA, OGG, WAV, AAC, M4A
- Video: MOV, MPG, MP4, 3GP, FLV, WMV, AVI
- Archives: RAR, ZIP, CAB
- Other file types: PDF, RTF, VXD, URL
Recuva Didn’t Work – What Next?
Recuva is convenient and has helped thousands of people recover precious files.
However, data recovery can be very complex. Sometimes it simply won’t be up to the task.
In such cases, you can look into professional-grade tools like UFS Explorer or R-Studio.
For particularly important data without other copies, consult data recovery experts. Not random IT guys or repair shops, but actual recovery pros.
They’re well-equipped and experienced in dealing with all sorts of data loss scenarios, not just accidental deletions.
Backups Are Non-Negotiable
I hope you were able to recover your files with Recuva. If not, try the alternatives I suggested above.
And although this might not be what you want to hear right now, I cannot stress this enough:
Ideally, follow the 3-2-1 method and keep at least two copies of your files.
Or at the very least, backup your most important files to an external drive (portable HDD, USB stick, even a phone will do – just backup!!).
If you have even one backup copy, you’ll never have to worry about situations like this or other threats like ransomware in the future.
Please leave a comment or share this article if you found it helpful.
And, if you’d like more explore more such useful apps, start here: