How to Create the Ultimate Multiboot USB Drive With Ventoy
Last Updated:
If you’re like me, you’ve probably accumulated a pile of bootable USBs over the years.
One for Windows setup, one for Linux live environments, one for diagnosing hardware issues, another for data recovery…
…the list goes on.
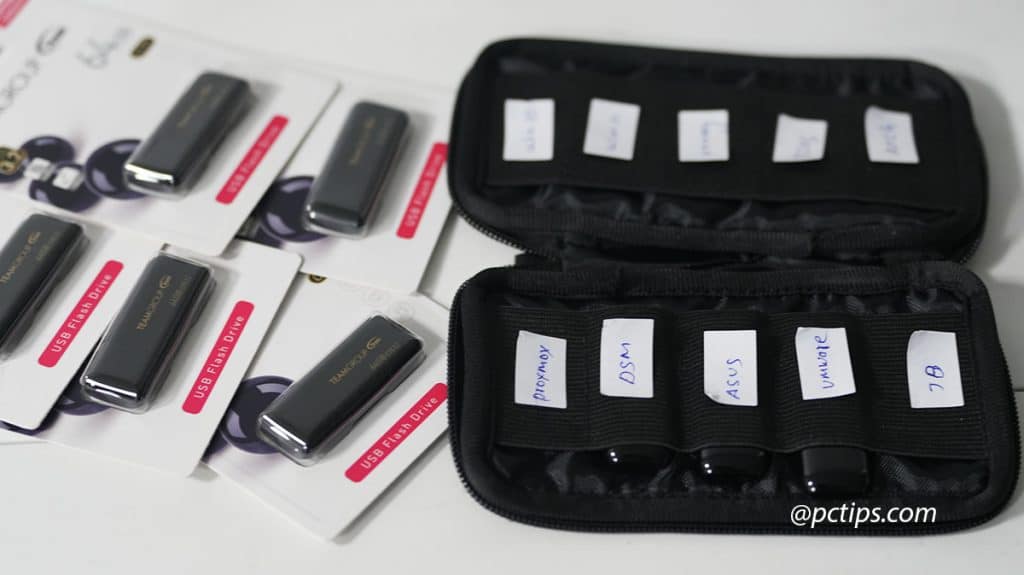
It’s a hassle to keep track of them all.
And inevitably, when you need a specific one, you can’t find it.
There’s got to be a better way, right?
Enter Ventoy, the open source tool that lets you create a single bootable USB drive to rule them all.
Just drag your ISOs onto the drive and boot.
It couldn’t be any simpler.
I’ve been using it since I first found it in 2020, and it’s become an indispensable part of my toolkit.
No more swapping USB drives or overwriting images!
What Makes Ventoy So Special?
Seriously, I’m not exaggerating!
This incredible tool turns any USB drive into a multiboot powerhouse.
No more messing with Rufus every time you need to create a new bootable drive.
Here’s what makes Ventoy so awesome:
- Creates a multi-boot USB drive that can hold hundreds of boot images (yes, HUNDREDS!)
- Add or remove ISOs to the drive without reformatting
- Supports a huge range of ISO files, including Windows, Linux, and Unix (1221 tested image files so far )
- USB drive still works for file storage – your ISOs don’t take up the whole drive
- 100% free and open source (because the best things in life are free!)
Choosing the Right USB Drive
To get the most out of Ventoy, you need to pick the right USB drive.
I recommend getting the largest, drive you can afford.
At a minimum, aim for:
- USB 3.0 or higher (USB 3.2 Gen 2 preferred for lightning-fast data transfer)
- At least 64GB capacity (256GB or more preferred – if you plan on storing lots of ISOs!)
- Reputable brand like Samsung, SanDisk, or Kingston (for reliability)
Remember, this drive is going to hold all your boot images and more, so don’t cheap out!
I’ve personally tested a bunch of high-end USB drives , and here are some of my top picks:
- SAMSUNG BAR Plus USB 3.2 Flash Drive, 512GB – This drive is blazing fast, with read speeds up to 400MB/s. It’s also built like a tank, with a sturdy metal casing.
- SAMSUNG FIT Plus USB 3.2 Flash Drive, 512GB – If you need a low-profile drive that won’t block adjacent ports, the FIT Plus is a great choice. It’s just as fast as the BAR Plus but in a tiny package.
- SanDisk 512GB Ultra Fit USB 3.2 Flash Drive – Another excellent low-profile option, the Ultra Fit boasts read speeds up to 400MB/s. It’s also very affordable for its capacity.
- SanDisk 1TB Extreme PRO USB 3.2 – If you need maximum capacity and speed, look no further than the Extreme PRO. With read speeds up to 420MB/s and a generous 1TB of storage, this drive can handle anything you throw at it.
Of course, you can go with smaller capacities like 256GB or 128GB if you don’t need as much storage.
But remember, this is an investment.
A high-quality Ventoy drive will serve you for years, so don’t be afraid to spend a little extra.
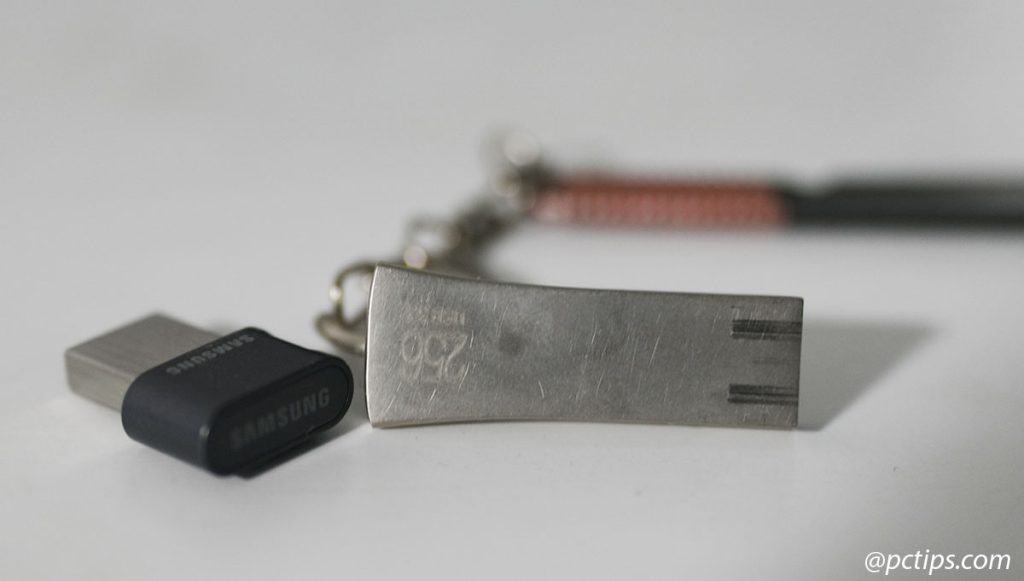
I’m using the SanDisk BAR Plus and FIT drives myself – they’re super fast and has plenty of room for my ever-growing ISO collection.
Installing Ventoy
Now that you’ve got your USB drive picked out, it’s time to get it installed.
The process is incredibly simple:
- Head over to the Ventoy official website or GitHub repo and download the latest release for your operating system.
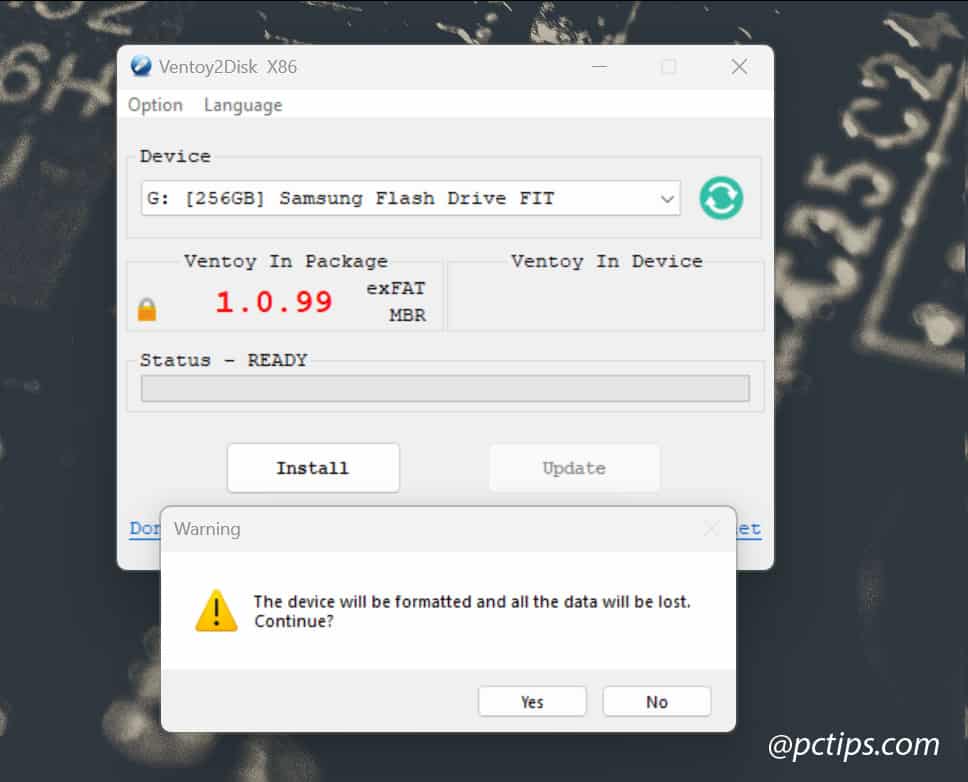
- Insert your USB drive and make sure it’s empty (The drive will be formatted, so make sure to back up any important data first!)
- Run
Ventoy2Disk.exe(for Windows) orVentoyGUI.x86_64(for Linux) - Select your USB drive from the list
- Click “Install” and let it work its magic – the process should only take a minute or two
- Once the installation is complete, you’ll see a new partition called “Ventoy” on your drive – this is where you’ll be storing your ISO files
That’s it! Your drive is now a multi-boot drive.
No complex partitioning or command line voodoo required. Even your grandma could do it.
For speedy program installation in the future, check out my guide on How to Install Any Windows Program in Seconds with Winget.
Ventoy’s File System
When you install Ventoy, it creates two partitions on your USB drive:
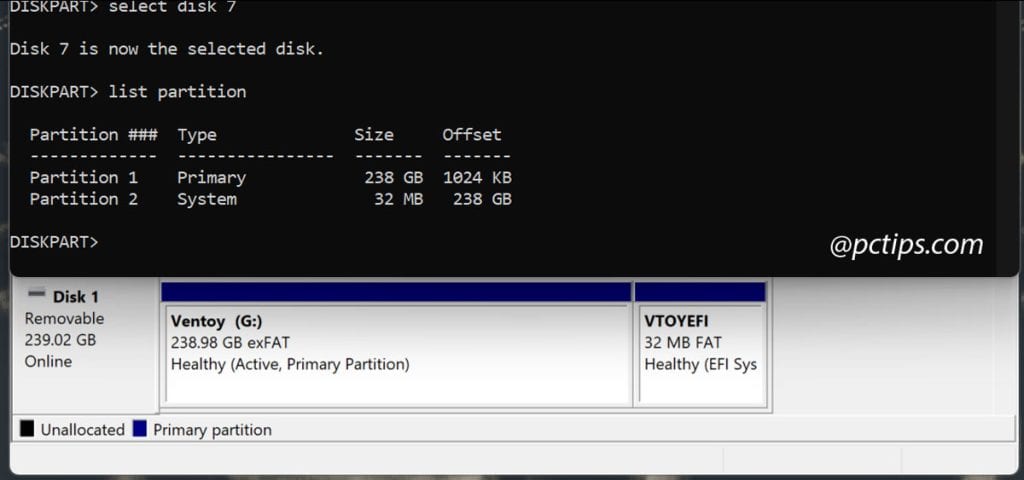
- VTOYEFI partition, which contains the bootloader and configuration files
- Ventoy partition, which is where you’ll store your ISO files . It’s formatted as exFAT by default, which means it’s compatible with Windows, macOS, and Linux out of the box.
If you prefer a different file system, you can change it in the “Options” -> “Partition Configuration” menu.
It supports NTFS, FAT32, and UDF in addition to exFAT.
Just format the Ventoy partition with your file system of choice, and it will boot from it without any issues.
Adding Boot Images to Your Ventoy USB
Adding ISOs to your Ventoy drive is ridiculously easy.
Just drag and drop your ISO files onto the data partition.
Ventoy will automatically detect the ISO and add it to the boot menu.
No extracting, no renaming, no configuring – just copy and go!
I’m not kidding. It’s really that simple!
You can add as many ISOs as you want, limited only by the capacity of your USB drive.
Ventoy supports a huge range of ISOs, including:
- Linux distributions (Ubuntu, Fedora, Arch, etc.)
- Windows installers (Windows 10, Windows 11, Windows Server)
- Utility discs (GParted, Clonezilla, MemTest86)
- Antivirus rescue disks (Kaspersky Rescue Disk, Avira Rescue System – for when things go sideways)
- And much, much more! (Seriously, the list is endless!)
In my testing, I’ve successfully booted everything from obscure Linux distros to massive Windows installers without any issues
Example ISOs to Get Started
If you’re not sure what to put on your Ventoy drive, here are a few of my favorites to get you started:
- Windows installation media – Having a Windows installer on hand is always useful for those unexpected reinstalls or new PC builds. I recommend keeping the latest version of Windows 10 and 11.
- Ubuntu Desktop – A great gateway drug into the world of Linux. Beginner-friendly with a polished UI.
- Manjaro – For a more advanced Linux experience, give Manjaro a try. Based on Arch Linux but with a focus on user-friendliness.
- Hiren’s BootCD – An incredible collection of diagnostic and repair tools. Indispensable for troubleshooting stubborn PC issues.
- MemTest86+ – Suspect faulty RAM? MemTest86+ is the way to diagnose.
- Clonezilla Live – For making quick and easy disk images and backups.
Of course, your ISO collection will vary depending on your needs, but these are some solid starting points.
My advice? Start with a few core ISOs, then grow your collection over time.
Whenever you come across a new ISO that looks interesting or useful, just toss it on your drive.
With the drive’s huge capacity, you’ve got plenty of room to experiment.
If you want more ideas, check out my article on 20 Genius Ways to Use a USB Drive Like a Pro.
Booting from Your Ventoy USB Drive
So you’ve got Ventoy installed and loaded up with ISOs – now it’s time to boot from your shiny new USB drive!
- Insert your flash drive into the target PC
- Restart your computer and enter the boot menu (usually by pressing F8, F11 or F12 during startup).

- Select your Ventoy USB drive from the list of bootable devices.
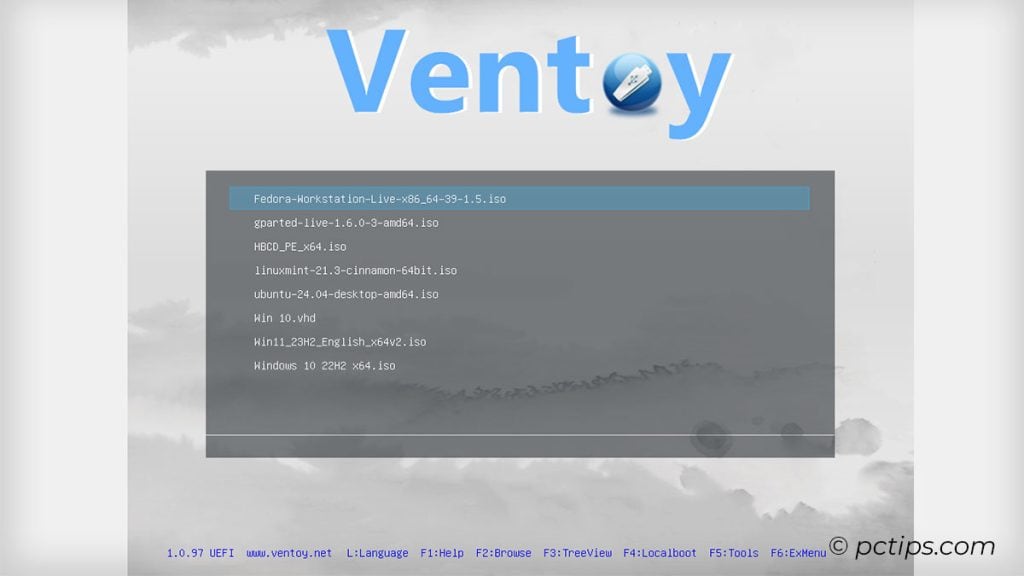
- Ventoy will load its boot menu, showing all the ISO files you’ve added to the drive.
- Use the arrow keys to select the ISO you want to boot, then press Enter.
Ventoy will then load the selected ISO and start the boot process.
It’s that easy!
One thing to keep in mind is that some ISOs may have their own boot menus or configuration options.
In these cases, just navigate the ISO’s boot menu using the arrow keys, or enter any required configuration options, and you’ll be on your way.
Organizing Your Ventoy Drive
As your ISO collection grows, you may want to organize your Ventoy drive to make it easier to find the ISO you need.
Ventoy supports folder-based organization, so you can create directories on the data partition and put your ISOs inside them.
For example, you might create folders like:
- linux/
- windows/
- utils/
- vm/
- vhd/
When you boot, all your ISOs will be scanned and shown in the boot menu. Hit F3 for a tree view with your folders expanded.
Remember, Ventoy only lists bootable files, so don’t worry about clutter.
That said, if you have a lot of files, it will take time to scan them all.
In that case, use a .ventoyignore file to exclude certain folders from scanning.
For more tips on file organization, check out my other articles:
- Best Way to Organize Files on Your Computer
- 20 File Naming Tricks to Find ANYTHING in Seconds
- 10 Clever Ways to Organize Your Desktop Icons
Customizing the Ventoy Boot Menu
If you want to add some visual flair to your Ventoy boot environment, check out the built-in theme support!
Ventoy can use the same theme format as the GRUB bootloader.
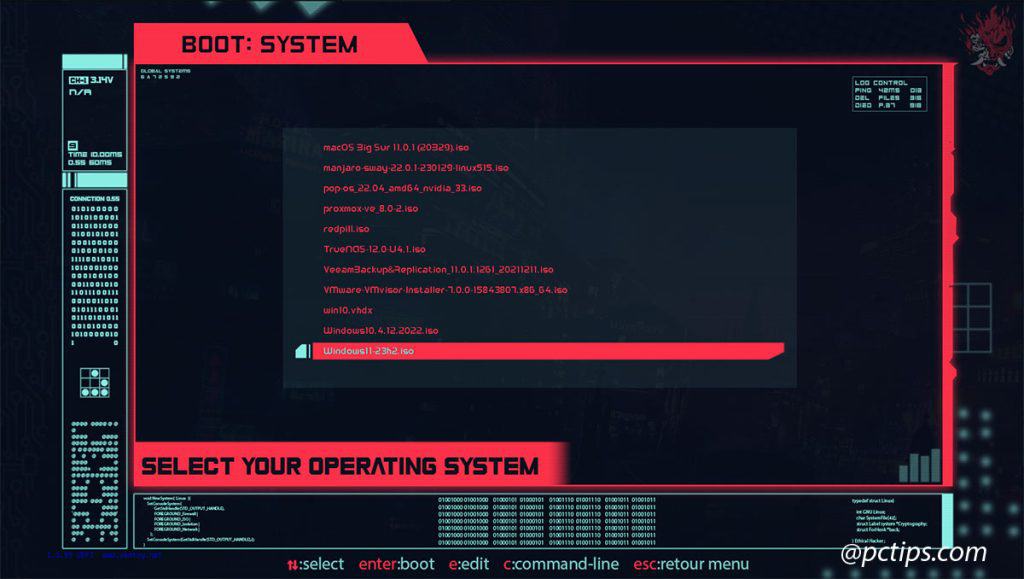
Here’s how to set a custom theme:
- Head to the GRUB Themes Repository and find a theme you like. Go for ones that match the GRUB2 or GRUB2/UEFI formats.
- Download your chosen theme and extract the archive file. The theme should be in a directory with a
theme.txtfile and various assets (background image, font files, etc.). - On your Ventoy partition, create a folder called
ventoyand inside that, a folder calledtheme. - Copy the extracted theme folder into the theme folder on your Ventoy drive.
- Create a ventoy.json file in the ventoy folder
- Refer to the official Ventoy theme documentation for the full theme configuration options. For this example, we’ll use the following configuration:
{
"theme": {
"file": "/ventoy/theme/your-theme/theme.txt",
"gfxmode": "1920x1080",
"display_mode": "GUI",
"serial_param": "--unit=0 --speed=9600",
"ventoy_left": "5%",
"ventoy_top": "95%",
"ventoy_color": "#0000ff",
"fonts": [
"/ventoy/theme/your-theme/Hack-12.pf2",
"/ventoy/theme/your-theme/Hack-14.pf2",
"/ventoy/theme/your-theme/Hack-16.pf2"
]
}
}- Replace “your-theme” with the name of your theme’s directory.
- Change the “gfxmode” value to match your screen resolution.
- Adjust the other values to taste – they control the positioning and color of the Ventoy menu text.
- Save
ventoy.jsonand reboot to scope out your glorious new theme!
I absolutely love the “CyberRe” theme – it gives my Ventoy menu an awesome cyberpunk vibe with its neon colors and hacker-style font.
It’s a perfect match for my collection of security testing and forensics ISOs.
There are tons of other great themes out there too, from minimalist designs to wild sci-fi and anime inspired ones.
Have fun browsing the theme repositories and trying out different looks on your Ventoy drive
Booting from Virtual Disk
Another handy feature is the ability to boot from virtual disk images like VHD and VHDX files using the VHD boot plugin.
This is useful for booting into pre-configured Windows environments without needing to set up a virtual machine.
To use the VHD boot plugin:
- Download the ventoy_vhdboot.img file from the vhdiso releases page.
- Copy the ventoy_vhdboot.img file to the ventoy directory. The full path should be /ventoy/ventoy_vhdboot.img.
- Copy your VHD/VHDX file to the Ventoy partition.
- Boot your drive. You should see a “
.vhdfx file” menu entry. Select it to boot from your VHD file.
A few important notes about using the VHD boot plugin:
- There are some compatibility issues with bootmgr, so the devs provide different versions of ventoy_vhdboot.img to test. If one doesn’t work, try another.
- The partition storing your VHD(X) files must be formatted as NTFS for Windows 10 v1803 and earlier. For v1809+, you can use exFAT as well, which is recommended for USB drives. NTFS is still preferred for hard disks.
- It’s best to confirm that your VHD(X) file boots normally using traditional methods before trying to boot it with Ventoy.
- In UEFI mode, only 64-bit Windows is supported. 32-bit will not work.
You can also boot VHD files stored on your local disk using Ventoy.
There are two ways to do this:
- Follow the instructions in the “Boot Image Files In Local Disk” section of the Ventoy docs.
- Use a custom menu entry in
ventoy_grub.cfg:
It will search all connected disks to find the file.
The VHD boot plugin really expands what you can do with Ventoy.
Being able to have portable, pre-configured Windows environments alongside your Linux ISOs is incredibly useful for testing, development, and sysadmin work.
It’s also great for trying out Windows preview builds without risking my daily driver install.
Updating Ventoy
Ventoy is actively developed, with new features and bug fixes released regularly.
Keeping it up-to-date is important for compatibility with new ISO formats and bug fixes.
To Update:
- Download the latest version
- Run the installer.
- Select your USB drive.
- Click “Update”.
The update process preserves all your existing files on the Ventoy partition.
You don’t need to recopy your ISOs or recreate your customizations.
Pro tip: Check for updates every few months or before adding a new, important ISO to your collection. This ensures maximum compatibility.
For a handy way to update all your other programs at once, check out this article on How to Install and Update All Your Programs at Once with Ninite.
More Tips and Tricks
We’ve only scratched the surface of what Ventoy can do.
Here are a few more advanced tips and tricks to take it the next level:
- Use plugins – Ventoy has a plugin system that lets you extend its functionality in all sorts of ways.
- Try VentoyPlugson – A web-based GUI for managing your Ventoy drive, tweaking settings, and installing plugins
- Use VentoyVlnk to boot from other partitions – The VentoyVlnk plugin lets you boot ISOs and virtual disk files that are stored on other partitions or drives. Handy if you’ve got a massive ISO library that won’t fit on your drive.
- Password-protect your boot menu – The password plugin lets you set a password for your boot menu, so nosy coworkers or family members can’t mess with your ISOs.
- Create persistent live environments – Lets you save changes made in a Linux live environment between reboots (like installed apps, settings, and files)
- Windows 11 Bypass: Ventoy can bypass Windows 11’s hardware compatibility checks and online account requirement, making it easy to install on unsupported PCs.
…and much more.
For the full list of Ventoy’s ever-expanding bag of tricks, check out the official plugin docs.
Ventoy has completely changed the way I work with bootable USBs.
No more juggling multiple drives or constantly overwriting ISOs.
I have my entire toolkit at my fingertips, ready to boot at a moment’s notice.
If you found this article helpful, please consider sharing it with your friends and colleagues.
The more people who know about Ventoy, the better.
Excellent article. I am looking for free tools for desktop support including hardware, software, and networking. Could you recommend some?
Hey Adrián, glad you enjoyed the article! There are some great free tools out there for desktop support. Here are a few of my go-tos: Speccy - detailed system info CPU-Z - processor and RAM specs HWMonitor - temperature and voltage monitoring Ninite - bulk program install/update Wireshark - packet sniffing and analysis Angry IP Scanner - network device mapping