21 Incredible Mouse Tips and Tricks You Need to Know
Last Updated:
Your mouse is capable of way more than just clicking and scrolling.
I’ve done multiple articles on keyboard shortcuts, tricks, and combos.
But it’s finally time to give the mouse its due.
If you’re someone who finds the mouse easy and straightforward, prepare to have your mind blown by these 21 insanely useful mouse tricks.
Though I prefer using the keyboard mostly, I use some of these constantly.
I’ve tested them all personally and can confirm they will change the way you use your mouse.
Let’s dive in!
Open New App Instances With Middle-click
One of my favorite mouse techniques is middle-clicking on the Windows taskbar.
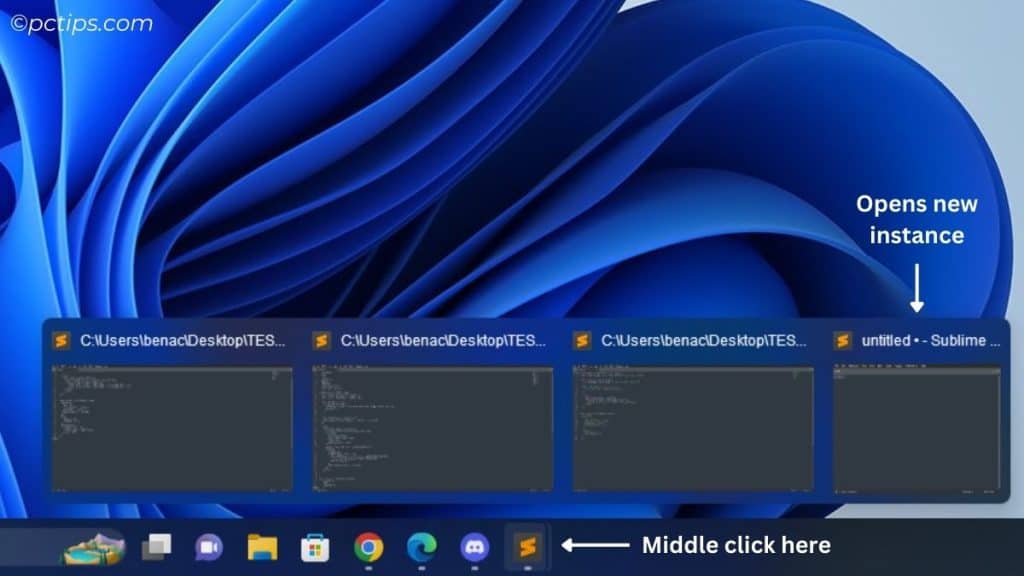
Middle-clicking a pinned app on the taskbar will open a new instance of that app.
I find this insanely useful when combined with virtual desktops.
For example, I often have separate Sublime Text instances open on different desktops, each focused on a specific project.
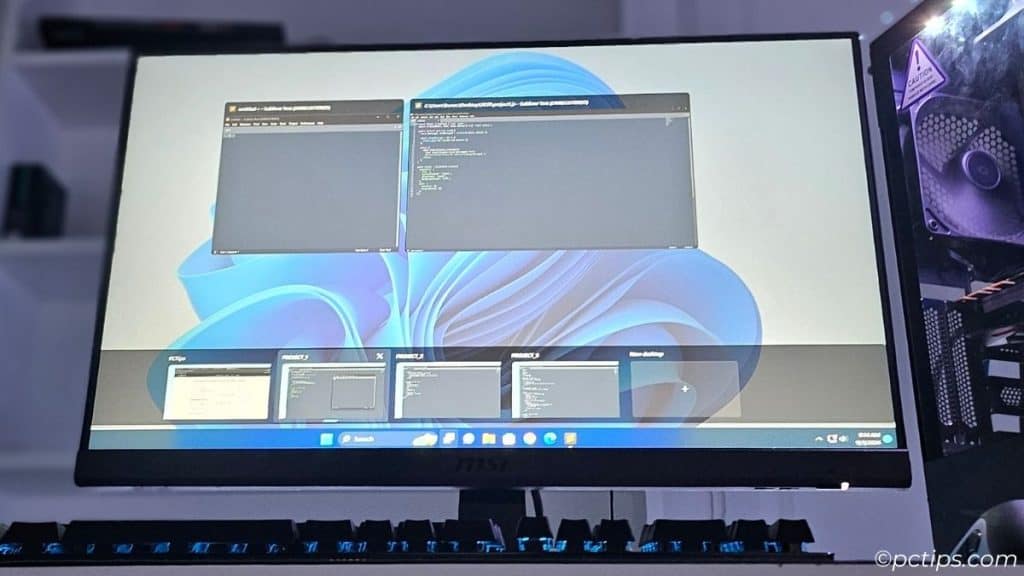
Not all apps support multiple instances, but many popular ones like Chrome, VS Code, and File Explorer work great with this trick.
This technique works with most applications that support multiple instances, like web browsers and file explorers.
If you want to learn more about virtual desktops, I recommend checking out my article: The Beginner’s Guide to Mastering Virtual Desktops.
Open A New Window With The Middle Button
Similar to opening new app instances, you can also open new windows within apps using the middle mouse button.
This works great for opening new File Explorer tabs (requires Windows 11 versions 22H2 and later).
Just select a folder and middle-click it to open it in a new tab.
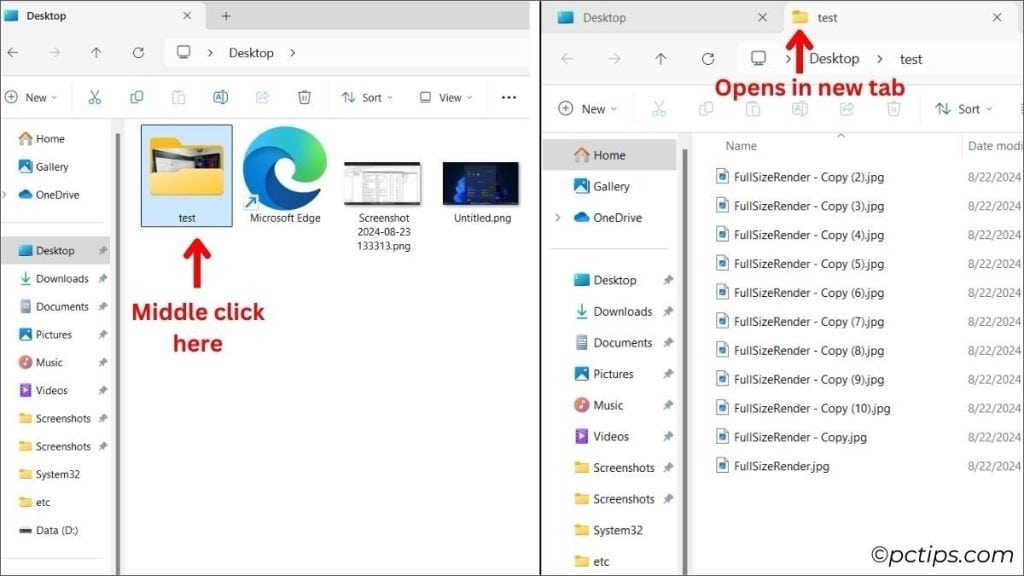
But it’s especially useful in web browsers – middle-click a link to open it in a new tab.
No more right-clicking and selecting “Open in new tab“!
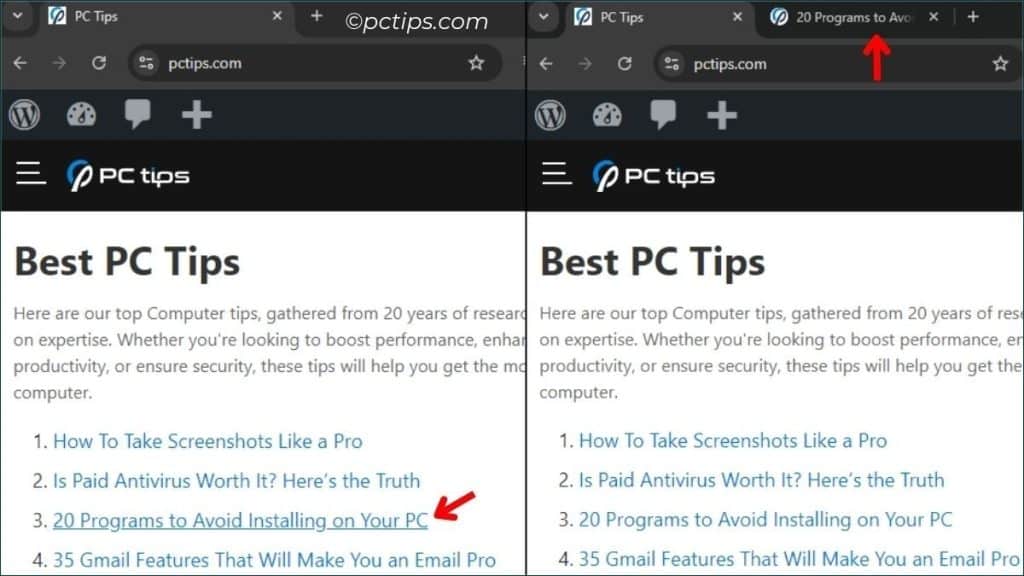
I use it all the time when reading articles online – I can open interesting links in new tabs without interrupting my current reading.
For more File Explorer tips, see my article: 50 Windows File Explorer Secrets You NEED to Know.
Close With The Middle Click
In File Explorer, middle clicking a tab will close it instantly.
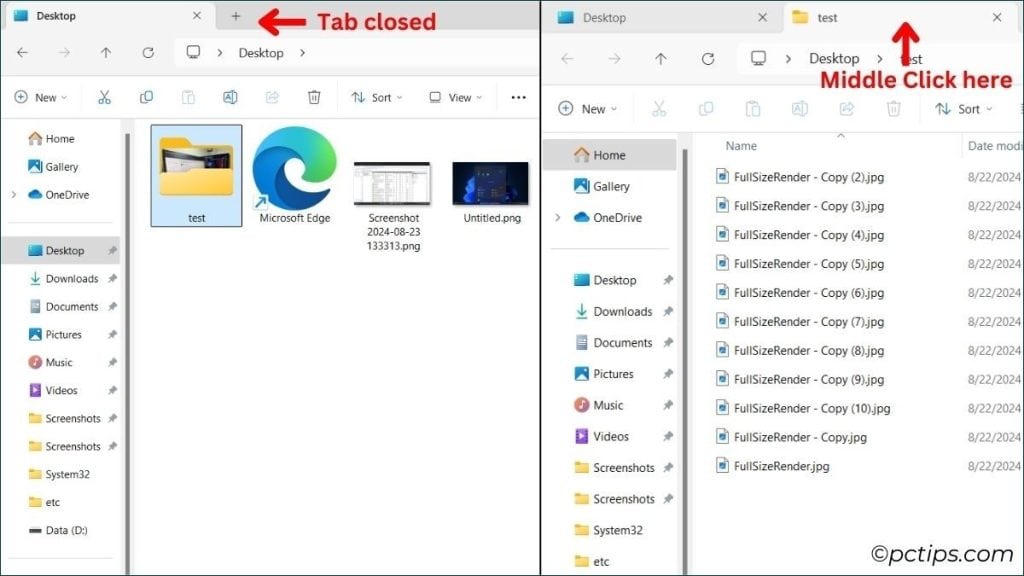
No need to carefully aim for that tiny ‘X’ button. Just click and it’s gone.
This also works for closing application windows or tabs from the taskbar thumbnail previews.
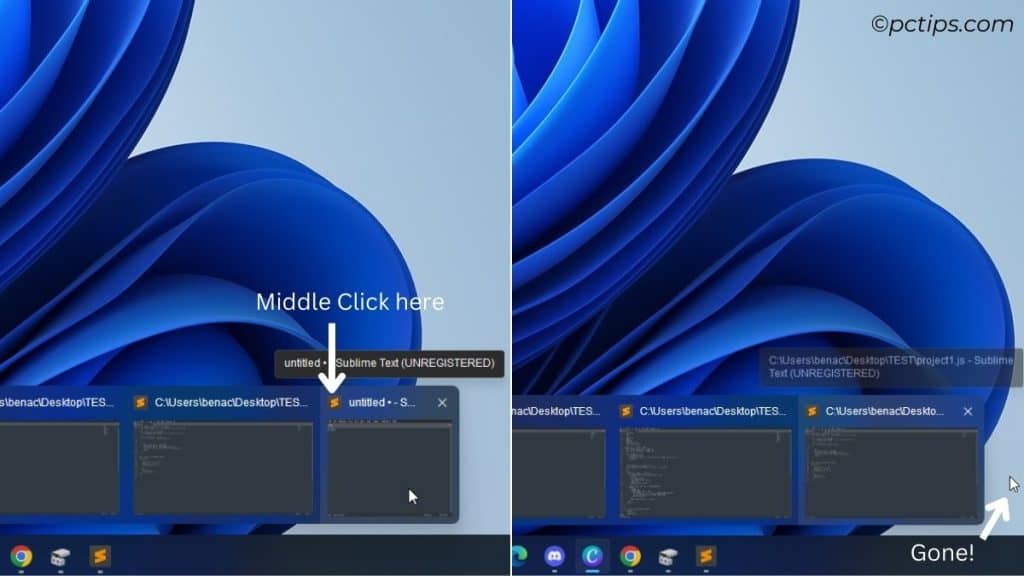
Hover over the app on the taskbar, then middle click the thumbnail of the window you want to close. Poof, it disappears!
But my favorite use for the middle click close is in the browser.
If you’re a tab hoarder like me, just scroll through your tabs and middle click the ones you want to close.
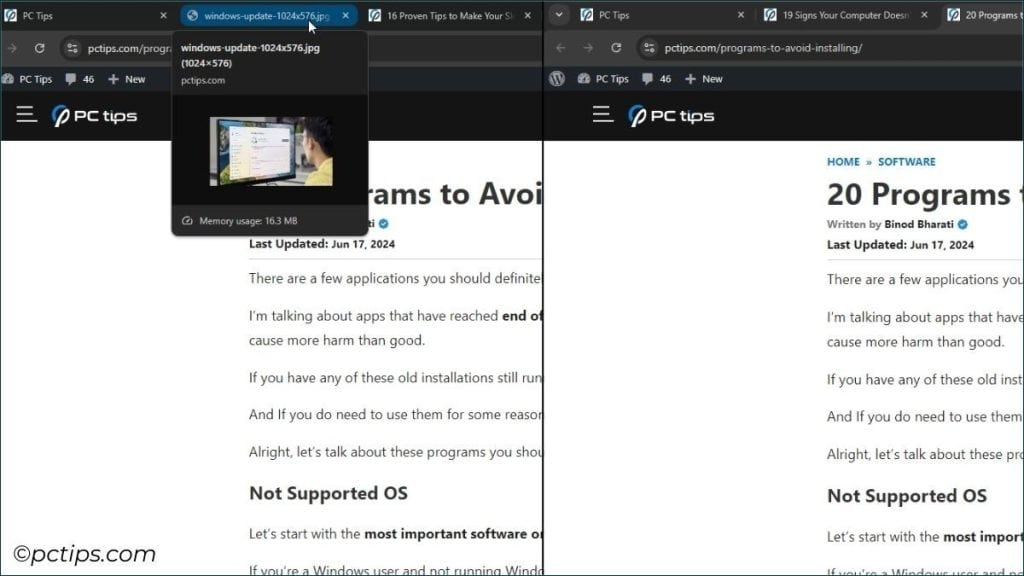
It’s satisfyingly efficient.
Tip: You can even middle-click to close windows or tabs without activating them.
Hover to Preview
Sometimes, you want just a little peek without the full commitment of a click.
That’s where hovering comes in.
In many apps, simply hovering your mouse over an item will give you additional details.
Hover over a taskbar icon to see thumbnails of that app’s open windows.

In File Explorer, hovering often pops up a helpful tooltip menu.
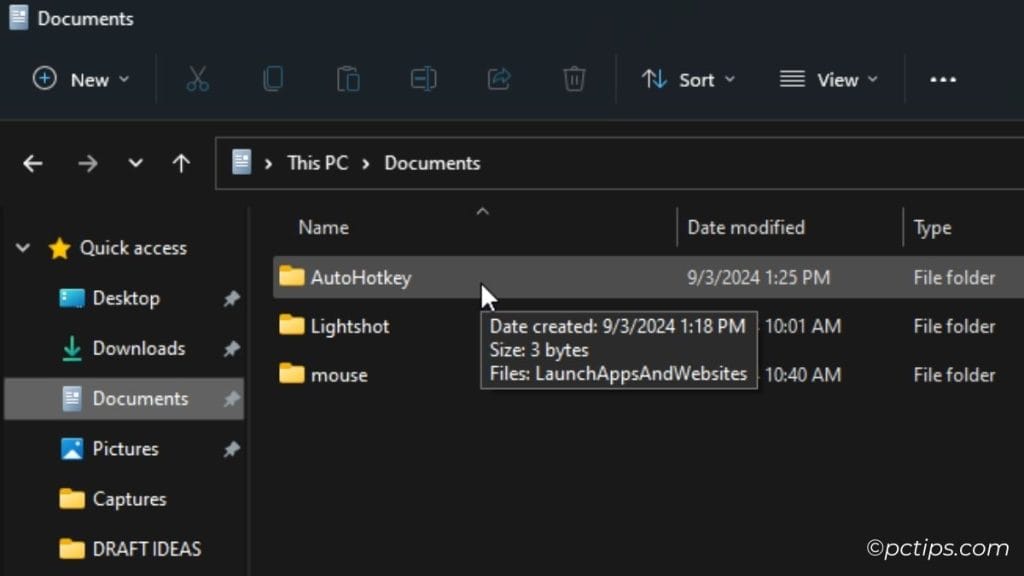
But perhaps the most useful hover of all is on webpage links.
Hover before you click to see where a link leads and make sure it’s legit.
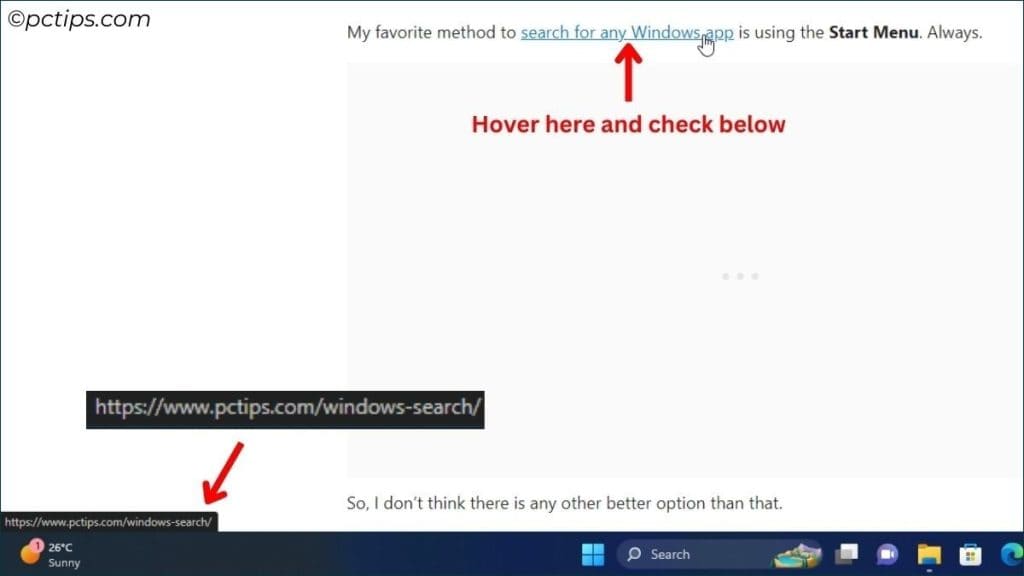
It’s one of the best ways to check if a link is safe before taking the plunge.
Selection Tricks
When working with text, precise selection is key, and I’ve got a few mouse techniques that really help:
- Double-clicking a word will select the entire word
- Triple-clicking will select the whole paragraph
- You can also select a range of text by clicking where you want to start, holding Shift, then clicking where you want to end
Once selected, you can drag the text to any text editor, Run box, or address bar to search.
This also works for selecting multiple files in File Explorer:
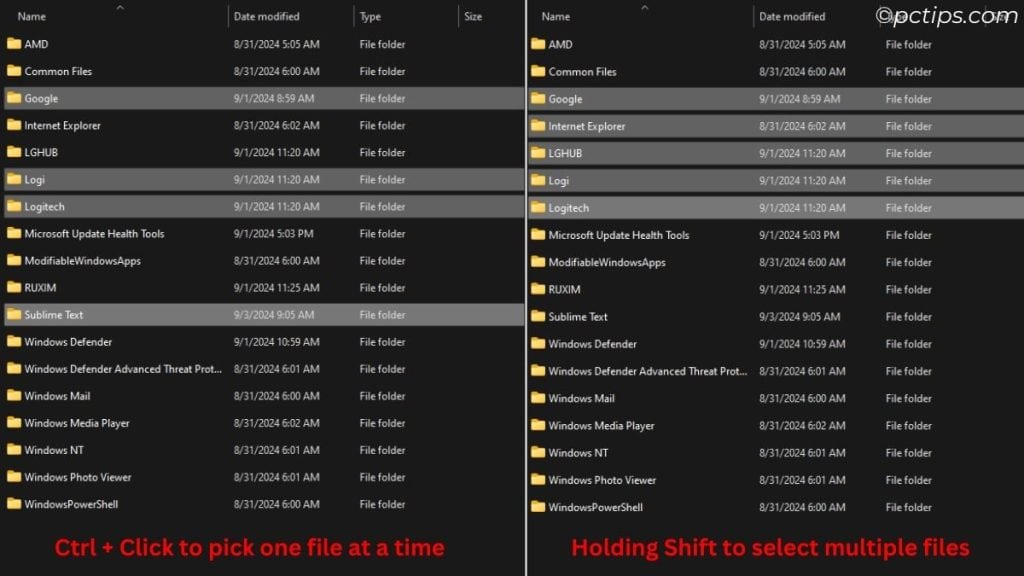
- Ctrl+Click to cherry-pick files one at a time
- To select all files between two points, click the first file, hold Shift, then click the last file
Quickly Copy Links
You probably already know that you can right-click a link and select “Copy link” from the menu, but there’s an even faster way.
Holding Alt will disable the link so clicking it won’t navigate away.
Then, you can triple-click the link to highlight the entire URL and hit Ctrl+C to copy.
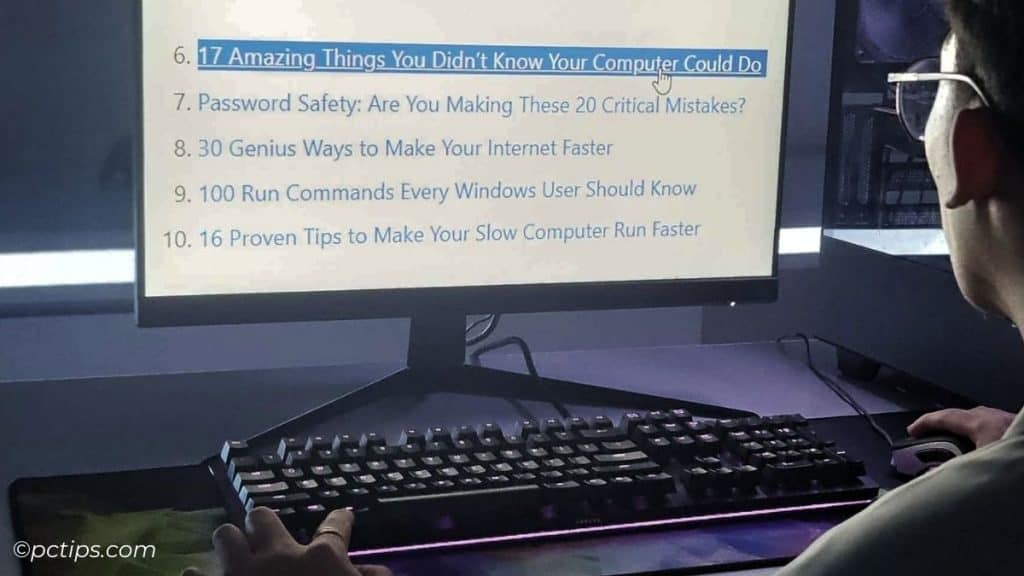
Once the link is copied, you can just Ctrl+V paste it wherever you need it.
I use this constantly, especially when assembling research notes or compiling resources.
For more copying and pasting tips, check out my article: 14 Killer Copy and Paste Tricks You Need to Know.
Zoom With Ctrl + Scroll Wheel
One of the most well-known but underutilized mouse features is the ability to zoom in and out using the scroll wheel.
Just hold the Ctrl key and roll the wheel up to zoom in, down to zoom out.
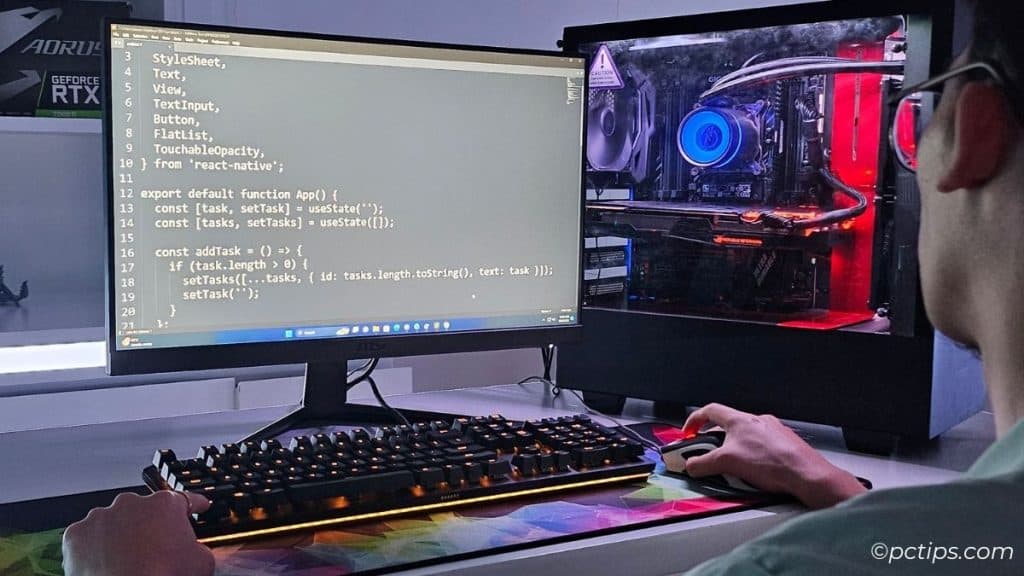
This works almost everywhere – web pages, Word documents, Excel sheets, PDF files, you name it.
I especially love using it to quickly adjust the font size in my code editor or to get a bird’s eye view of a complex spreadsheet.
Snap Windows With Mouse Drag
Windows Snap is one of my favorite features for multitasking.
While I prefer using keyboard shortcuts to trigger it, you can also do it with a simple mouse drag.
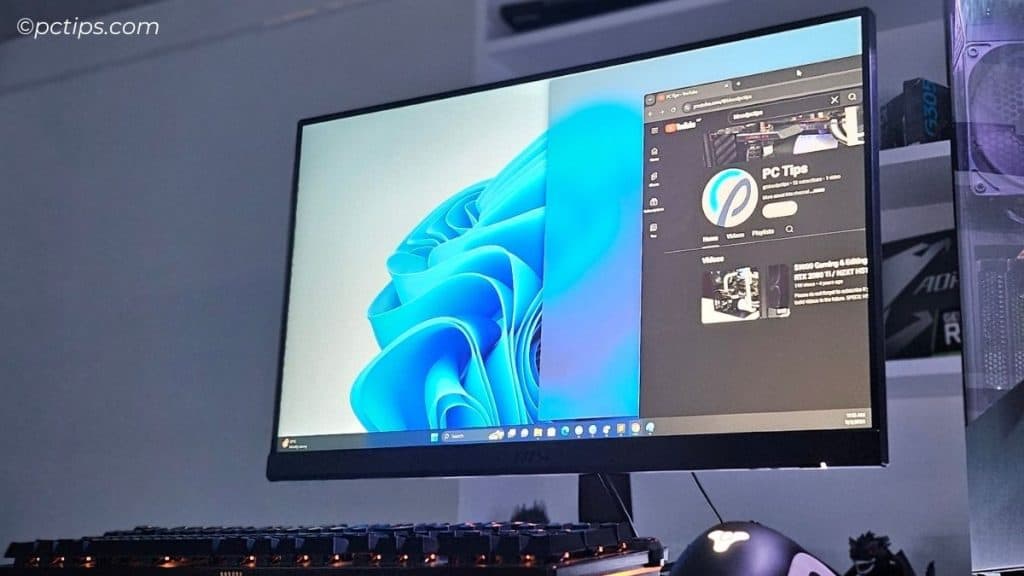
Click and hold the title bar of any window and drag it to the left or right edge of your screen until a translucent outline appears.
Release the mouse, and the window will snap into place.
You can even drag a window to the top of the screen to reveal the Snap Layout options.
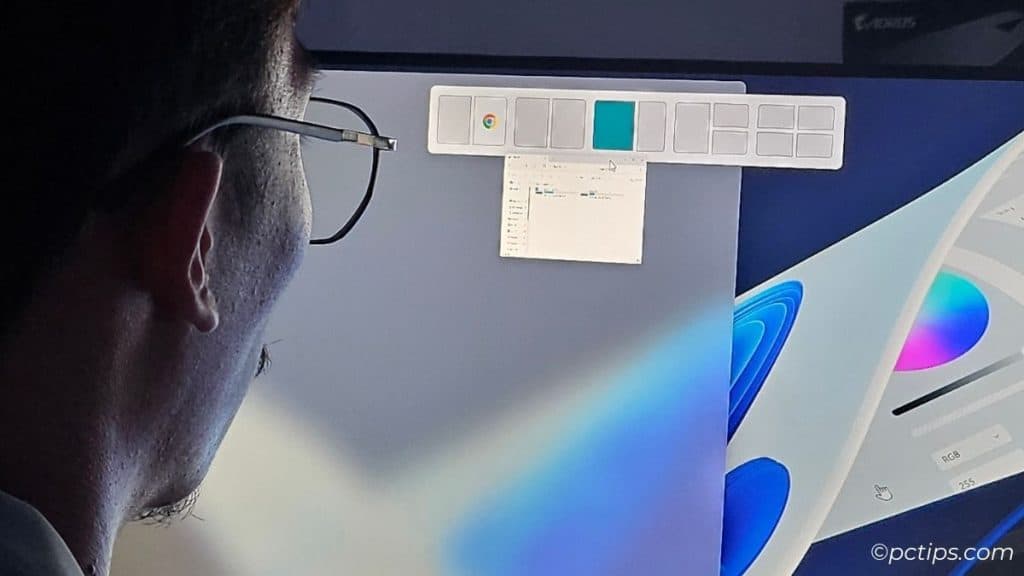
But do keep in mind that it only works on the latest Windows 11 (22H2 and later). Here are some more new Windows features that you can check out.
Just select your desired layout to arrange windows perfectly.
For even more advanced layouts, check out FancyZones in Microsoft PowerToys.
Some bonus tips:
- Dragging to the top edge maximizes the window.
- Double-click a window’s title bar to maximize it, and double-click again to restore.
- You can also grab the title bar and shake it vigorously to minimize all other windows, leaving you focused on just the one you shook.
Drag and Drop Like A Pro
Dragging and dropping is a classic mouse move, but there’s more to it than you might think.
- Drag and drop files between File Explorer windows
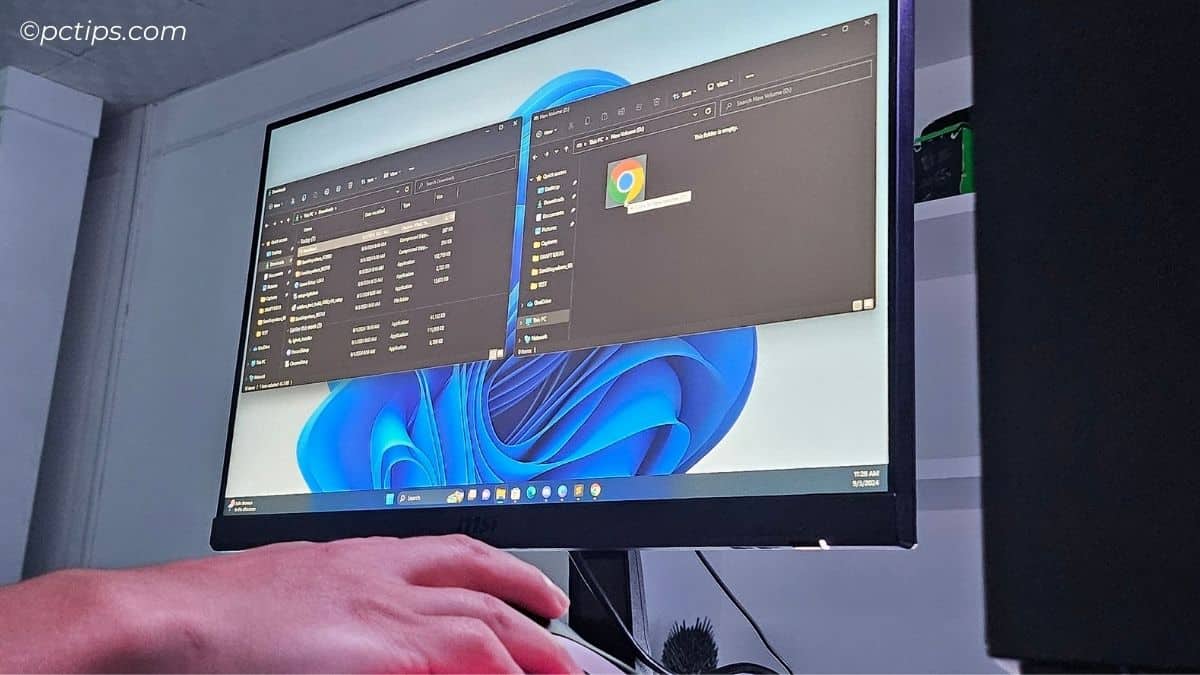
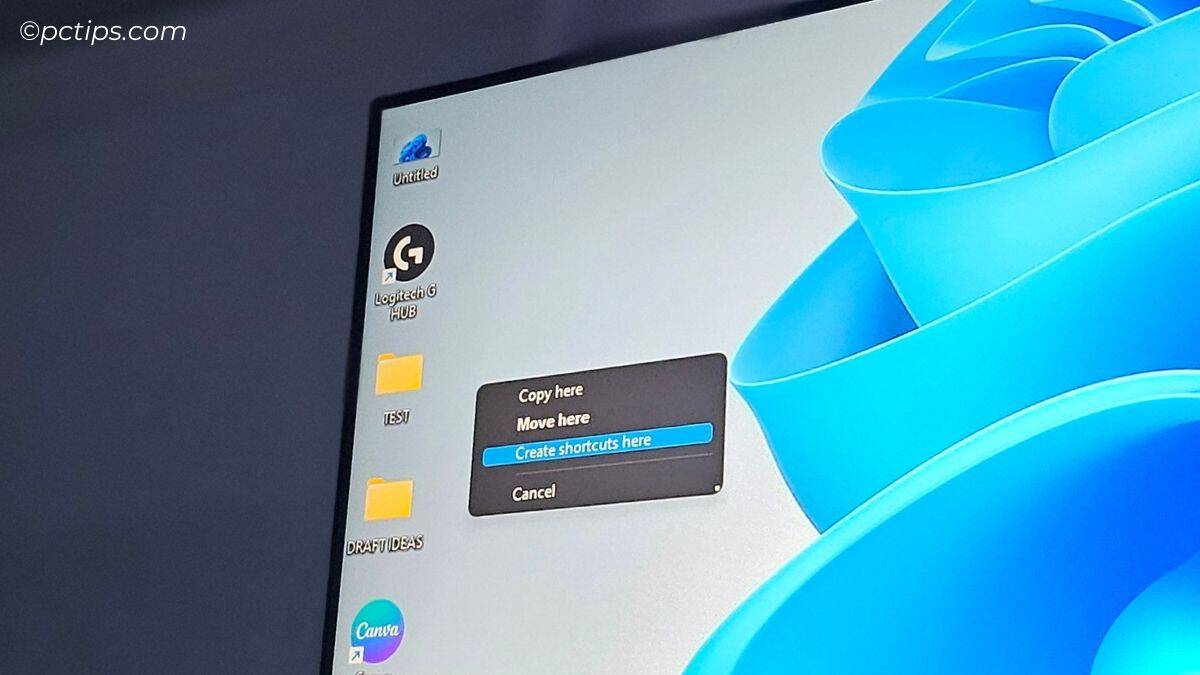
- Right-click and drag for more options (copy, create shortcut, etc.)
- Drag text or images between application windows
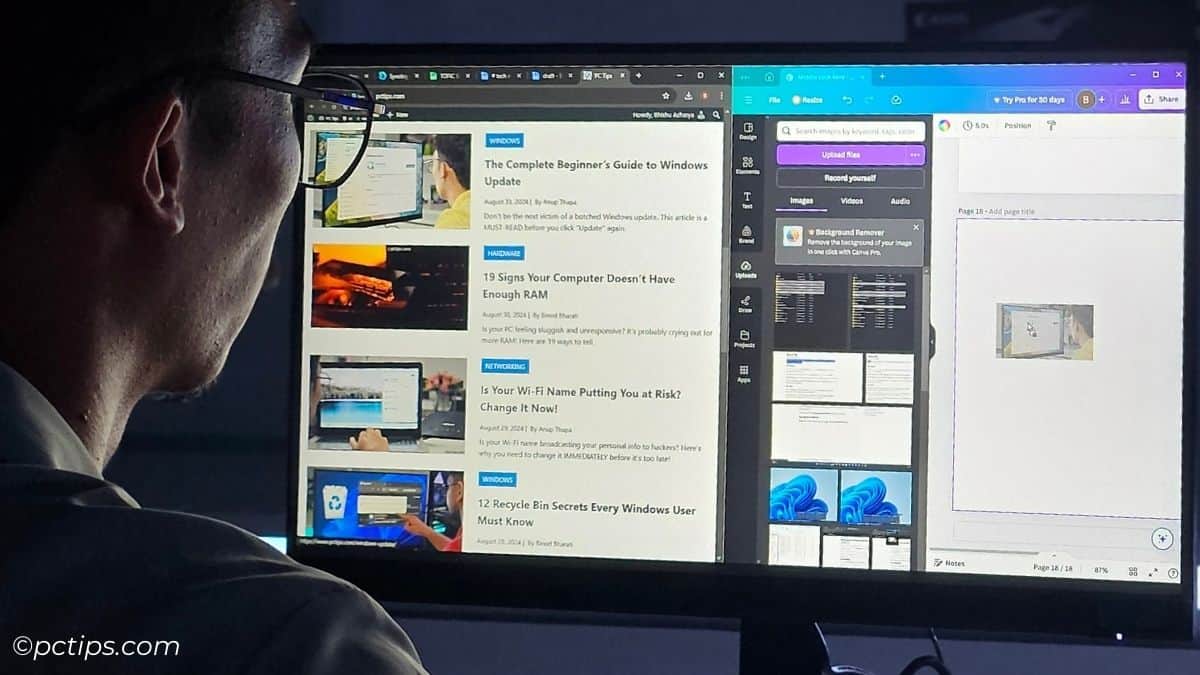
- Drag files onto upload controls on web pages
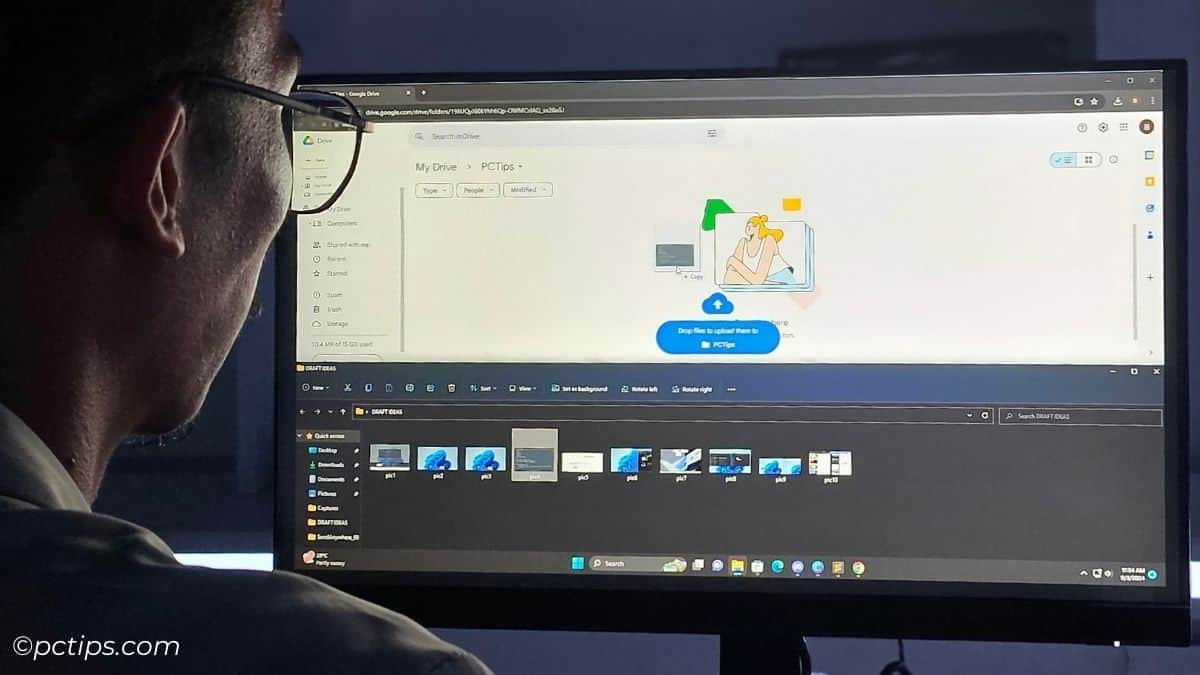
For more ideas, see my article: 15 Windows Drag-and-Drop Secrets Nobody Told You.
Navigate Back and Forward With Thumb Buttons
If your mouse has thumb buttons (the ones on the side that you can press with your thumb), you can usually use them to navigate back and forward in your web browser or file explorer.
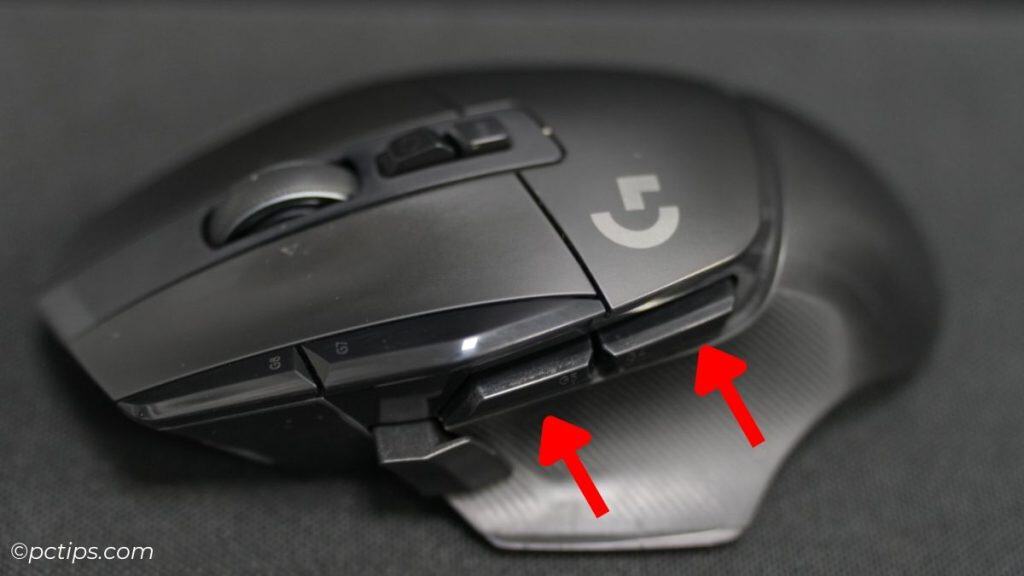
This is so much faster than moving the mouse up to the back/forward buttons or pressing Alt+Left/Right.
Some mice also let you remap the thumb buttons to perform other functions, like closing tabs or switching between virtual desktops.
Check your mouse software to see what options are available.
Download Mouse Software For More Features
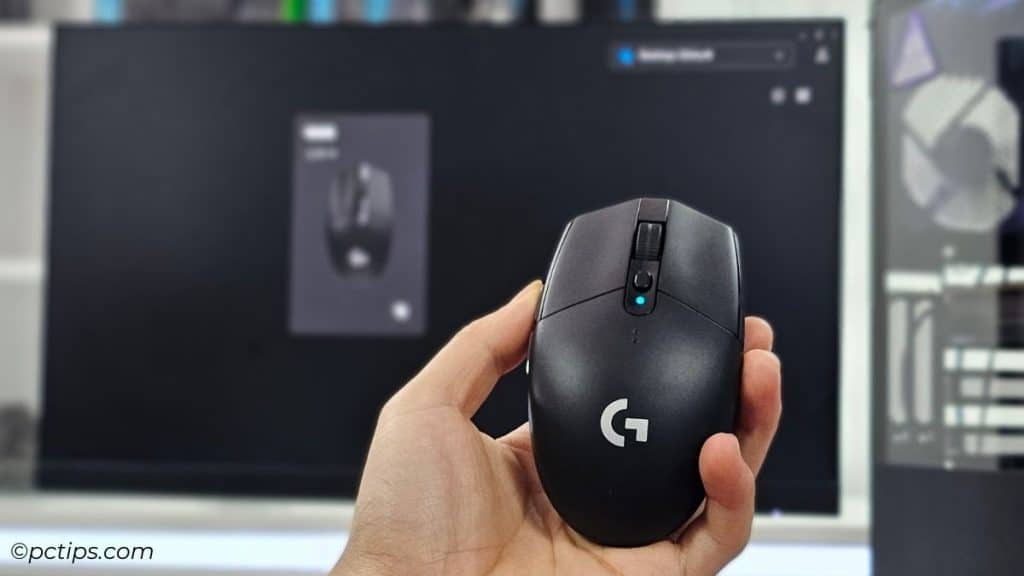
If you really want to supercharge your mousing, consider installing the custom software for your mouse, if it exists.
Many mouse makers, like Razer, Logitech, and Corsair, offer advanced software that lets you customize buttons, create macros, adjust sensitivity, and more.
These programs can be especially useful for gaming mice, which often have extra buttons and features that you can map to in-game actions.
But even for productivity, being able to customize your mouse can be a huge time-saver.
Just be sure to download the software from the manufacturer’s official website to avoid any potential malware.
Find Your Ideal DPI Setting
DPI, or dots per inch, is a measure of your mouse’s sensitivity.
A higher DPI means the mouse cursor will travel further on screen with less physical movement of the mouse.
Lower DPI means more precise control, but you’ll need to move the mouse further.
For precise tasks like photo editing or sniping in an FPS, you might want a lower DPI for more accurate control.
For zipping around large screens or whipping 180s in a game, a higher DPI can be helpful.
Most gaming mice let you adjust DPI on-the-fly with a dedicated button.
For example, my Logitech G502x has a “DPI shift button” below the thumb buttons that temporarily changes DPI while held.
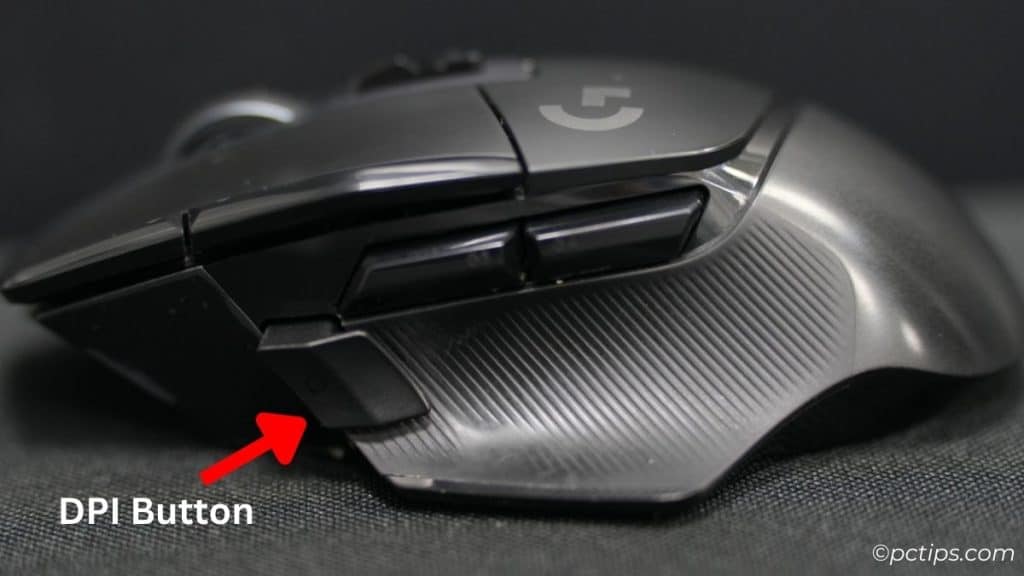
I tend to use a higher DPI like 3600-6400 on my triple monitor setup for general computing, but whenever I’m gaming or need more precision, I can hold the DPI shift to drop to 800 DPI.
In the mouse software, you can set various DPI levels and use DPI Up/Down buttons to change as needed.
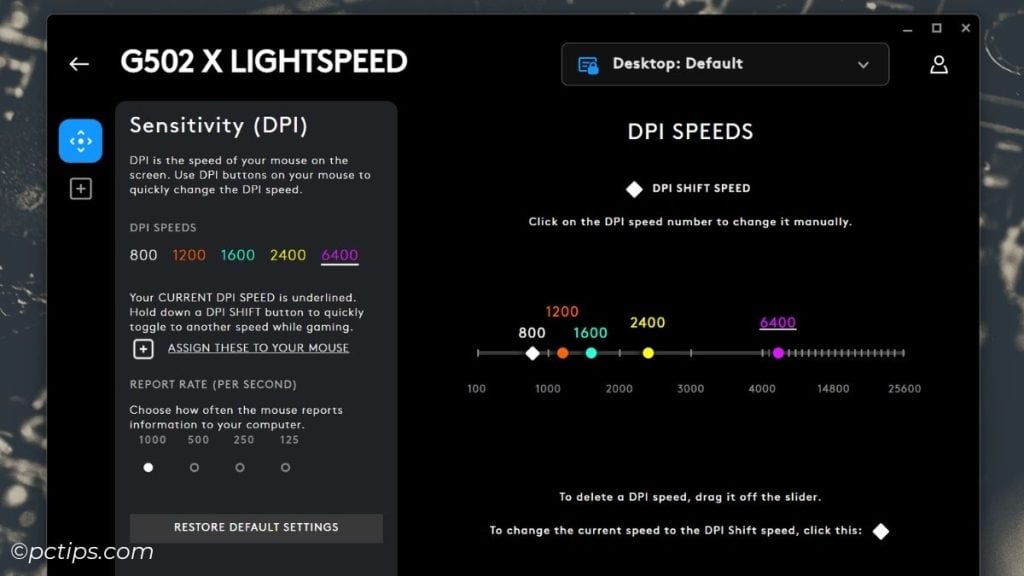
Experiment to find your perfect sensitivity for different tasks.
Customize Your Buttons
This is especially useful for mice with lots of extra buttons, like MMO gaming mice.
Take the Logitech G502x for instance. It has a whopping 13 programmable buttons!
Using your mouse’s software (in this case, Logitech G HUB), you can map buttons to keyboard shortcuts, macros, or even completely different mouse functions.
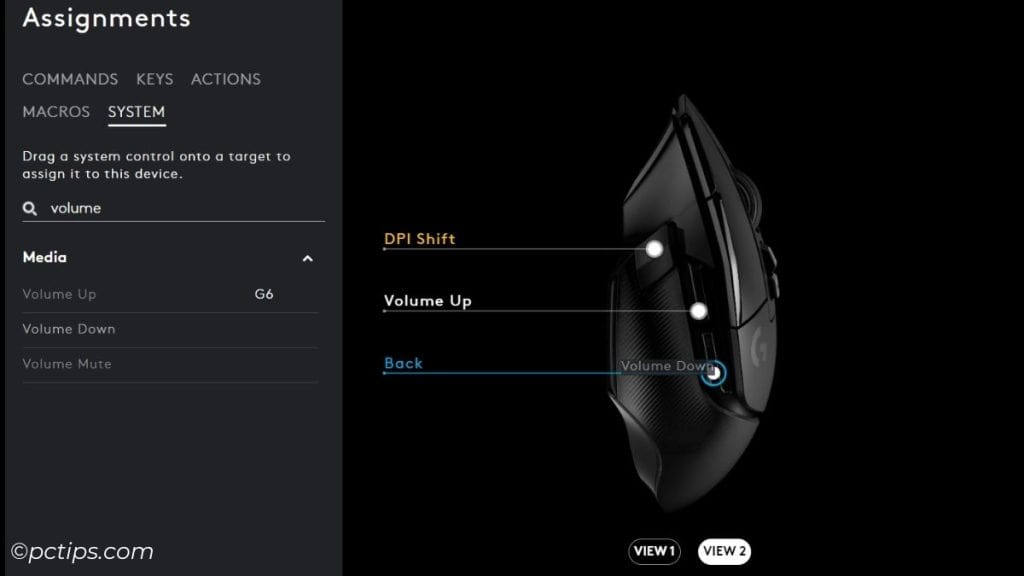
Maybe you want the thumb buttons to control volume instead of navigating back/forward.
Or perhaps you want a button dedicated to launching your email app.
The possibilities are nearly endless.
You can create different profiles for different games and applications, ensuring your mouse is always optimized for the task at hand.
Set Up Mouse Profiles For Different Tasks
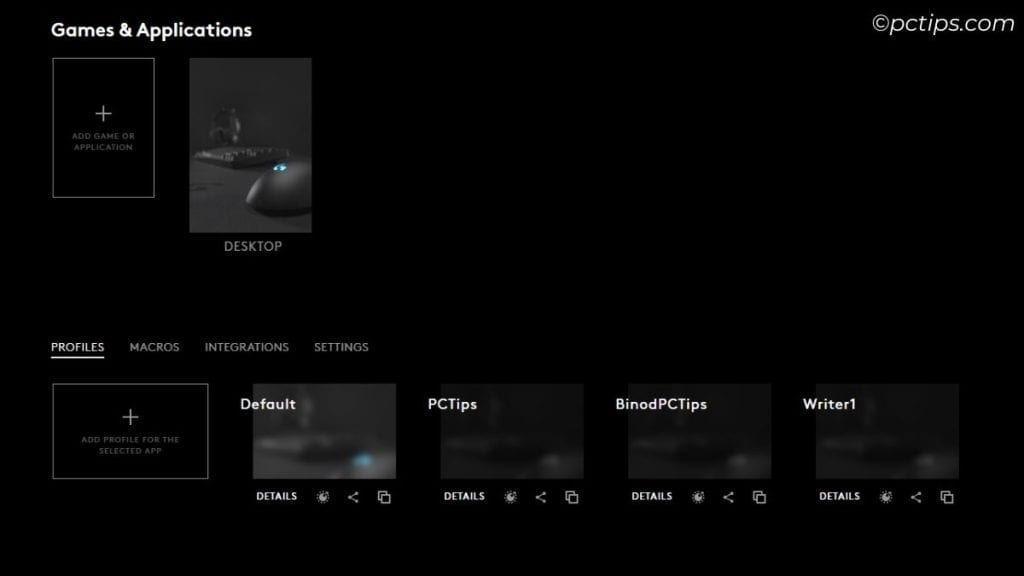
If you use your computer for very different tasks – like gaming, graphic design, and office work – you might find that different mouse settings work best for each task.
That’s where mouse profiles come in handy.
Many mouse software suites let you create multiple profiles with different button mappings, DPI settings, and more.
You can then switch between these profiles as you switch tasks.
Your mouse will transform to perfectly suit the job at hand!
Some mice even have onboard memory, so you can take your profiles with you to other computers.
Enjoy Hyperfast Scrolling
If you deal with long documents or endlessly scrolling web pages, you’ve gotta try hyperfast scrolling.
Some mice, like the Logitech G502 or MX series, have a special scroll wheel that can unlock to spin freely.
Logitech calls this “Hyperfast/MagSpeed Electromagnetic scrolling.”
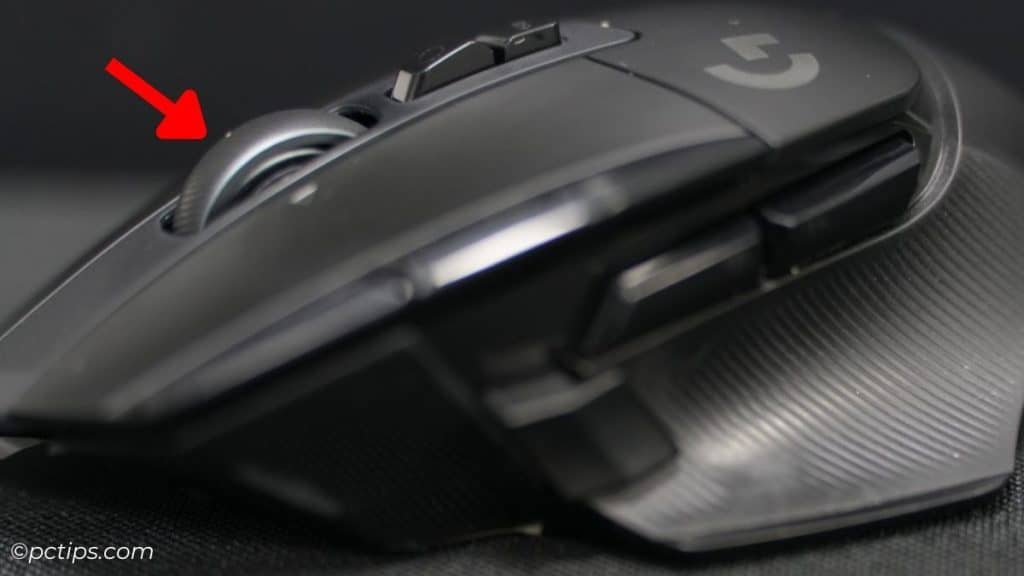
In this mode, the wheel can scroll up to 1,000 lines per second!
Give the wheel a flick and it’ll keep spinning, scrolling through pages and pages with a single finger swipe.
It’s magical for powering through long PDFs or websites.
Most mice with this feature have a button to toggle between free-spinning and regular “ratchet” mode scrolling.
Scroll Horizontally
If you’re lucky enough to own a mouse with a thumbwheel, like the Logitech MX Master 3, you can use it to scroll horizontally.
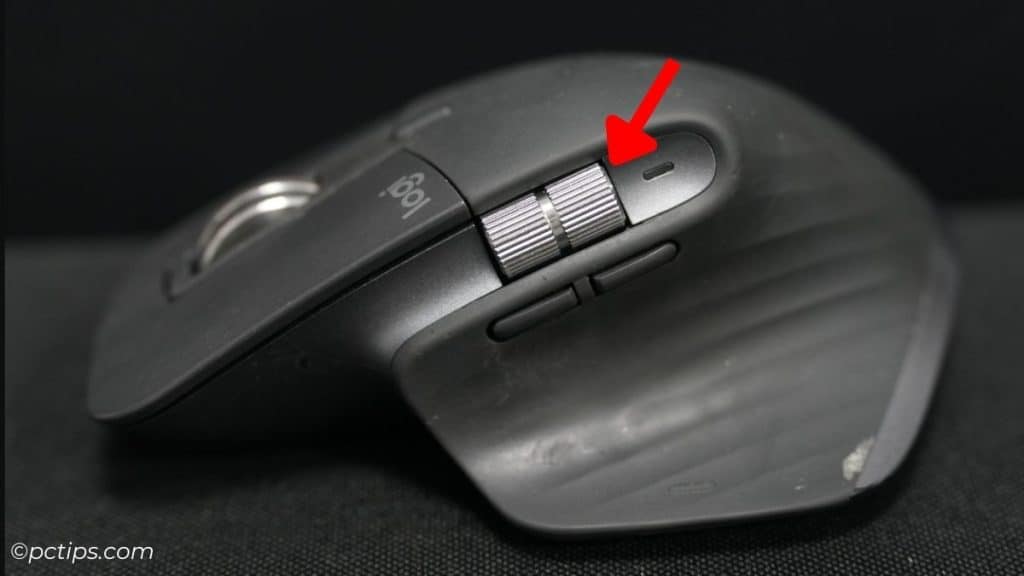
This is incredibly useful for wide documents like spreadsheets or for websites with horizontal layouts.
No more clicking and dragging the horizontal scroll bar!
Use Your Mouse on Multiple Computers
Again, mouse like the Logitech MX series, can be paired with multiple computers and switch between them seamlessly.
You can even copy and paste text, images, and files between computers using Logitech Flow.

But even if you don’t have a mouse with this built-in feature, you can buy a USB switch to share your mouse (and other USB peripherals) between computers.
I use a SABRENT USB 2.0 Sharing Switch which lets me share my mouse and keyboard between up to 4 computers.
Adjust Your Mouse Weight For Comfort
Gaming mice like the Logitech G502/G502x often come with adjustable weights.
You can add or remove weights to make the mouse heavier or lighter.
A heavier mouse can feel more stable and precise, while a lighter mouse is easier to flick around.
The weights are usually hidden in the mouse’s underbelly.
Pop open the hatch, add or remove weights until it feels right, then get back to work.
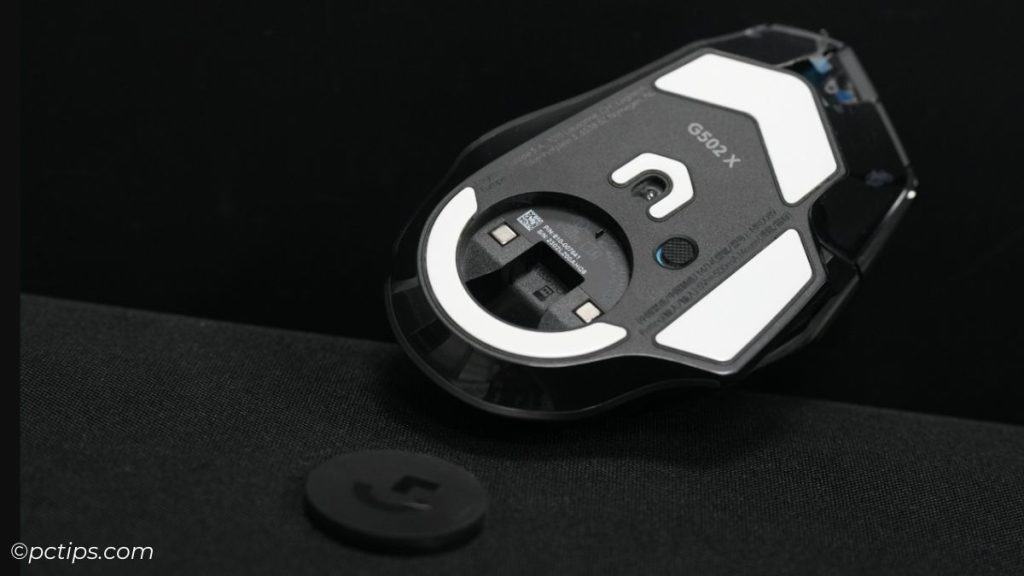
It’s all about personal preference.
Master Mouse Gestures
For the true mouse connoisseurs out there, let me introduce you to mouse gestures.
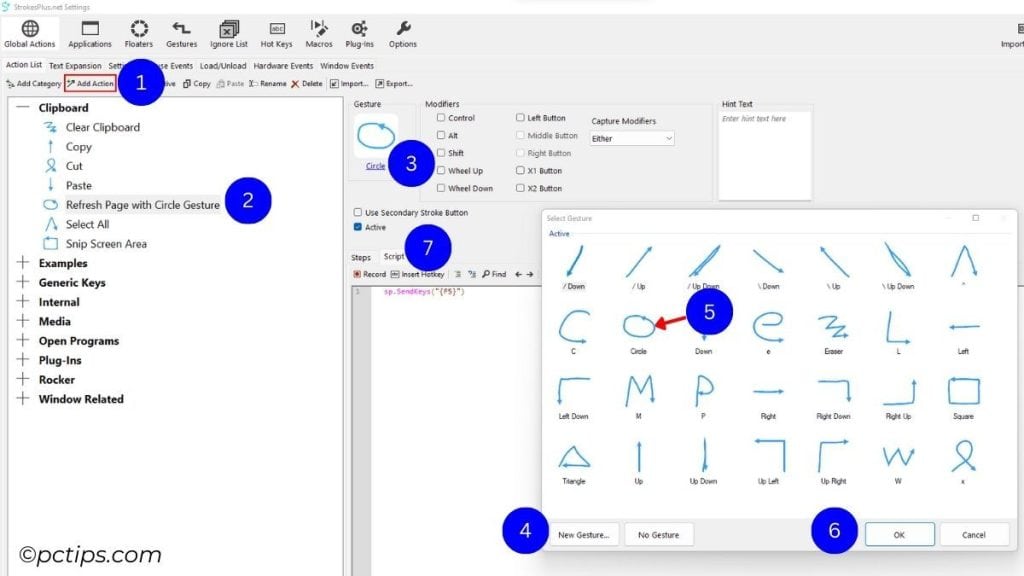
Mouse gestures let you trigger actions by moving your mouse in a specific pattern.
For example, you could set up a gesture where drawing a circle with your mouse refreshes the page, or drawing a “Z” opens your email inbox.
It takes a bit of setup (and a lot of practice), but once you’ve got your gestures down, you’ll feel like a productivity wizard waving a magic wand.
Some mouse software includes gesture support, but you can also use third-party programs like StrokesPlus to add gesture control to any mouse.
Make Macros For Repetitive Tasks
Macros are like cheat codes for your computer. They let you automate complex tasks with a single button press.
Many mouse software packages include macro editors that let you record and assign custom macros to your mouse buttons.
You can also use a dedicated macro tool like TinyTask or AutoHotkey
For example, you could set up a macro that launches your most-used apps and websites with a single click:
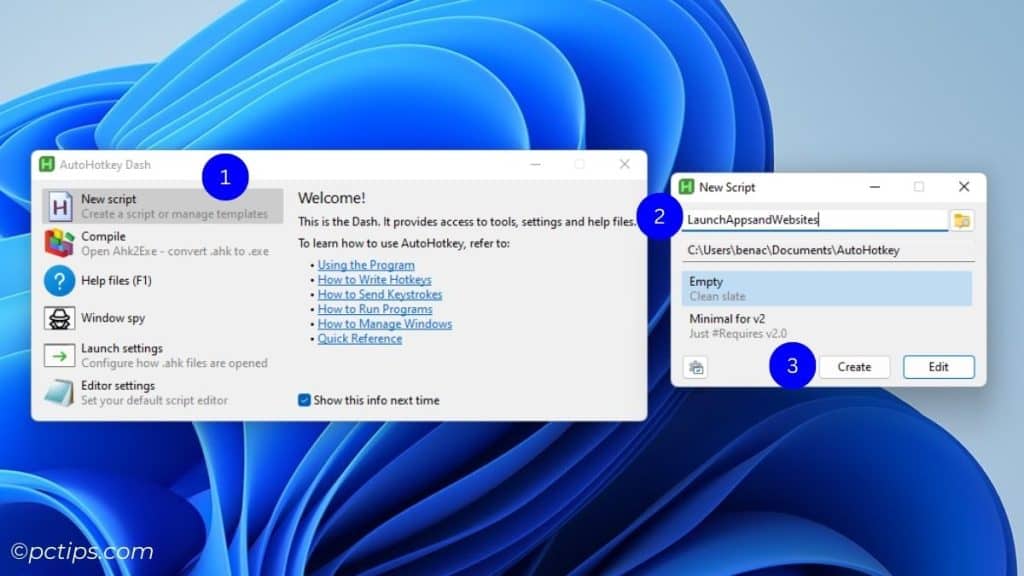
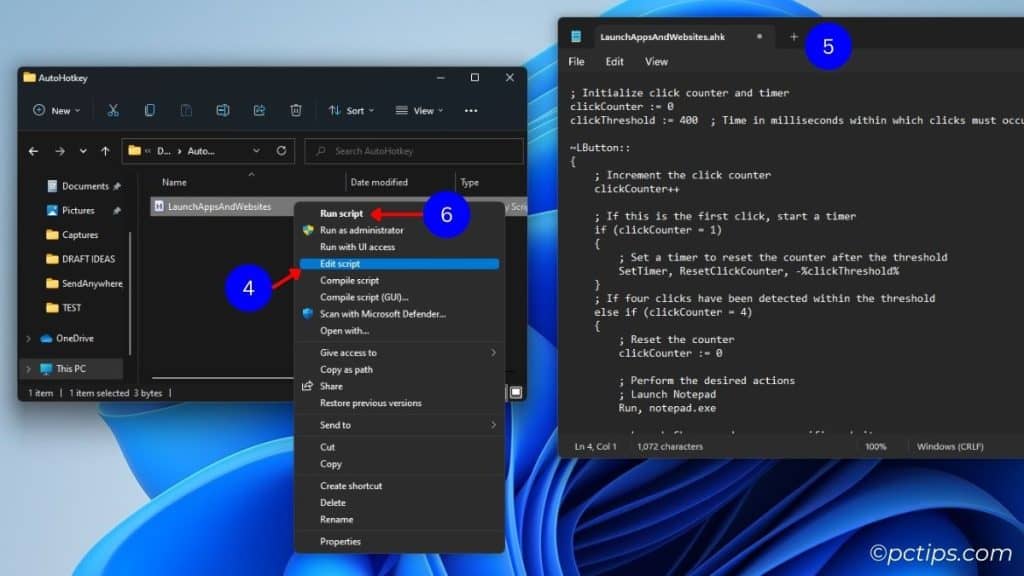
Or create a macro that types out your email signature so you never have to type it again.
The possibilities are endless!
If you find yourself performing the same sequence of actions over and over, consider if a macro could automate it for you.
Choose the Right Mouse For Your Needs
With so many mice available, it’s important to pick one that fits your specific needs.
Think about things like:
- Wireless vs wired
- Ergonomic design for comfort
- Number and placement of buttons
- Sensor type and maximum DPI
- Battery life (for wireless mice)
- Customization and software options
There’s no single “best mouse” for everyone, but with a little research, you can find the perfect mouse for your needs.
Personally, I’m a big fan of the Logitech G502 series. I used the original G502 for years before upgrading to the G502X.
But I’ve also had great experiences with mice from Razer, Corsair, and others.
I hope these tricks will change the way you use your mouse.
I tried to share genuinely useful tips that I’ve personally tested and can vouch for.
If you found this helpful, please bookmark it, share it on social media, and let me know your favorite mouse tricks in the comments below.
GREAT INFO as usual!! TY