Best Mouse Settings (Tested & Optimized)
Last Updated:
I’ve used a LOT of mice over the years — everything from cheap basic 2-button scrollers to top-of-the-line gaming beasts.
And along the way, I’ve tinkered with practically every mouse setting imaginable to figure out what actually makes a difference.
Buckle up, because what I’ve discovered might just change the way you use your mouse forever.
Understanding Mouse DPI and Sensitivity
The first things you NEED to understand are DPI and sensitivity.
DPI (dots per inch) is a hardware spec—it measures how many “dots” your mouse reports per inch of physical movement.
The higher the DPI, the LESS you have to move your hand to move the cursor on screen.
Sensitivity (or “pointer speed” in Windows) is software-based. It multiplies that DPI signal.
Finding the right balance is key.
With higher pointer speeds, you sacrifice some accuracy for quickness.
So what’s the sweet spot?
Finding Your Sweet Spot
To adjust your pointer speed in Windows:
- Open Run (Win + R) ( Read: 100 Most Useful Run Commands )
- Type
main.cpland hit Enter - Go to the Pointer Options tab
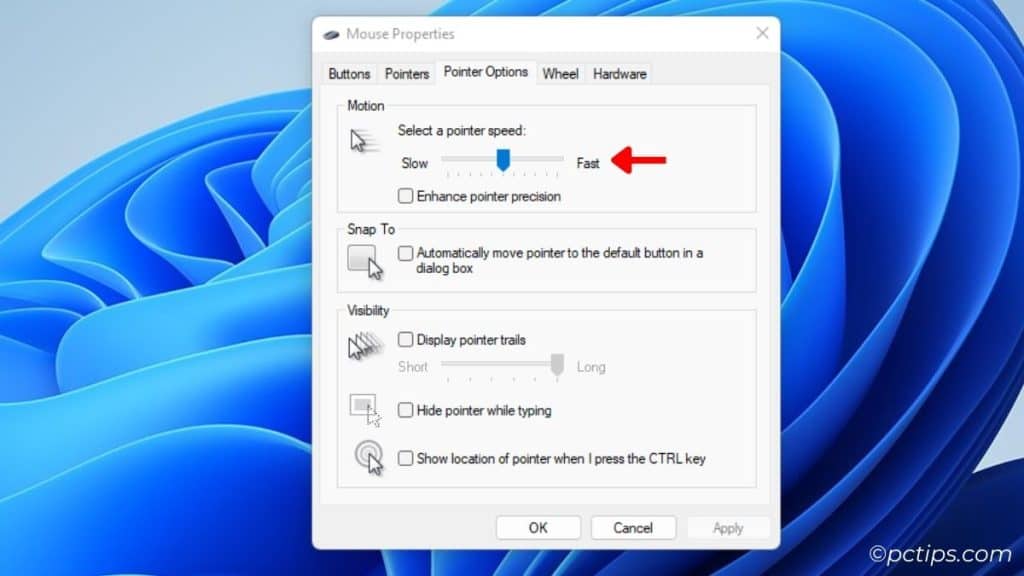
I tested every single notch on that slider.
For most people, the 6th notch is the ideal setting. It gives a good balance of speed and precision.
But it depends on your DPI, screen size, and personal preference.
Experiment to find what feels right!
Quick note: The Mouse Properties window scales sensitivity from 1-11. But in the new Windows 11 Settings app, it’s 1-20. It’s the same thing under the hood.
Enhance Pointer Precision… Or Not
While you’re in that settings window, you might notice the “Enhance pointer precision” checkbox.
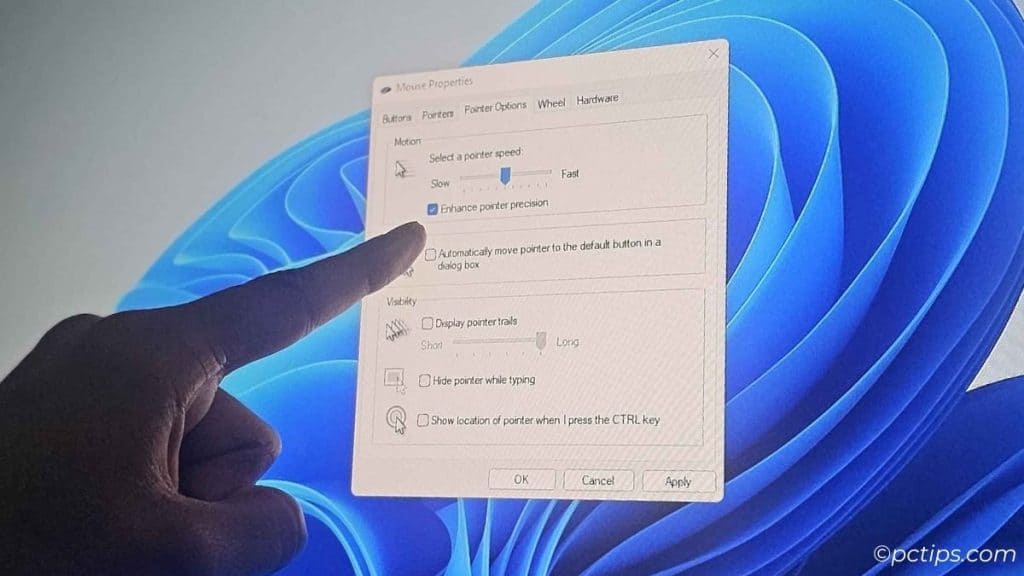
This setting adjusts your pointer speed based on how fast you move the mouse.
It’s a good concept in theory, but in practice, I recommend keeping it OFF for more consistent control.
Most people, especially gamers and precision-oriented users, will prefer it disabled.
Change Your DPI in Mouse Software
Most modern gaming mice can go up to 25000+ DPI these days.
Now, I’m not saying you need to go quite THAT high.
But don’t be afraid to experiment with 800, 1600, even 3600 DPI.
Especially if you’re on a high-res or multi-monitor setup.
I personally use 3600-6400 DPI on my triple monitor setup
For everyday computing and even gaming, 800-1600 DPI is great for most people.
To change your mouse DPI:
- Google “[your mouse model] software”
- Install the mouse software
- Look for DPI or sensitivity settings
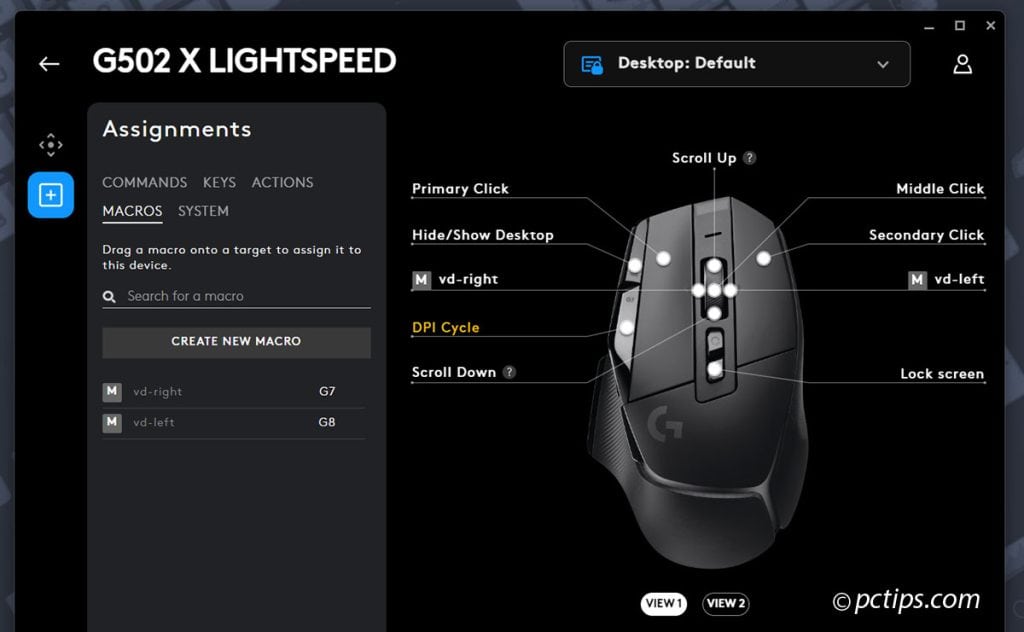
For example, I use Logitech G HUB for my G502x mouse.
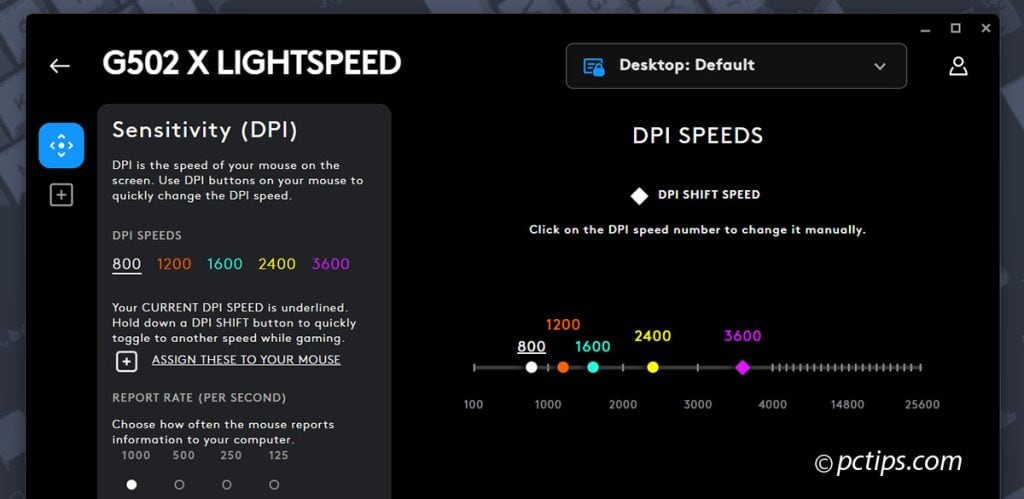
You can usually set multiple DPI “stages” and switch between them with a button press.
If your mouse doesn’t have software, no worries—you can use the Windows sensitivity slider instead.
Max Out Your Polling Rate
Polling rate is how often your mouse reports its position to your PC.
Higher polling rates can reduce input lag.
Most gaming mice let you adjust this.
I recommend maxing it out – usually 1000Hz.
You’ll find this setting in the same software as the DPI options.
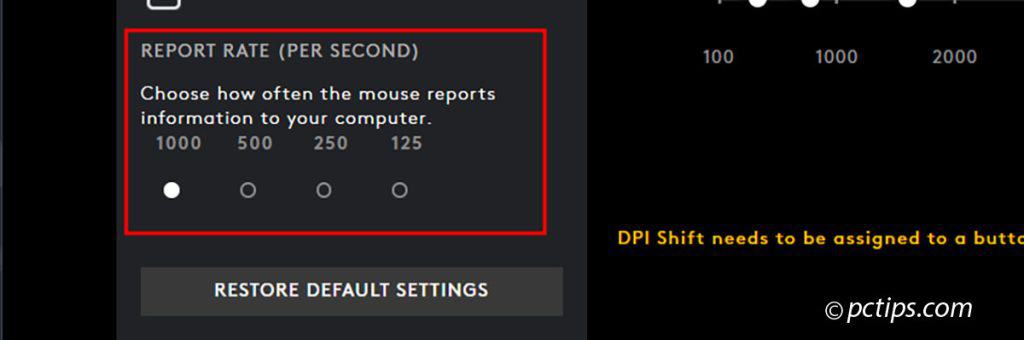
Note that higher polling rates may increase CPU usage slightly. .
Pick a Pointer You Can See
For the visually impaired, I can’t recommend the Pointer Trails feature enough.
It helped my dad a TON when he was learning to use a mouse.
Just tick the box and adjust the length of the trail.
That said, I personally find trails VERY distracting as an everyday user.
If you feel the same, just leave it unchecked.
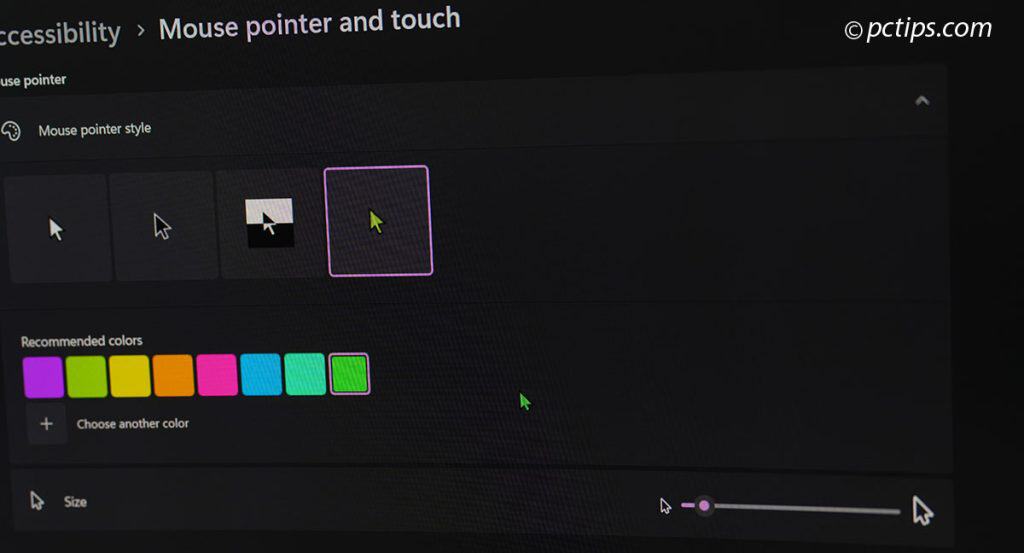
What I DO like is rocking a big, bold pointer that’s easy to spot on any background!
Here’s how to set it up:
Win 11:
- Go to Settings > Accessibility > Mouse Pointer and Touch
- Choose your pointer color and size
Win 10:
- Search for “change pointer” in Start
- In the “Pointers” options, choose your scheme
I’m loving the jumbo neon green these days…it NEVER gets lost, even on my triple monitor setup.
While you’re in there, I also suggest ticking the “Show location of pointer when I press the CTRL key” option.

It’s super handy for those times when you lose track of your cursor.
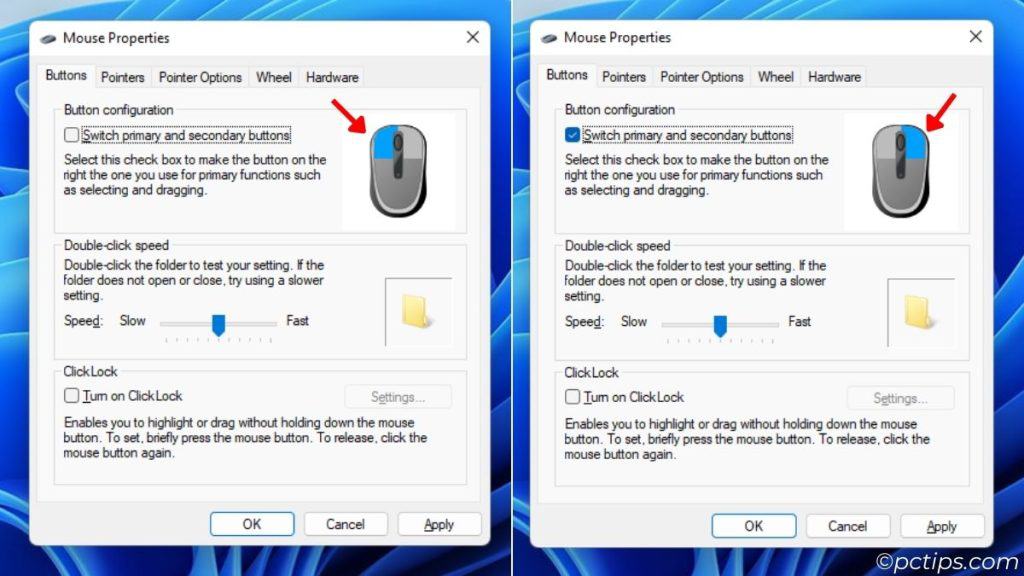
Swap Your Primary Buttons
If you’re a lefty, you might prefer to swap your primary mouse button.
To do this:
- Open Mouse Properties
- Go to the Buttons tab
- Check “Switch primary and secondary buttons“
For most people, the default primary button settings are just fine.
Finding the Right Double-Click Speed
Have you ever tried to open a file or folder with a quick double-click, only to have nothing happen?
Or worse, have it register as TWO separate clicks and mess up your flow? Ugh, I HATE that.
If this happens to you a lot, it might be time to adjust your double-click speed.
Here’s how:
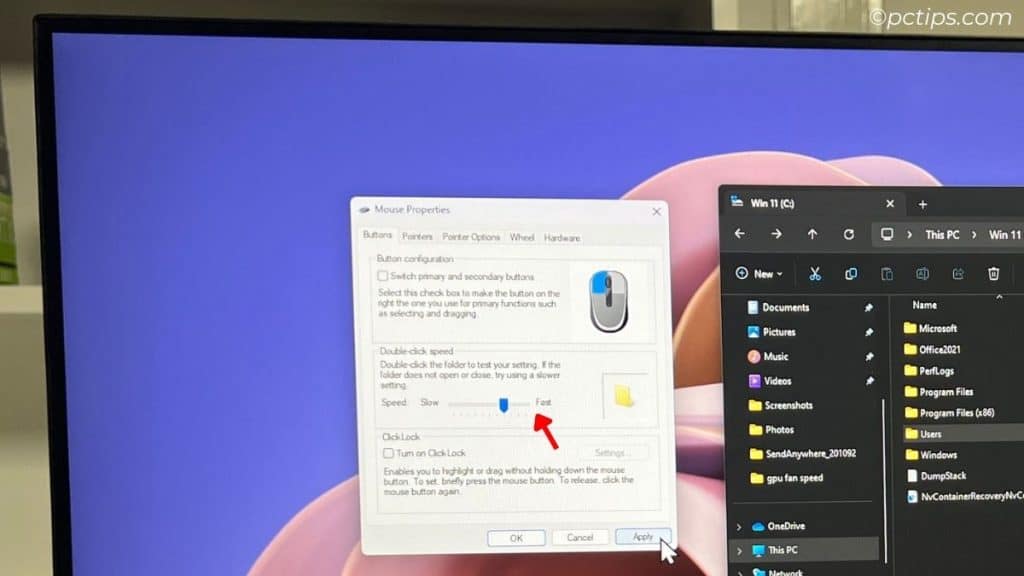
- Open the Mouse Properties window (instructions above)
- Under the Buttons tab, look for the Double-click speed slider
- Adjust it to a faster setting, but not so fast that single-clicks register as doubles
I suggest doing the test using the folder icon there to find what feels right.
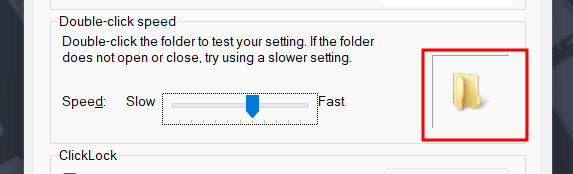
I find the default 5th notch works great for most people and mice.
But if you have an older mouse with squishy buttons, bumping it up to 7 or 8 can help prevent accidental double-clicks.
To ClickLock or Not to ClickLock
ClickLock is a Windows feature that lets you highlight or drag without holding down the mouse button.
You click once to start and again to stop.
It’s meant as an accessibility feature for people who have difficulty holding down a button.
But I find it more annoying than helpful.
If you do want to enable it…
Go to the “Buttons” tab in Mouse Properties and check the box.
You can adjust the hold-down delay too.
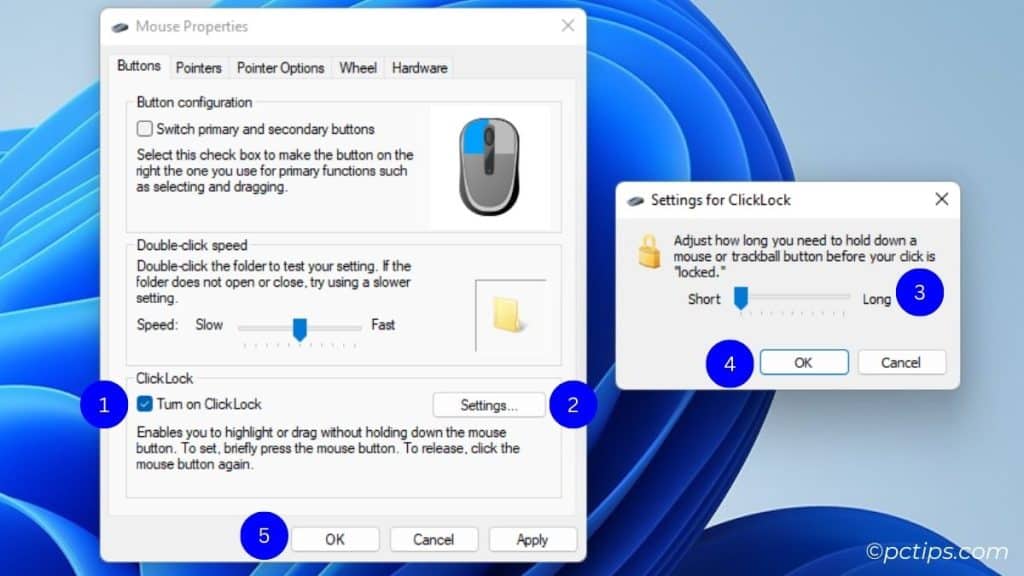
Personally, I leave this one unchecked. But it’s there if you need it!
Customizing Scroll Wheel Behavior
Most mice have smooth scroll wheels these days, but some still use the old-school notched style.
Read: 15 Scroll Wheel Tricks You Wish You Knew Sooner
If your wheel has a hardware switch for smooth vs notched, set it however you like!
I prefer smooth for web browsing and general use, but notched can be nice for precise zooms and weapon switches in games.
In Windows, you can adjust the number of lines that scroll with each wheel.
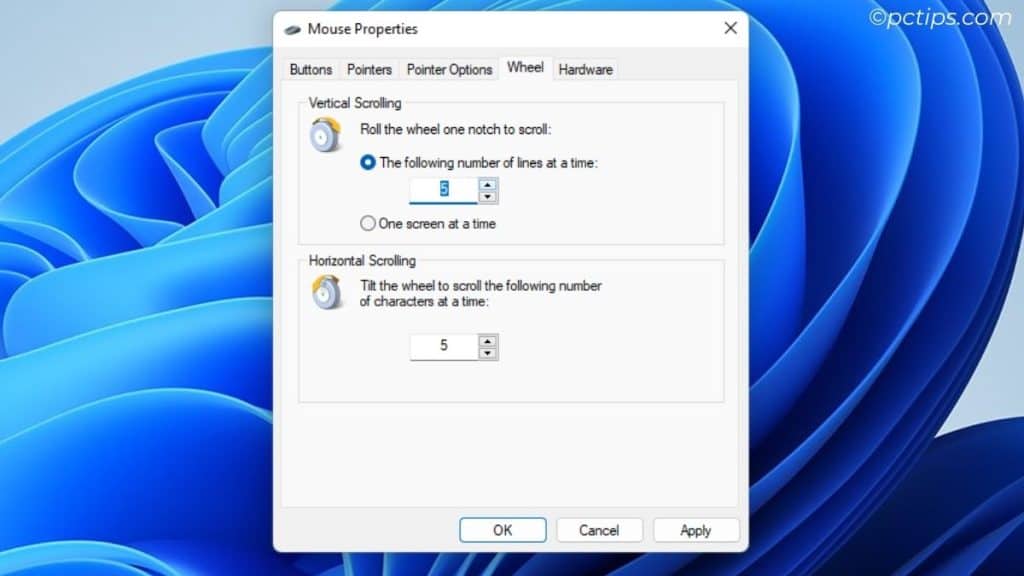
To access these settings:
- Open the Mouse Properties window
- Go to the Wheel tab
- Adjust the Vertical/Horizontal Scrolling options to your liking
In my experience, 3 lines is ideal – it’s a good balance of speed and control.
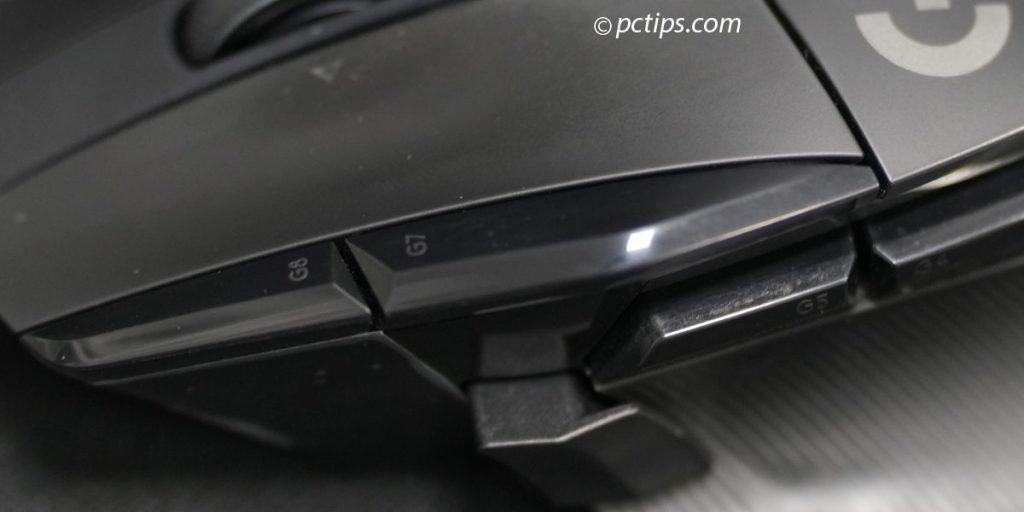
Make Use of Those Custom Buttons
These days, most mice have more than the standard left, right, and middle clickers.
Thumb buttons, tilt wheels, DPI toggles…if you’ve got ’em, use ’em!
They’re awesome for web browsing, productivity, and gaming.
The exact configuration will depend on your mouse software.
But at minimum, I suggest setting up these:
- Forward/back for web browsing
- Task View to see all windows
- DPI toggles for on-the-fly sensitivity
- Macros for spamming abilities or emotes
- “Snapping” windows to half the screen
To remap:
- Open your mouse software (Logitech G HUB, Razer Synapse, etc)
- Find the button assignment menu
- Pick your button and choose its new function
Keep in mind not all mice will have the option to reassign buttons in Windows.
Wireless Mouse Users
If you’re rocking a wireless mouse pay attention to power settings.
Some mice can enter low power mode, which sacrifices performance to extend battery life.
I like to keep mine above 30% at all times for optimal responsiveness.
Use the extender/adapter that came with your mouse.
Plug it into the rear USB ports (where PS/2 ports used to be) for the most direct connection.
And make sure the receiver is close enough to your mouse!
Microsoft PowerToys
Have you heard of Microsoft PowerToys?
It’s a free set of utilities for power users. And it has some AWESOME mouse features.
- Find My Mouse: Quickly locate your mouse pointer by double-pressing the left CTRL key
- Mouse Highlighter: Highlight your mouse pointer with a colored circle when you hit a hotkey
- Mouse Jump: Zip your cursor to a specific part of the screen with a custom shortcut.
- Mouse Pointer Crosshairs: Gives you crosshairs to pinpoint your clicks.
You can download PowerToys from the Microsoft Store or GitHub. Highly recommended!
Read: 25 Hidden Windows Features You Probably Didn’t Know About
Third-Party Tools
If you really want to dive deep, check out some of these third-party tools:
- X-Mouse Button Control: Customize your buttons and make custom macros. Very powerful.
- AutoHotkey: The ultimate Windows automation tool. Tons of mouse-related scripts out there.
- Raw Accel: A driver-level mouse acceleration program. For the tinkerers out there.
A Few More Tips Before I Go
Before I sign off, here are a few more mouse tips:
- Reduce your mouse weight if adjustable (some gaming mice let you add/remove weights)
- Don’t be afraid of high DPI. It might take some getting used to, but it can speed up your workflow big time
- Invest in a good mousepad. I like ones with stitched edges and a smooth, consistent surface.
- Use a mouse bungee. It keeps your cord lifted and prevents snags.
- Keep your sensor clean. A quick wipe with a microfiber cloth does wonders.
- Set up multiple mouse profiles for different use cases (gaming, productivity, etc).
- Every mouse has a different shape, be conscious of your hand size and shape when buying yourself and mouse so that you don’t cramp your hand
- If you have multiple computers, consider a mouse that lets you swap between them seamlessly
- Remap common shortcuts or macros to your extra mouse buttons for ultimate efficiency
If you’re a hardcore gamer, you probably already have a tricked out mouse.
But just in case, here’s some tips to up your game:
- Experiment with angle snapping and acceleration in your mouse software. They can help with pixel-perfect aiming.
- Set your monitor’s refresh rate to the highest possible
- Reduce your mouse weight if adjustable (some gaming mice let you add/remove weights)
- Test other in-game settings like Mouse Filtering and Mouse Smoothing to see what feels best to you
- If your mouse has a “debounce time” setting, lower it for faster clicks.
- Some mice let you adjust “lift-off distance“. Lower it to reduce cursor movement when repositioning.
- Don’t be afraid to experiment with different mouse grips. Palm, claw, fingertip… find what’s comfy for you.
- As much as I love the look of RGB lighting, it can actually add a tiny bit of latency to your mouse inputs. If you’re a hardcore competitive gamer, consider disabling the lighting for optimal performance.
And if you found this helpful, spread the word!
Consider giving it a share or bookmark for future reference.