30 Genius Ways to Make Your Internet Faster
Last Updated:
I’ve been an internet speed freak for years. There’s nothing more frustrating than a slow connection when you need to get stuff done online!
Over time, I’ve accumulated a bunch of tips and tricks that I use constantly to keep my internet humming.
Here are my top 30 – try ’em out and prepare to have your mind blown by the speed boost!
First things first: test your current speed at a site like speedtest.net.
This will give you a baseline to compare against.
Make sure to run the test a few times at different times of day to get an accurate average.
Now, on to the tips!
Restart Your Router and Modem Regularly
Unplug both devices, wait a full 60 seconds (I like to hum the Jeopardy theme), then plug the modem in first.
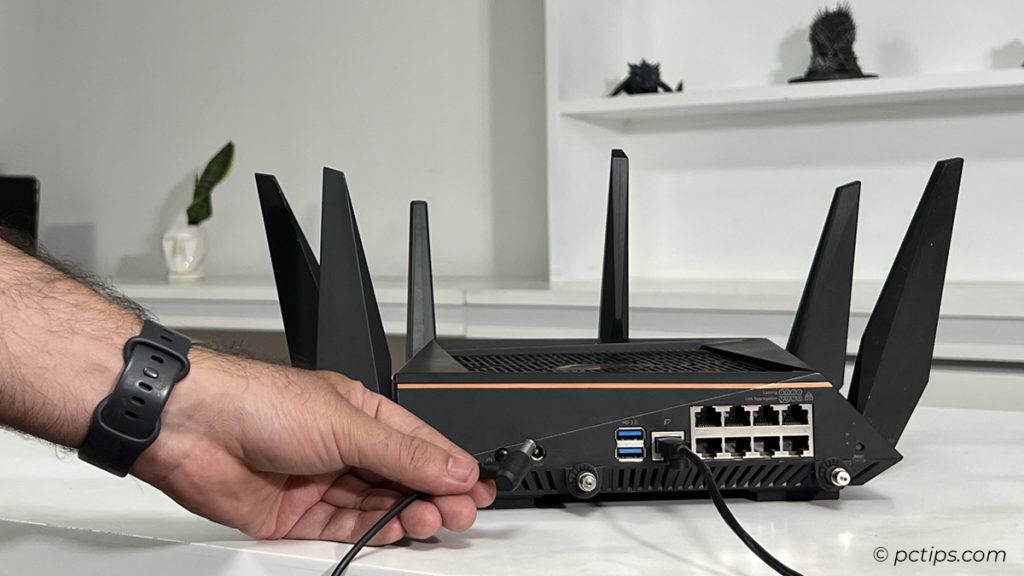
Wait until all the lights stabilize, then fire up the router. Give ’em a minute to shake hands and do their thing.
I recommend regularly rebooting your router.
My RT-AX89X router has an Enable Reboot Scheduler feature tucked away in Administrator > System. I’ve got it set to restart every night at 2 AM.
Set it and forget it for a nice weekly flush of any memory leaks or stalled connections.
Switch to a Wired Ethernet Connection if You Can
Plug directly into your router via Ethernet. I know, wires are so 2005. But when you need raw speed, nothing beats a nice CAT 6 or CAT 7 Ethernet cable.
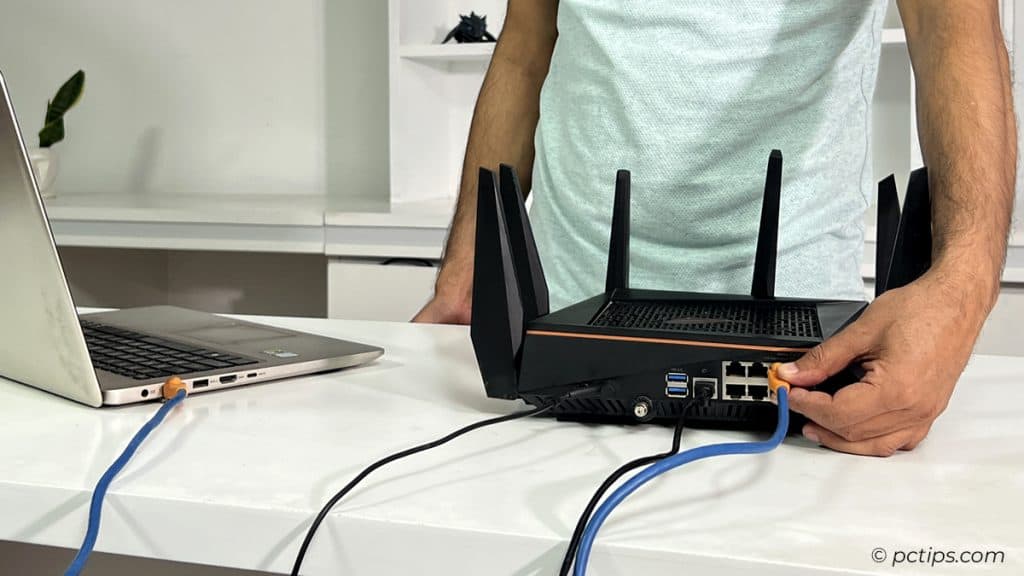
Skip the thin, cheap wires and invest in high-quality, shielded Ethernet cables to eliminate interference.
Keep the ethernet drivers updated. Yeah, it’s basic, but drivers are always getting better.
Windows doesn’t always grab the latest, so get them straight from the maker of your network card (Realtek, Broadcom, etc).
Disable Wi-Fi When Wired
Cut the Wi-Fi when you’re wired. No point in keeping both connections competing.
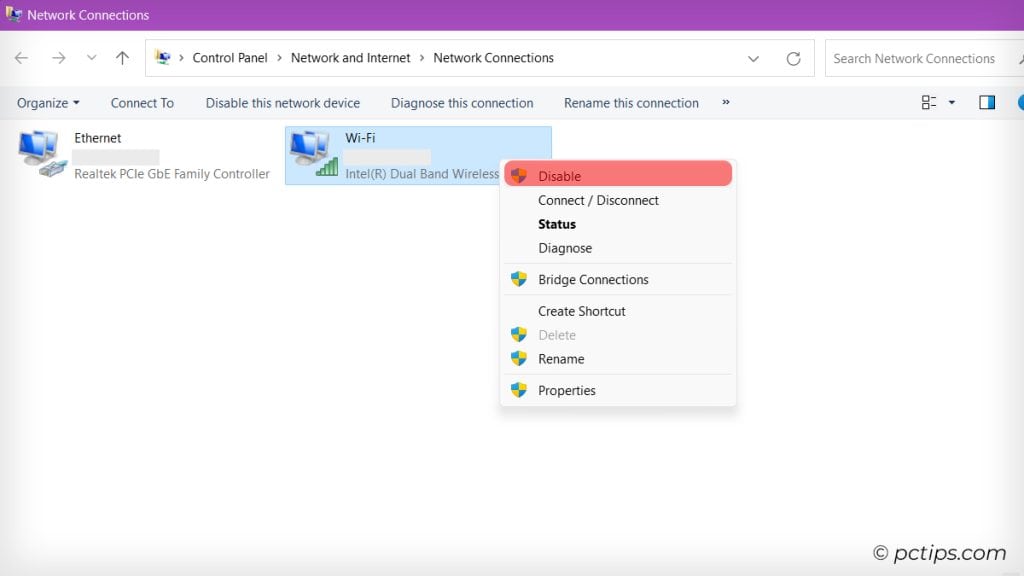
Disable the wireless card on your device when you’re plugged in to ensure you’re taking full advantage of that sweet, sweet Ethernet speed.
Upgrade to a Gigabit Switch
Ditch old school hubs for sleek new switches. Switches intelligently direct traffic – hubs are just dumb repeaters.
A nice 5-port Gigabit switch is under 20 bucks these days and will eliminate congestion from multiple wired devices.
But why stop at Gigabit? If you’ve got a serious need for speed, consider making the jump to 10 Gigabit Ethernet (10GbE).
Now, 10GbE gear isn’t cheap for average home users. But for hardcore gamers, video editing pros, or speed demons like myself, it’s worth every cent.
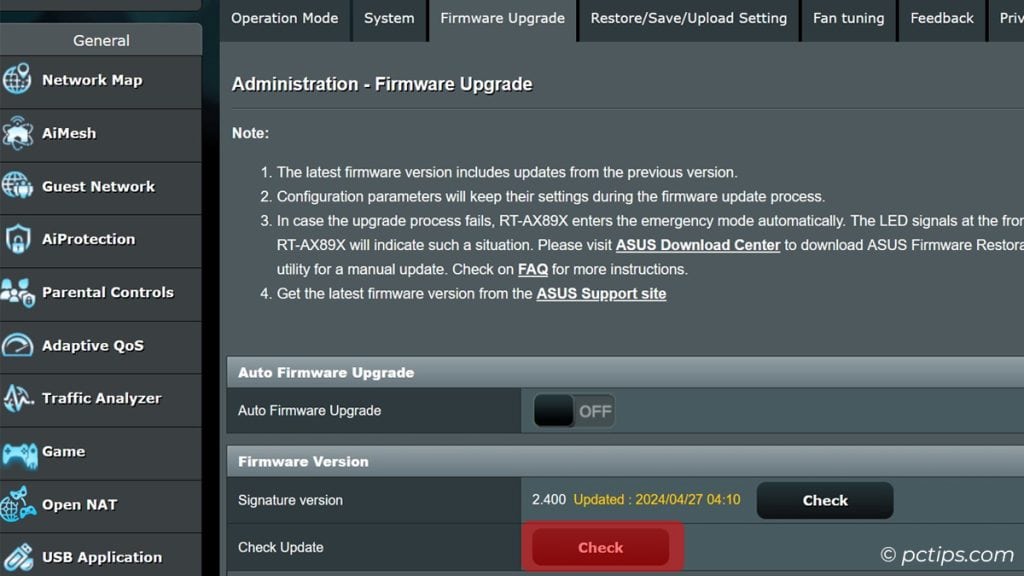
Update Your Router’s Firmware
This is a biggie – manufacturers are always improving performance.
Log into your router’s admin page (usually 192.168.1.1 or 192.168.0.1) and look for a firmware update section.
Download the latest version from the manufacturer’s site and flash it following their instructions carefully.
Invest in a Modern Router
Buy a newer router that supports the latest wireless standards (Wi-Fi 7 is where it’s at in 2024).
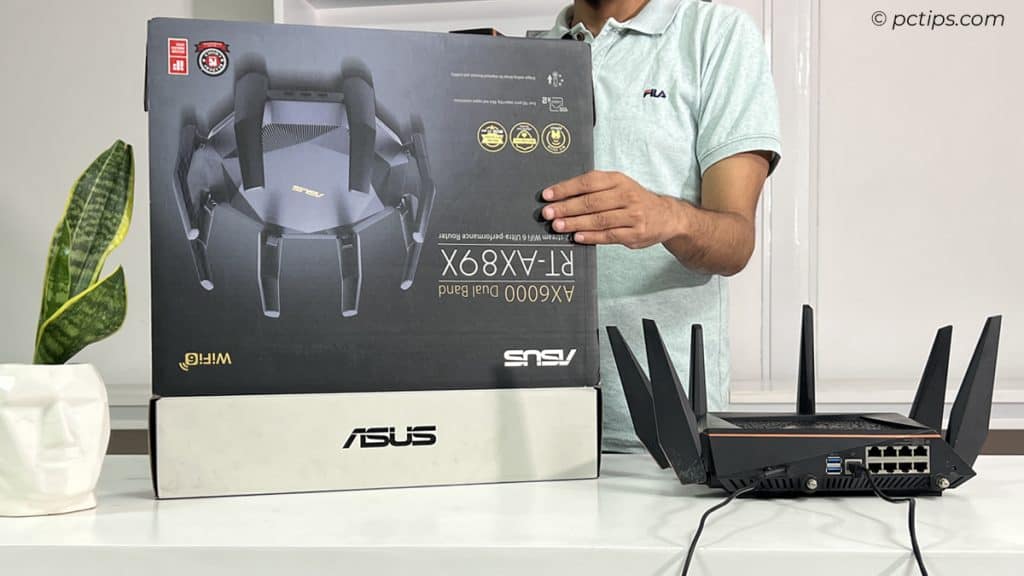
Got a crusty old router from 2012? Toss that ancient paperweight in the trash.
Check out the “End of life“ list for your router brand—D-Link, ASUS, TP-Link, Netgear, or Synology.
If it’s on the list, well, it’s time for an upgrade.
Look for routers that support Wi-Fi 6E or Wi-Fi 7 or has 10 Gig ports for better speed and performance.
Eliminate Interference Sources
Is your router too close to the microwave, cordless phone base, or Bluetooth speakers? These pesky devices can cause interference and slow down your Wi-Fi.
Move your router away from other electronics and large metal objects.
Elevate it off the floor too – radio waves spread out and down, so higher is better.
Relocate Your Router
It’s basic physics – shorter distance means faster speeds.
Aim for the middle of your home, preferably high up on a shelf or mounted on a wall away from metal objects.
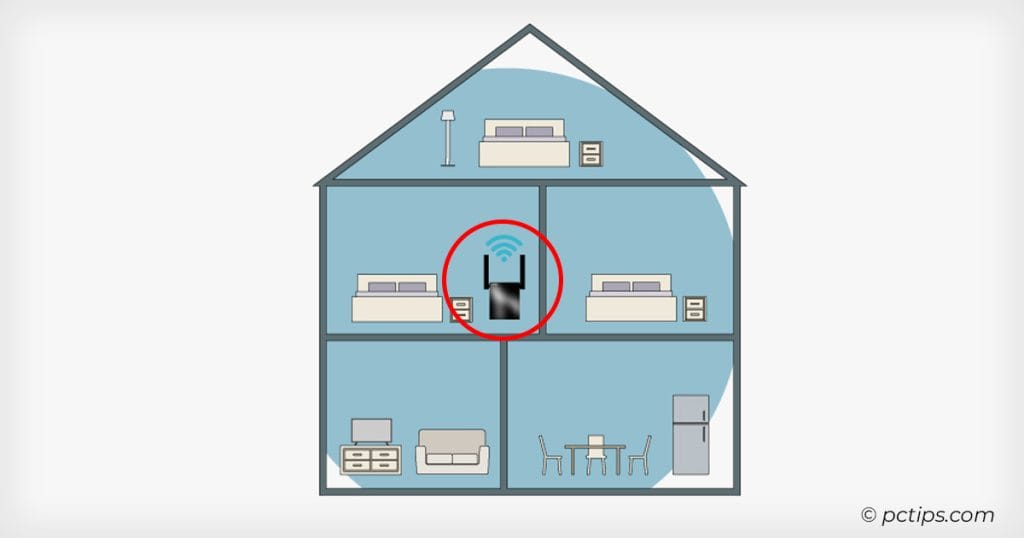
You can also do a signal strength heatmap and move your router to the best possible location.
Don’t stick it in a cabinet!
Relocate Signal-Killing Objects
Check for signal-killing objects. Fish tanks are the worst offenders – water kills Wi-Fi dead.
Other culprits are brick walls, ceramic tile, concrete floors, and metal file cabinets.
Do an RF site survey with tools like Netspot (Android, iOS) and banish your router from the Bermuda Triangles in your house.
Upgrade Your Antennas
Amp up your router’s antennas. Upgrading to a high-gain antenna can significantly extend your router’s range and speed.
Directional antennas let you pinpoint your signal to where you need it most.
Grab some 9 or 10 dBi high-gain beauties from Amazon and watch your speeds soar.
Position Antennas for Maximum Coverage
Angle your router antennas perpendicularly for maximum coverage.
One straight up, one sideways.
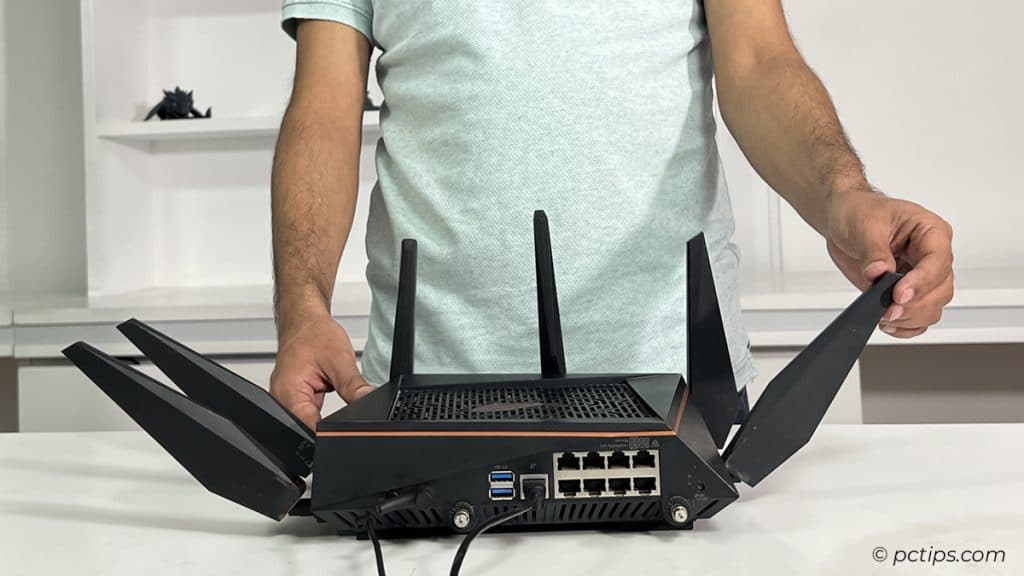
This simple positioning trick can extend your range and eliminate dead zones.
Omni-directional antennas work best this way.
Secure Your Wi-Fi
Cut off Wi-Fi piggy-backers. An unsecured network is just inviting every freeloader in a 500 ft radius to slow you down.
WPA2 or WPA3 is a must. Set a strong password and consider hiding your SSID to keep your network invisible to casual snoopers.

Secure your Wi-Fi with a nice beefy password. I like 63 random characters – the maximum length for most routers.
Use a tool like Bitwarden to generate and save an ultra-secure passphrase. No more “password123” for you!
Read my guide on How to Create Super-Strong Passwords (That You Won’t Forget!)
Choose a Less Crowded Channel
Channels 1, 6, and 11 tend to have the least overlap.
Use a tool like inSSIDer or Wi-Fi Analyzer to scope out the least busy channel in your neighborhood.
Log into your router settings and change to the optimal channel for an instant boost.
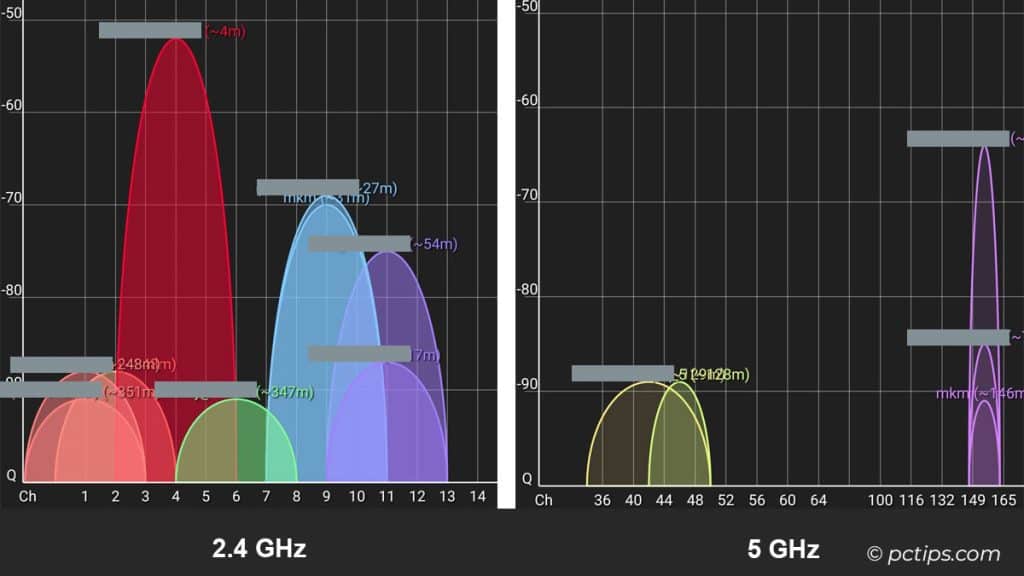
Choose 5 GHz Over 2.4 GHz
Opt for 5 GHz over 2.4 GHz. You’ll have less interference from your neighbor’s baby monitor and enjoy much faster speeds, especially if you’ve got an 802.11ac router.
To put this to the test, I ran a little experiment— and the results were impressive.
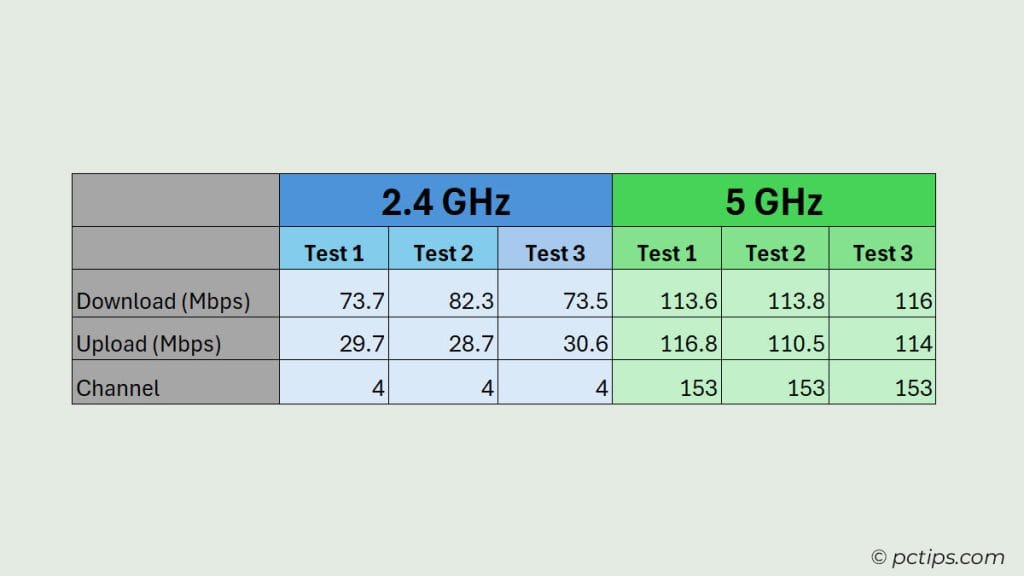
The downside is the shorter range, so keep that in mind.
Set Up a Guest Network for Visitors
We’ve all been there – friends or family come over and ask for the Wi-Fi password.
Next thing you know, they’re streaming 4K video and downloading huge files, tanking your speed.
The solution? Set up a separate guest network with limited bandwidth. Most modern routers have this feature built right in.
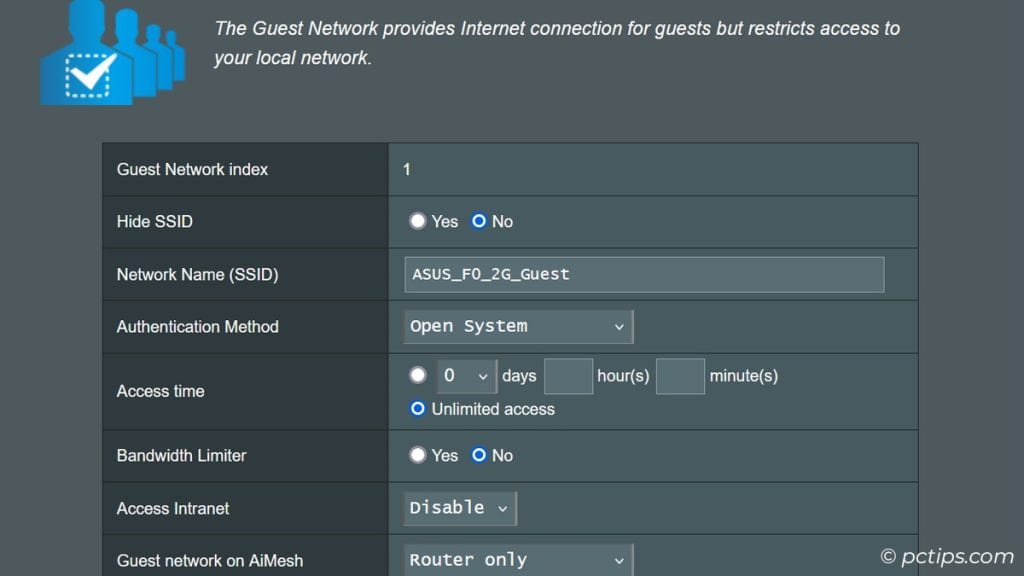
Give your guests the special password and let them have at it without dragging down your main connection.
You can be a good host without sacrificing your sanity!
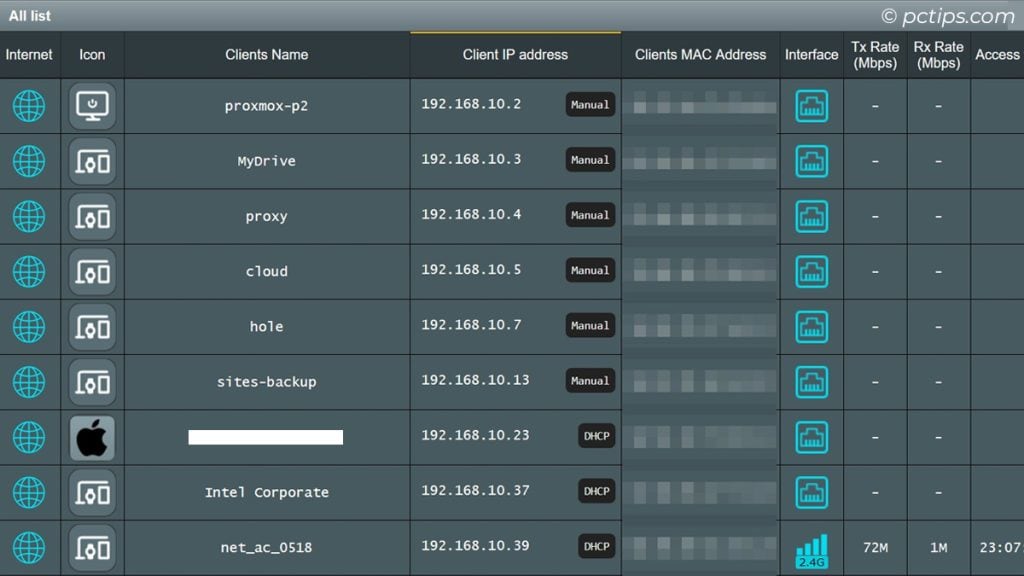
Limit Connected Devices
Speaking of guests, do you really need your smart toaster and Wi-Fi enabled blender connected 24/7? Probably not.
Go through your list of connected devices in your router settings and give the boot to anything non-essential. The fewer devices splitting that sweet, sweet bandwidth, the better.
For devices you can’t kick off entirely, see if you can schedule them to connect only during off-peak hours, like in the wee hours of the morning.
A little goes a long way!
Prune Out Old, Unused Devices
Go through your router’s list of connected devices and remove any that you no longer use.
That old tablet gathering dust in a drawer could be secretly sipping your bandwidth.
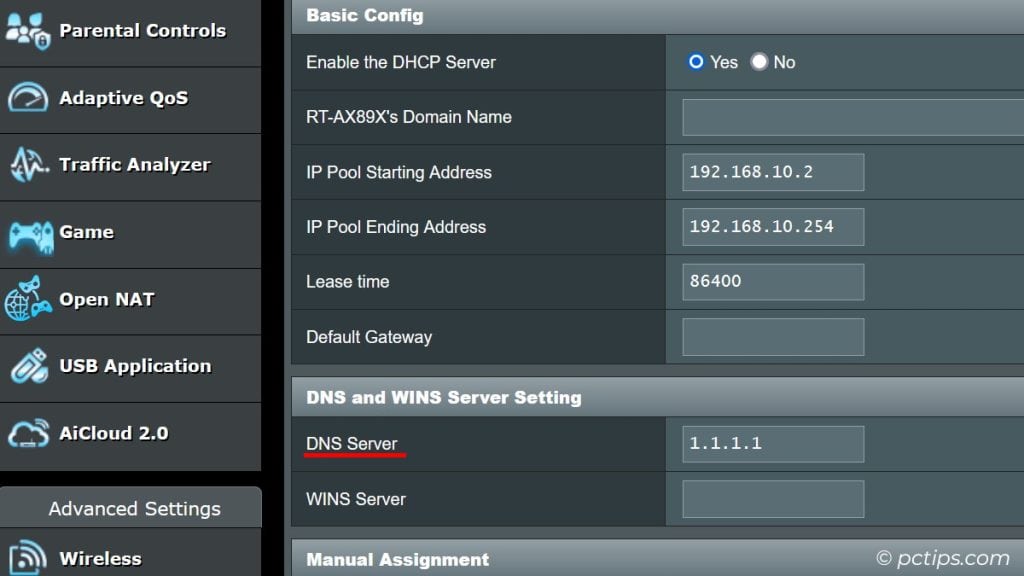
Try Alternate DNS Servers
DNS is like the phone book of the internet, translating domain names to IP addresses. Sometimes your ISP’s DNS can be slower than molasses.
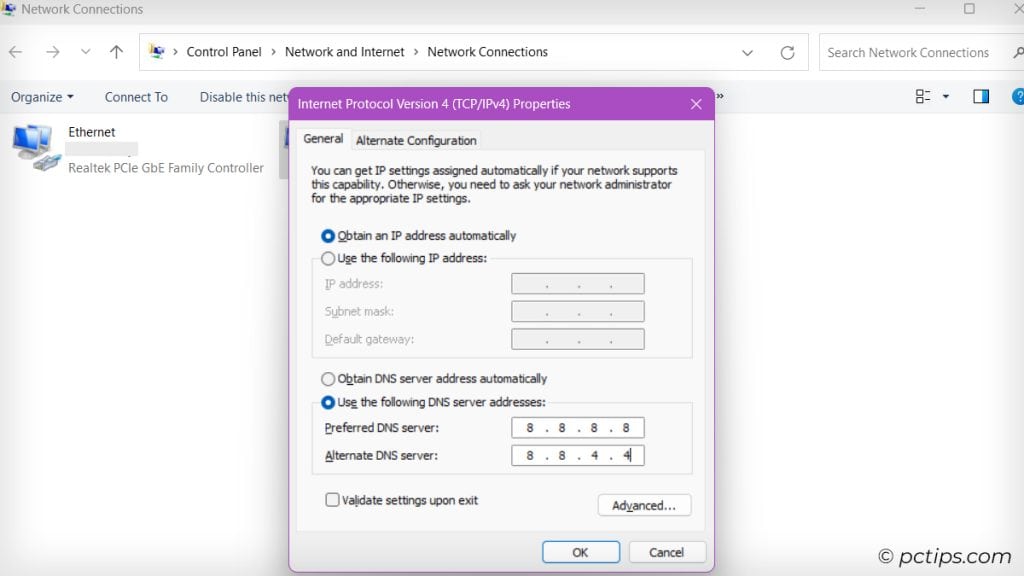
Give Google’s Public DNS (8.8.8.8 and 8.8.4.4) or Cloudflare’s DNS (1.1.1.1) a try. They’re typically faster and more secure than the default servers from most ISPs.
It’s an easy switch in your router settings, and you might just see a noticeable speed boost. Plus, it’s free – can’t beat that!
On Windows, change your DNS by going to Network Connections > Right-click your adapter > Properties > IPv4 > Properties > Use the following DNS server addresses.
Prioritize Traffic with QoS
Use QoS settings to prioritize important traffic. This amazing feature in your router settings is a life-saver!
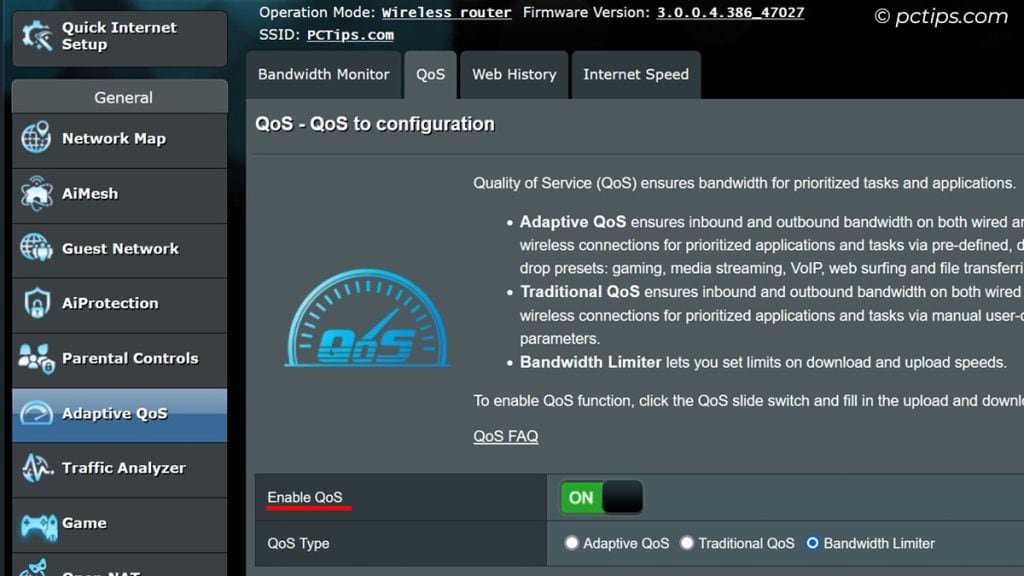
You can set specific applications (like your work VPN or Zoom) to always get top priority, even if the kids are streaming 4K Netflix.
Block Bandwidth Vampires
Block bandwidth vampires at the router level. I’m talking BitTorrent, Usenet, and anything else that slurps up huge amounts of data.
No need to slow down the whole house for your roommate’s Linux ISO addiction.
Most good routers have settings to block specific traffic types.
Scan for Viruses & Malware
Malicious software can hog your bandwidth by using your internet connection for nefarious purposes.
Regularly scan your devices with a reputable antivirus program and remove any threats.
Purge Background Apps
Some apps run in the background even when you’re not using them, sucking up precious bandwidth.
Close out any apps you’re not actively using to free up speed for the stuff you care about.
Disable Auto-Play Videos
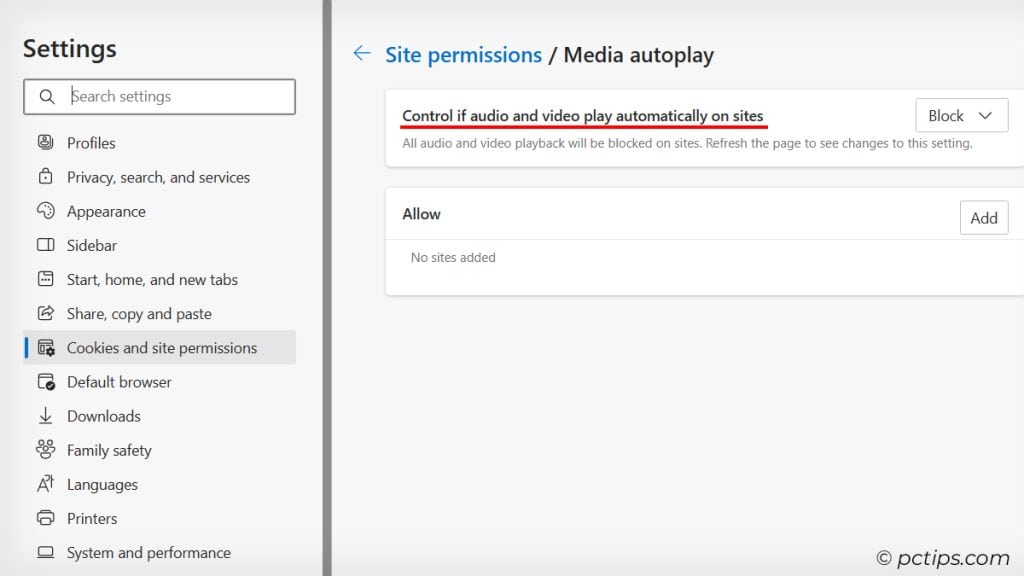
Many websites now auto-play videos, which can be a major bandwidth drain.
Disable auto-play in your browser settings to put a stop to this speed-killing feature.
Clear Your Browser Cache
Regularly clear your browser cache.
Over time, it gets bloated, especially if you visit a ton of different sites.
In Chrome, hit Ctrl+Shift+Del to bring up the clear browsing data window, check all the boxes, and set the time range to “All Time.”
Optimize Your Network Adapter Settings
Sometimes, misconfigured network adapter settings might be causing all the trouble with the internet.
To fix this, go to Device Manager > double-click on your adapter > Advanced tab > Property.
Here, choose either 802.11 n, 802.11 ac or 802.11 ax (802.11 ac/ax being the latest standard).
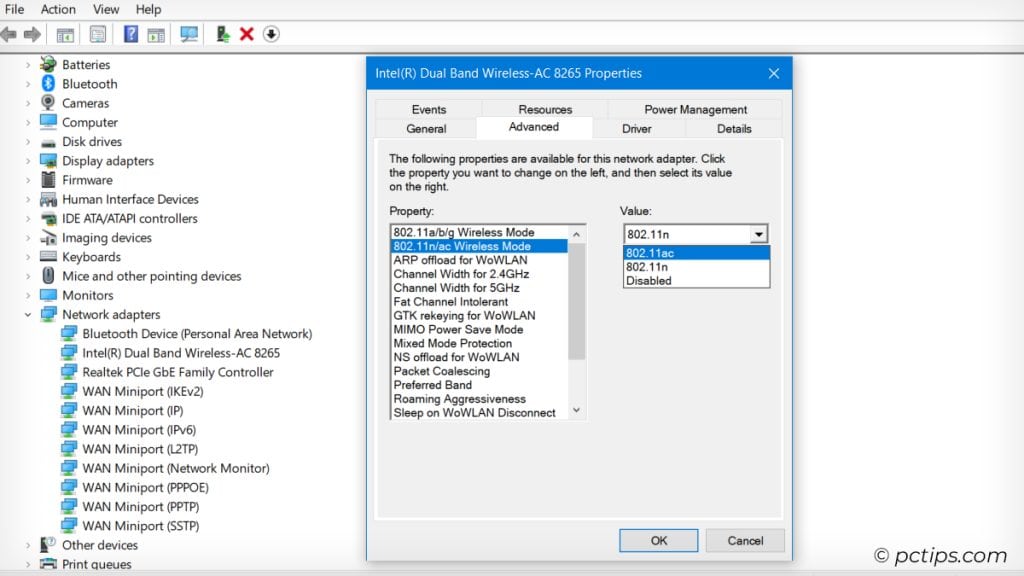
Now, scroll down to Preferred band and select 5GHz. Remember that 802.11 ac does not support 2.4 GHz band.
For Ethernet adapters, click on Speed & Duplex and select the maximum speed your adapter supports in the value section.
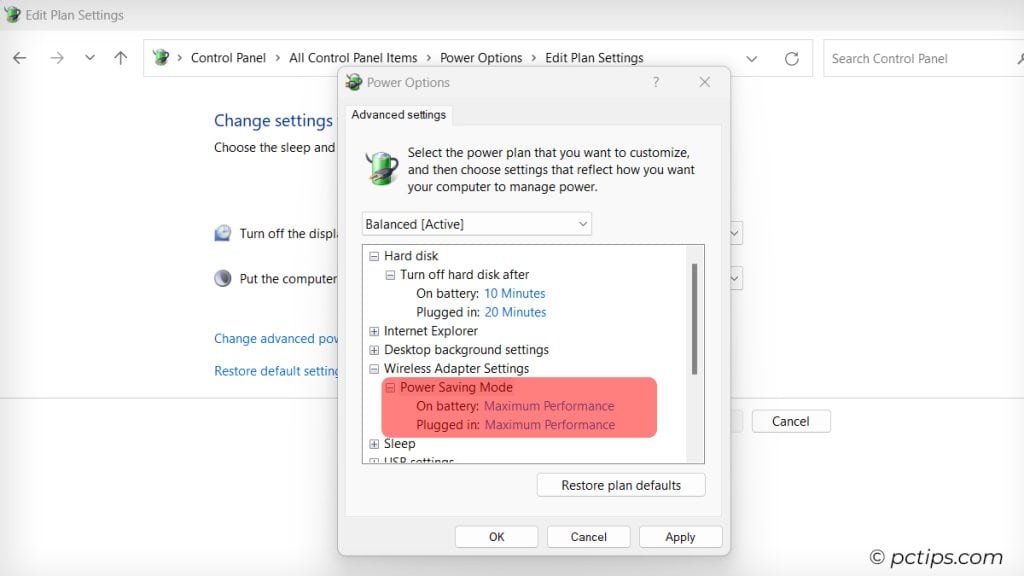
Optimize Power Settings
Adjust your devices’ power settings so they don’t turn off the network adapter to save juice.
In Control panel, go to Power Options > Change Plan Settings > Change Advanced Power Settings > Wireless Adapter Settings > Power Saving Mode > Maximum Performance.
Use a Download Manager
For large files, a download manager can seriously boost your speed by splitting the file into smaller chunks and downloading them simultaneously.
I used to swear by Internet Download Manager (IDM). It’s not free, but it’s worth the price tag. Blazing speeds, pause and resume support, the works.
But nowadays, I’ve switched to the download manager built into my Synology NAS.
I’ve got a DS1821+, and its Download Manager app is a beast. I just queue up downloads and let the NAS do its thing quietly in the background.
No more bogging down my main rig!
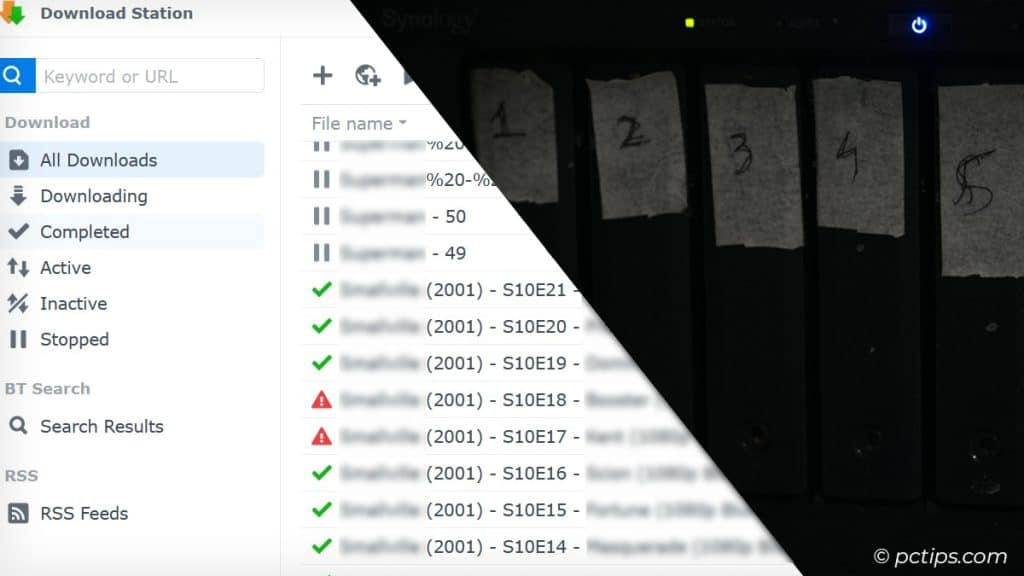
The speeds are on par with IDM, and I adore the convenience of centralized management on the NAS.
There are plenty of other stellar download managers out there, both free and paid:
- Free Download Manager
- JDownloader
- EagleGet
- uGet
Take your pick! Just remember, download managers can sometimes affect other network traffic.
I suggest scheduling huge downloads for off-peak hours.
Use Wired Connections for Streaming and Gaming.
Go wired on streaming devices and game consoles.
Wireless is great for convenience, but a wire is always faster and more reliable.
Plug in your PlayStation, Xbox, Roku, or Apple TV for buffer-free 4K streaming and low-ping game sessions.
Try Powerline Networking
Consider powerline networking adapters to extend fast-wired connections anywhere you have an electrical outlet.
These are great for consoles, smart TVs, and gaming rigs far from the router.
TP-Link makes some screamers that are plug-and-play.
Block Ads and Trackers
Ads suck. They’re annoying, they slow down your browsing, and they’re tracking your every move. Time to fight back!
Install an ad-blocker extension like uBlock Origin or AdBlock Plus. Easy to use, effective, and they don’t sell your data like some shady blockers.
But don’t stop there. Trackers are like creepy stalkers, following you across the web. Privacy Badger is my go-to for shutting them down.
Implement DNS Level Ad-Blocking
Ready to take your ad-blocking to the next level? Try DNS-based blocking.
It’s like hiring a bouncer for your network. Any ad or tracking domain tries to enter, they get the boot.
Personally, I use Pi-hole. Install it on a Raspberry Pi or in Docker, point your devices to it for DNS, and watch the ads vanish.
But if you don’t want to manage your own hardware, you can also use a cloud-based solution like NextDNS or Adguard DNS.
Fair Warning: Some ad-heavy sites might break. But a quick whitelist entry fixes that. A small price for a speedy, ad-free existence!
Load Balance Traffic to Improve Network Performance
If you have multiple internet connections (maybe your home office splurged on a backup line), put them to work with load balancing!
High-end routers like my ASUS RT-AX89X have dual WAN support built right in.
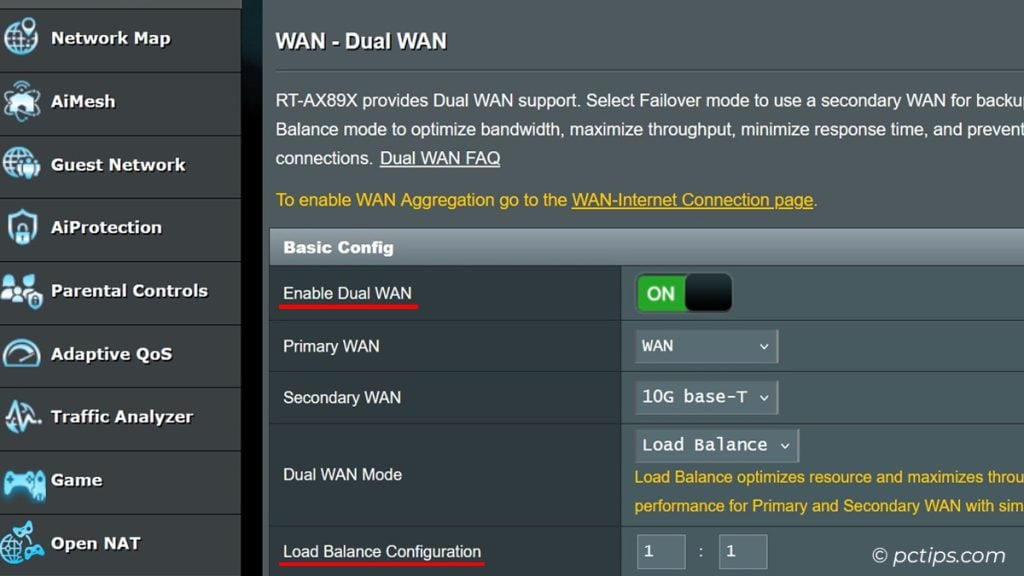
You can use a dual WAN router or a load balancing service to split your traffic between the two connections based on rules you set.
Dedicate one to streaming video, the other to browsing.
It’s a bit of an advanced technique, but if you’re battling buffering while trying to stream your shows, it can be a lifesaver. And you’ll feel like a total networking pro, which is always a plus.
Adventurous? Try DD-WRT
Try installing DD-WRT firmware on your router.
Advanced users only! DD-WRT is an open-source router firmware that unlocks a TON of power user features for tweaking every possible setting.
Proceed with caution, but the rewards can be substantial.
Negotiate a Free Upgrade
Call your ISP and beg for a free upgrade to a higher speed tier.
It sounds crazy, but it’s worked for me a couple of times!
Many ISPs would rather bump you up than lose you to a competitor.
Be nice and you might get an unadvertised promotion.
But if your ISP won’t budge, don’t be afraid to shop around.
Look for new customer deals from other providers in your area.
Also, a recent FCC report suggests that most of the DSL providers in the USA offer speeds lower than what they advertise.
They often offer tempting introductory rates and perks to win your business.
Just be sure to read the fine print – some deals come with contracts or hidden fees.
If you find a winner, make the switch!
A new ISP could be your ticket to faster speeds at a lower price.
Your High-Speed Game Plan
These aren’t so much secrets as just an accumulation of knowledge from my years of tinkering.
Hope they help you as much as they’ve helped me over the years!
Don’t stress about doing everything at once. This guide is your ultimate internet speed toolbox.
Start with the easy wins. Reboot your router. Optimize its placement.
As you get more comfortable, dive into advanced techniques like QoS and Load Balancing.
Small changes can have a big impact. Every tip you implement is a step toward faster internet.
Your action plan:
- Run a speed test. Record your baseline.
- Pick 2-3 easy tips. Reboot your router, secure your Wi-Fi, upgrade Ethernet cables.
- Test speed again. Celebrate wins!
- Try a few more tips. Track what works best.
- Make optimization a habit. Schedule regular reboots, updates, and audits.
- Stay curious. Keep learning. The internet is always evolving.
You’ve got this! Show that laggy internet who’s boss.
Now it’s your turn. Share your wisdom in the comments below.
And hey, if this guide helped you, pay it forward.
Share it with a friend or family member who’s struggling with sluggish internet.
I'm not computer-savy but I know this info can be helpful to a lot of you out there
Great information. Very good article.
Great information. Good article.
Great Advice!