How to Remove Monitor Stand Easily
Last Updated:
Need to mount your monitor on a wall/desk? Or transporting it somewhere?
Hold on right there! Your first job is to remove the monitor stand.
“But how do I do it?” “Is the monitor stand actually removable?” “Do I need to separate both the base and stand?”
Don’t worry! After setting up multiple monitor stands here at the office, I’ve got it all figured out.
To the ones who installed the stands themselves – the disassembly process is just the reverse! Only teeny-tiny things to bear in mind.
Ready? Let’s get started!
Gather Necessary Tools
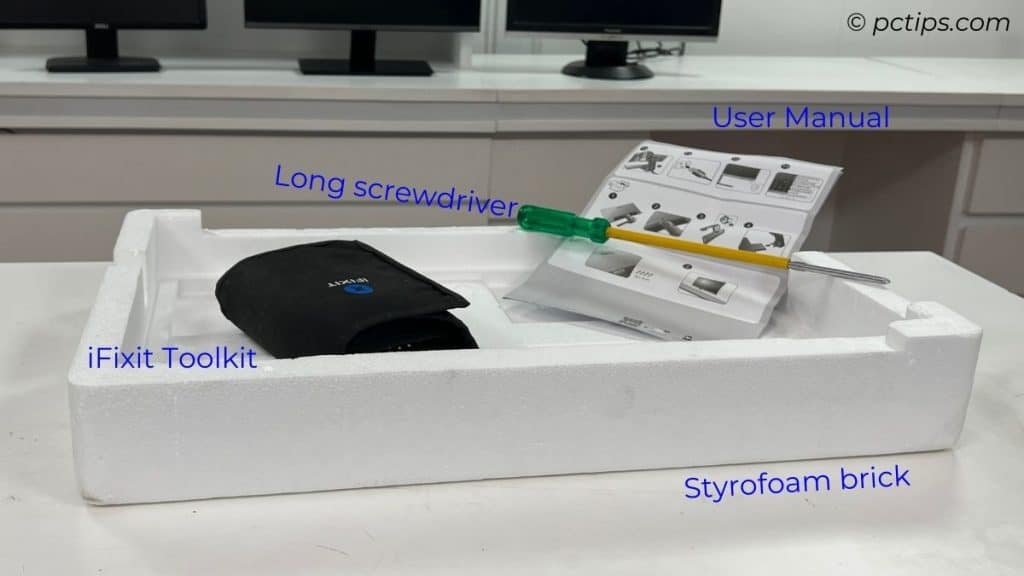
Before jumping in, have you disconnected all the cables? I’m referring to both the video and the power ones.
Once that’s done, we’re going to need some tools. Gather these:
- User Manual (Don’t have it? Find it online!)
- Styrofoam brick (should be included in the package)
- Soft cushion/towel/blanket/non-abrasive cloth (in case you’ve lost the packaging box)
- A long screwdriver (some models are packaged with the one needed, like my Redmi G24)
- A short one too
- A pen or any other pointed tool (optional)
Next comes the workspace! Make sure the surface is smooth and free of rough/scratchy textures.
Additionally, ensure there is nothing unnecessary that could pose a risk to the monitor screen. Wipe the table to double-check for safety.
Place Monitor Cautiously
Start by placing the Styrofoam or soft cushion/cloth on the table.
Then, very carefully place the monitor on top of it.
If you’re using Styrofoam included in the packaging box, it should fit securely.
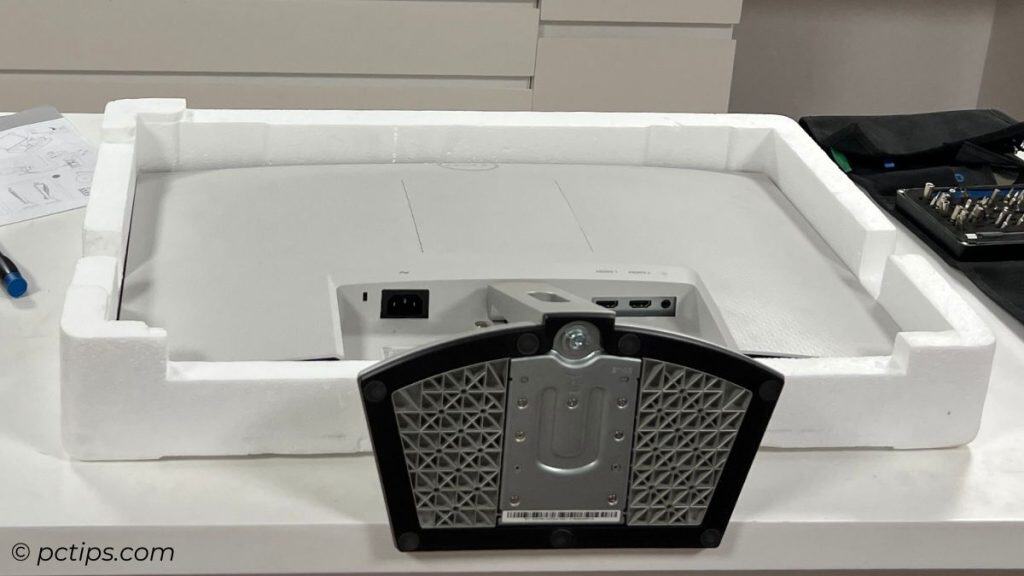
Good job! Now, let’s begin the disassembly.
Detach the Base
Although there’s no strict rule on which part to remove first, I prefer starting with the base. This makes the entire process much easier and safer.
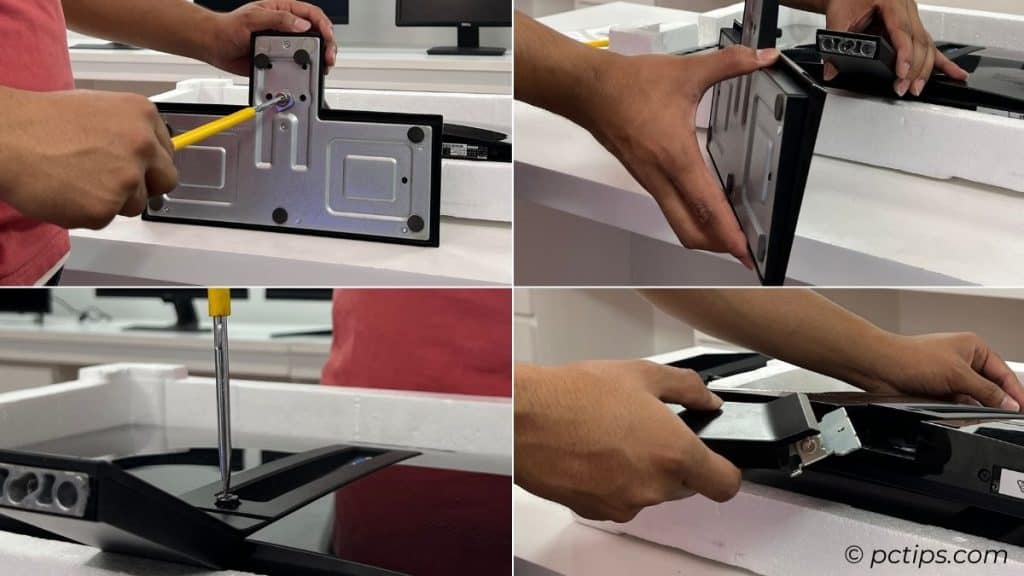
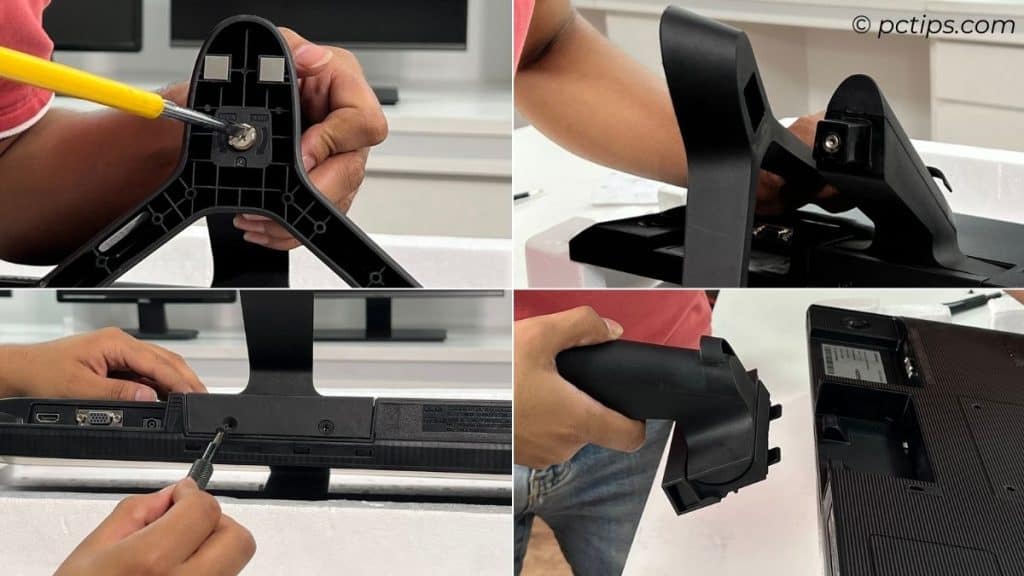
In most modern monitors, the base is usually secured with a folding wing screw. In some models, it might be without a wing.
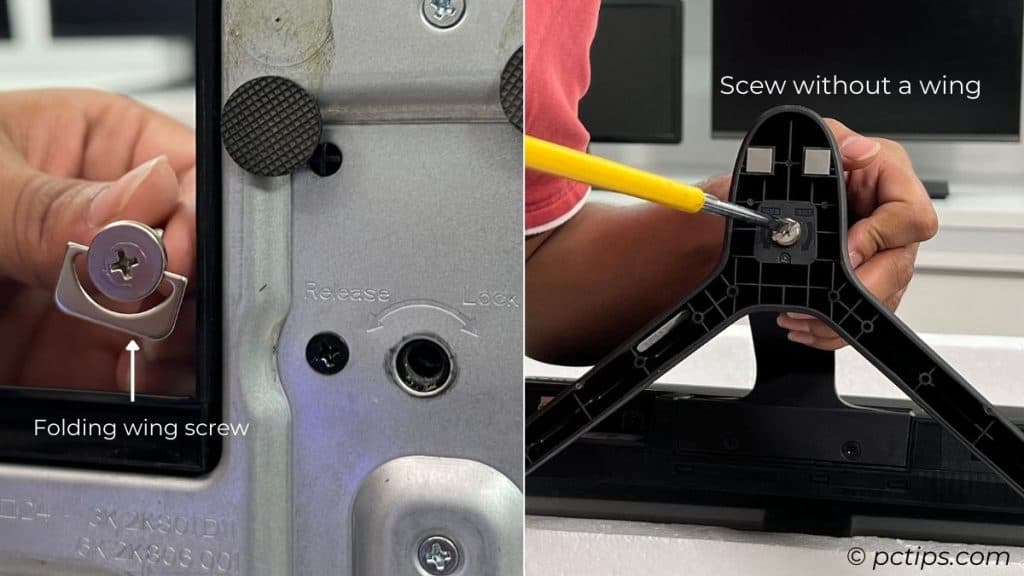
Untighten the screw with the help of a screwdriver. Or simply lift the wing and loosen it with your fingers.
Don’t forget to hold the stand with your other hand. My BenQ GW2480’s stand was so loose that as soon as I removed the screw, it fell off and NEARLY BROKE!
Also, note that there can be exceptions. For example, check this Dell ST2220L:
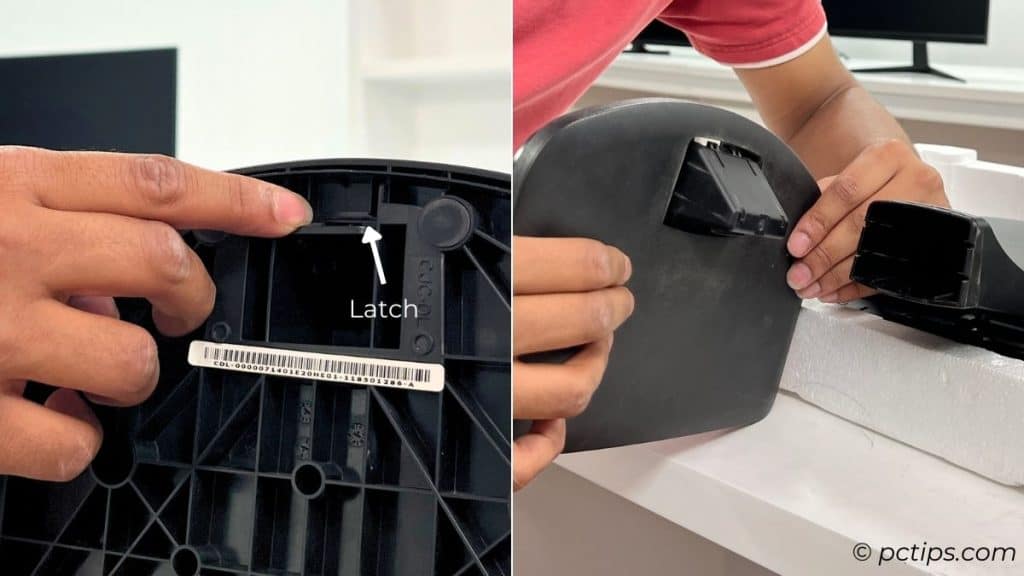
There’s no screw at all. I just have to press the latch and take it off by wiggling it a bit.
Remove Plastic Cover
A few monitors, like my MSI Optix G241, comes with an extra layer of safety for hiding the screws:
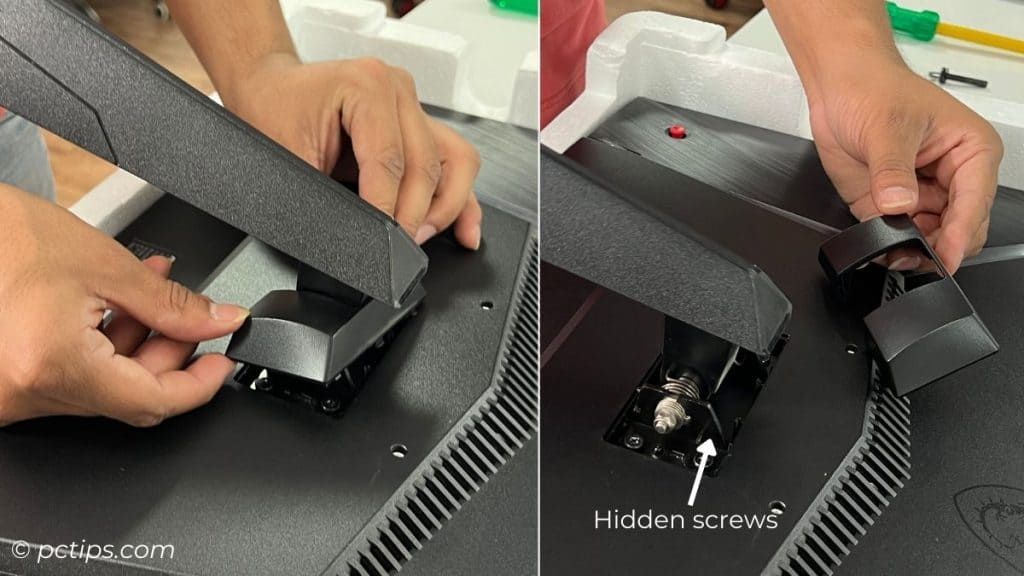
Look for the tabs at the edges and pull it off. It’s that simple!
But keep in mind that with certain monitors (like my old Viewsonic VA2226W), you’ll have to apply an extra amount of force. Just make sure you don’t break anything in between.
Separate the Stand Riser
Caution: Applying too much pressure when handling the monitor may break its screen.
Now comes the main part.
The process to remove the stand riser (also referred to as ‘stand neck’) varies from one monitor to another.
Here, I have discussed about few :
Having Screws
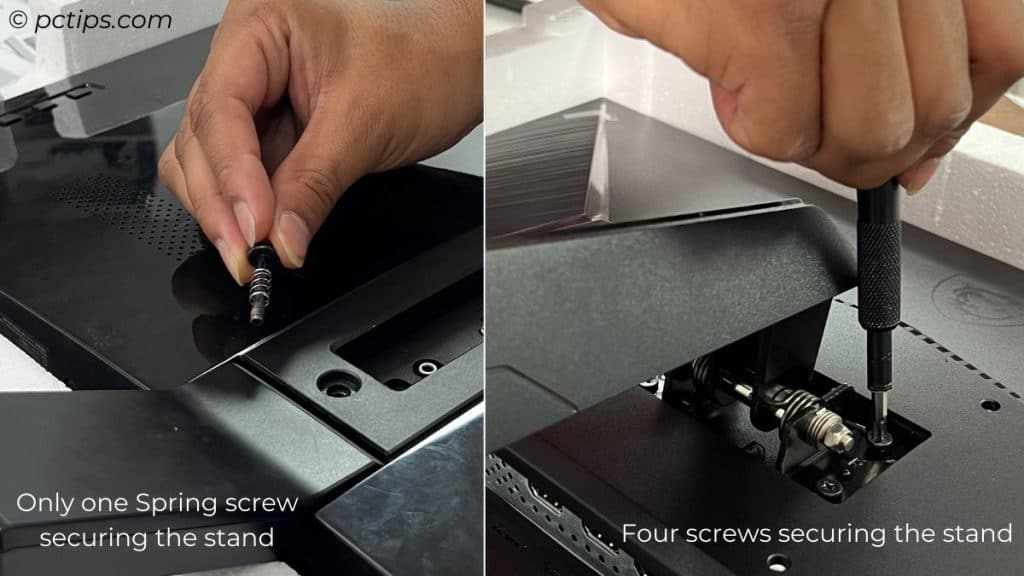
This one is VERY SIMPLE!
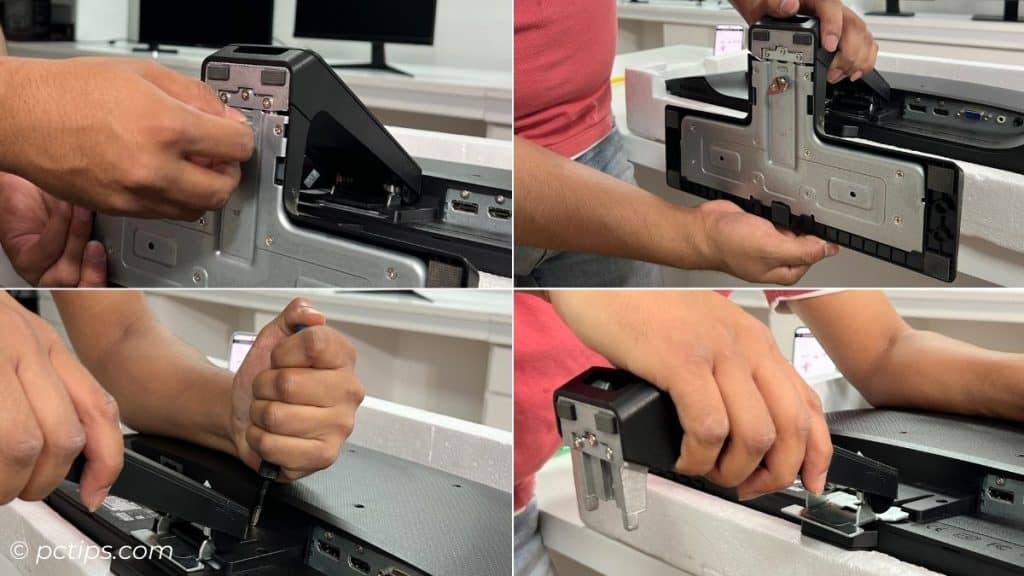
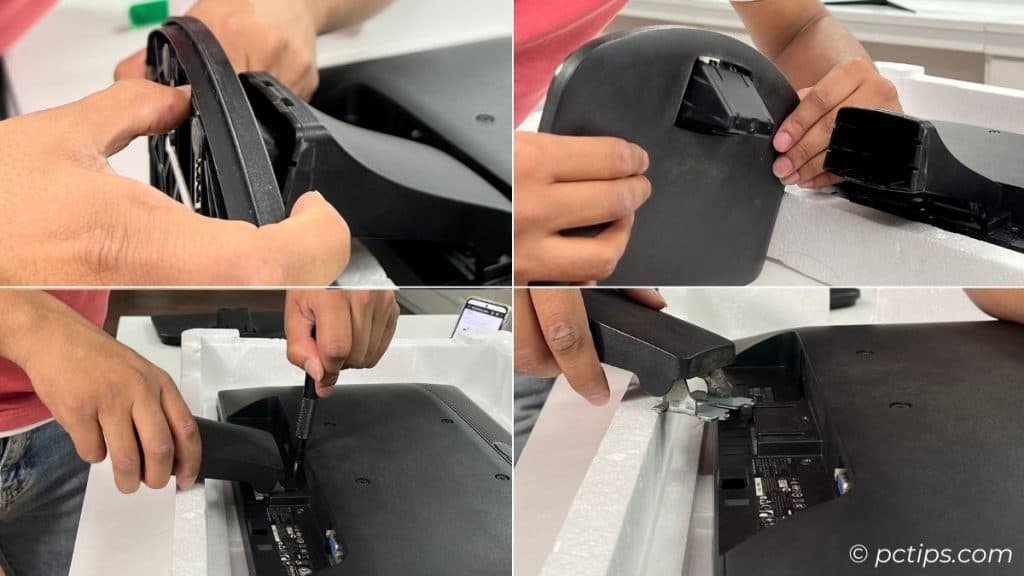
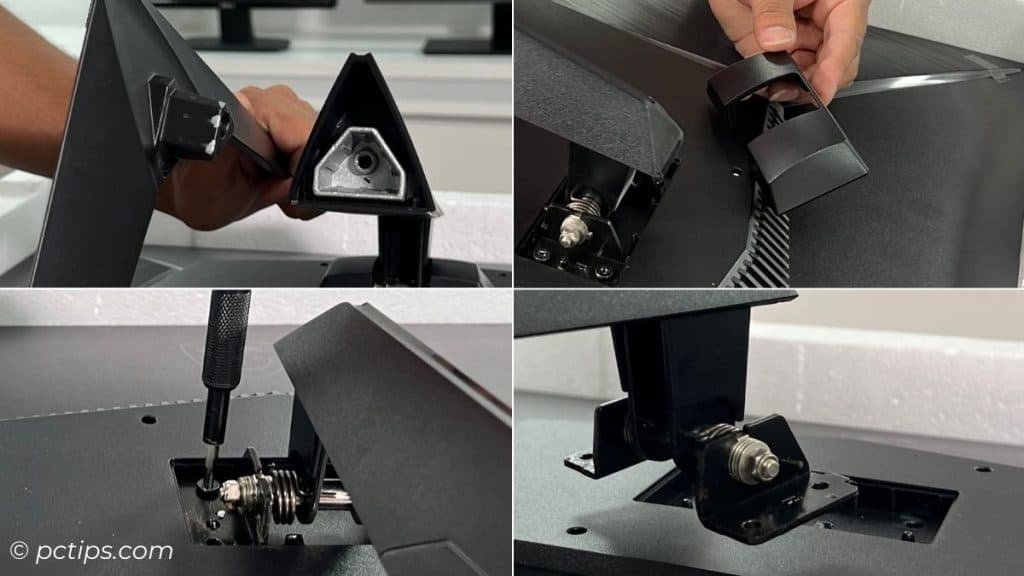
Just loosen all the screws with an appropriate-bit screwdriver and the stand should come off easily.
Some displays, like my BenQ EW2440Z, use a single spring screw, while others like Samsung LF22T354FHWXXL and MSI Optix G241, may have two or more screws.
Identify the monitor configuration and proceed accordingly.
Having Release Button
This one can be a little tricky but don’t worry!
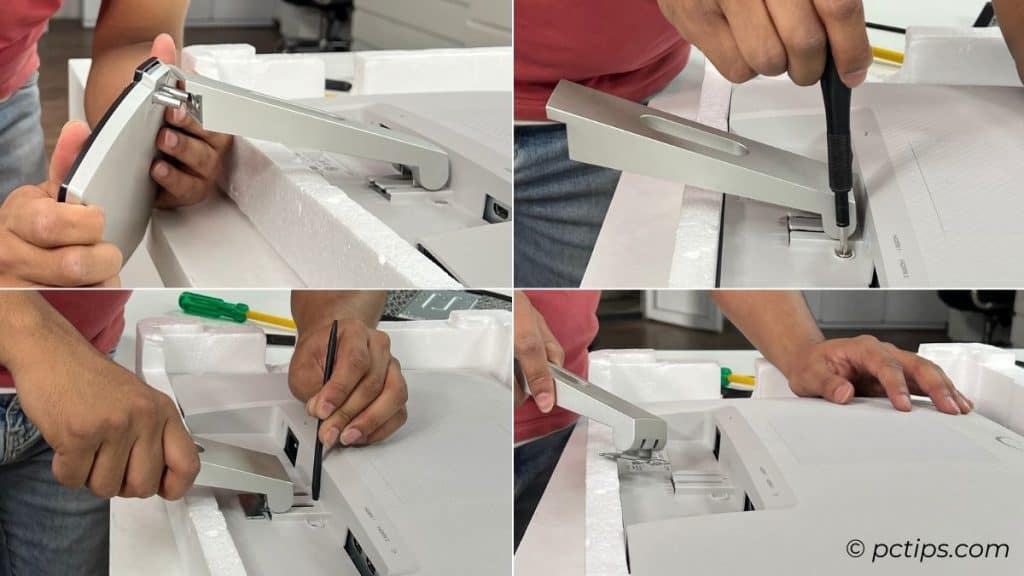
Take a pen or any other pointed object (even a screwdriver shall do) to press the ‘release button’. Just make sure it can enter inside the gap.
In my case, the Dell S2421HN had a pretty tiny gap that didn’t fit a pen, pencil, or even the screwdriver. So, I used the pointed side of a spudger (from my iFixit toolkit).
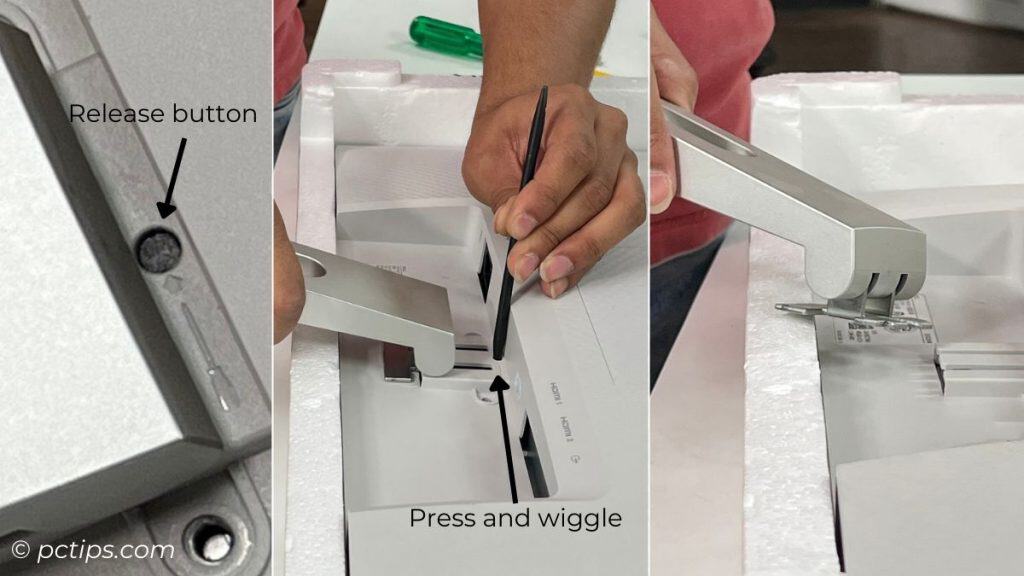
While pressing the release button, slowly wiggle and pull the stand out.
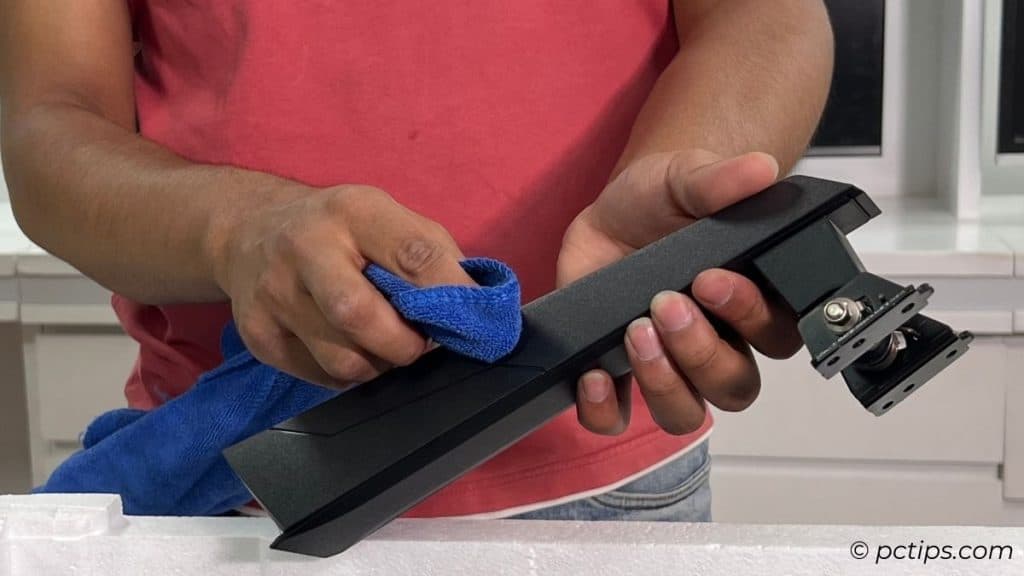
There you go! You’ve successfully removed both the stand and the base.
Use a microfiber cloth to clean off the dust.
While you’re at it, I advise thoroughly cleaning all other parts, including the screen and every corner.
Keep Them Safe
A study by Kensington done on 335 people shows that 50.6 % of monitor arm users reported a decrease in the degree of neck flexion versus those with an alternative setup.
So, regardless of how you are planning to set your monitor, make sure you keep your old stand and the screws safe. You’ll need them again.
The safest place to keep it is inside the original packaging box. That’s where I always store mine and recommend you do the same.
What Next?
The work is done! Now, if you’re transporting the monitor, make sure to pack it securely.
Use Styrofoam and other necessary protectors from the original packaging.
Interested in a detailed guide on mounting monitors? Stay tuned for our upcoming content under this title.
Until then, keep supporting PC Tips!
Still Having Issues?
The steps to disassemble the monitor are pretty simple and straightforward.
However, I have also seen a few old monitors with complex designs, making it very difficult to remove the stand.
In this video of DIY with Michael Borders, he had to open up the back cover as well to remove his Samsung monitor stand. How hectic is that?
Each monitor is unique, and so is the disassembly process. That’s why it’s important to always have the user manual nearby.
They may have proper instructions for disassembly. Even if they don’t, there should be a step-by-step process for assembly (You can always do the reverse of what it says!).
Still can’t remove monitor stands? Mention your monitor model in the comment section below. We’ll help you out.
How We Tested
To make this article simple and easy-to-follow, we took a hands-on approach by removing the stands of different monitors right here in our warehouse.
But before that, we reviewed the user manuals for each display. For those without their original packaging and user manuals, we had to download the documents from their support pages.
Enough talks already! Let me share some glimpses. These images will provide a clearer idea of how we did all the dirty work behind the scenes.
