Make Your Computer Easier to See (and Use!)
Last Updated:
Staring at a computer screen for hours on end can take a serious toll on your eyes.
According to the American Optometric Association, the average American worker spends seven hours a day in front of a computer, either in the office or working from home.
That’s a lot of screen time!
All that eye strain can lead to a host of unpleasant symptoms like dry eyes, headaches, blurred vision, and neck and shoulder pain.
In fact, the Vision Council reports that nearly 60% of adults experience these issues on a regular basis. Yikes!
But here’s the good news: there are plenty of simple steps you can take to make your computer setup much easier on the eyes (and the brain).
Let me share a few of my favorites with you.
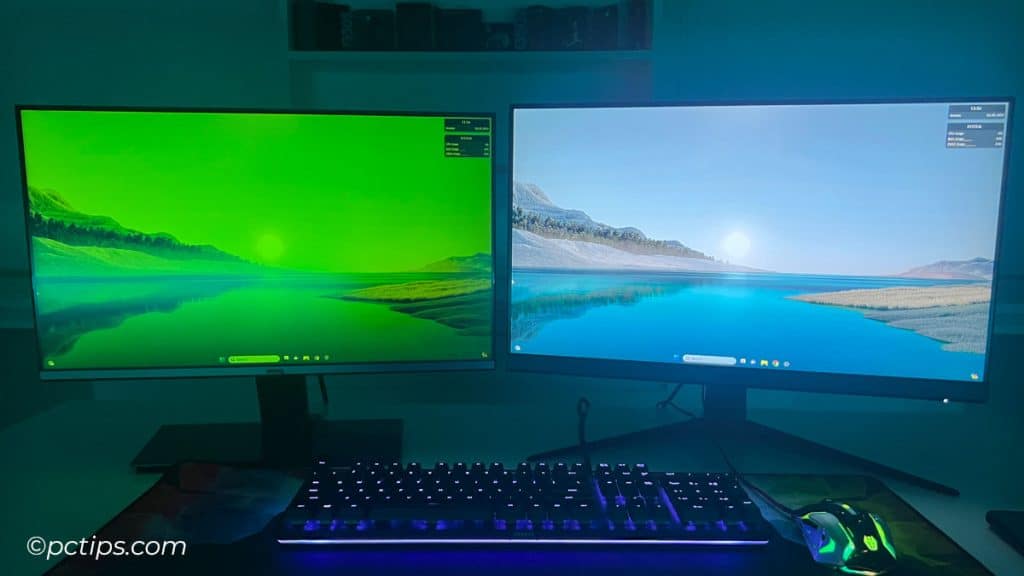
Adjust Your Display Settings
Check your display settings and play around with the brightness, contrast, and color temperature.
Every monitor is different, so you might have to fiddle with it a bit.
Personally, I like to crank down the brightness a notch or two from the default – it’s easier on the eyes, especially in dim lighting.
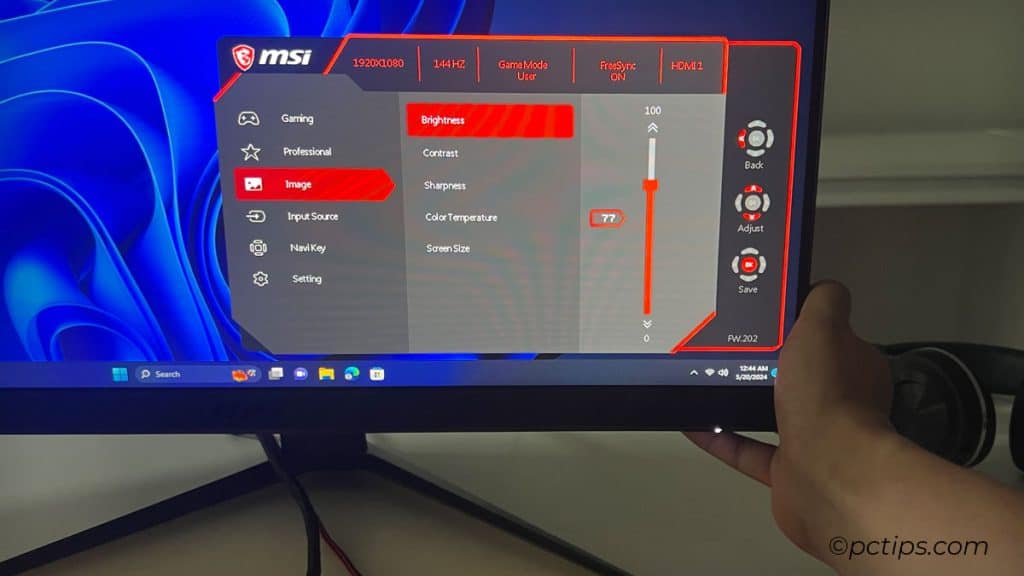
While you’re in there, check if your monitor has a “Reading Mode” or “Eye Comfort Mode” buried in the settings.
These usually dial down the blue light and amp up the warmer tones to reduce eye strain.
It might look a bit funky at first, but give it a shot – after a few days it’ll probably feel more natural than staring into the usual harsh bluish-white glare.
Use Monitor Presets
Most modern monitors (and graphics cards) have handy built-in presets for different use cases like gaming, watching movies, photo editing, and good ol’ fashioned reading.
Use them!
For example, “Reading Mode” usually makes things gentle on the eyes by upping the text contrast and clarity.
Movie mode punches up the colors and brightness for a more vibrant video.
The gaming preset minimizes input lag and maximizes framerates.
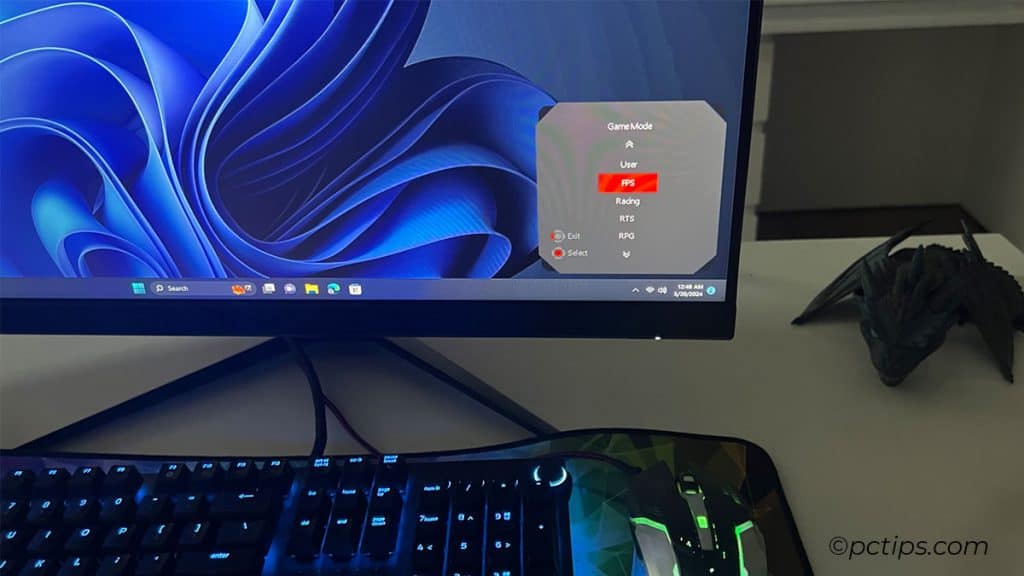
You get the idea.
Play around with the different options and see what works best for your peepers.
Tweak Your Environment
Sure, you can tweak the monitor settings, but don’t forget about optimizing your workspace too!
Make sure any light sources (lamps, windows, etc) aren’t causing excessive glare on your screen.
You want your ambient lighting to be around the same brightness as your display.
If overhead lights are too harsh, try a desk lamp off to the side instead – it’ll cast an easier glow across your work area without the blinding glare.
Oh, and if you’re rocking a glossy screen, do yourself a favor and get a cheap matte screen protector to cut down on distracting reflections!
Adjust Your Display Scaling
One of the quickest ways to improve readability is to adjust the size of text, apps and other items.
In Windows, this is controlled by the “Scale and layout” setting.
I find that bumping this up to 125% or even 150% makes a huge difference, especially on high-resolution displays.
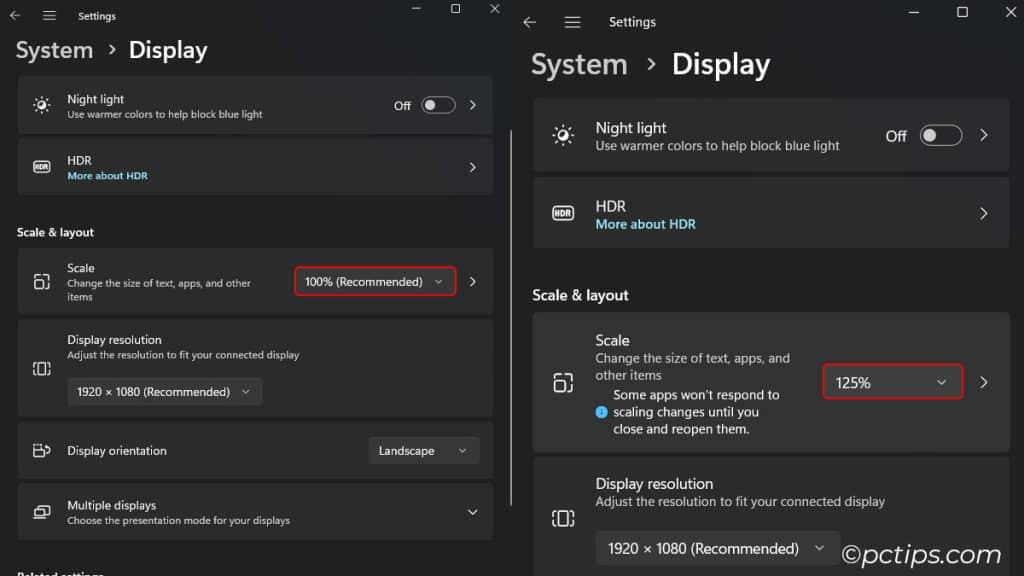
Everything gets a bit larger, so you don’t have to squint to read.
It’s like putting on a pair of reading glasses for your PC!
Play around with this and find a comfortable size for your eyes.
It might take a few tries to get it just right.
Embrace Dark Mode
Staring at a bright white screen all day can feel like you’re gazing into the sun.
Give your eyes a break by embracing the dark side – of themes, that is!
Most operating systems and apps offer a “Dark Mode” now that flips your screen to a soothing dark gray or black.
It’s way kinder on the eyes, especially in dim environments.
On Windows, head to Settings > Personalization > Colors under “Choose your mode“.
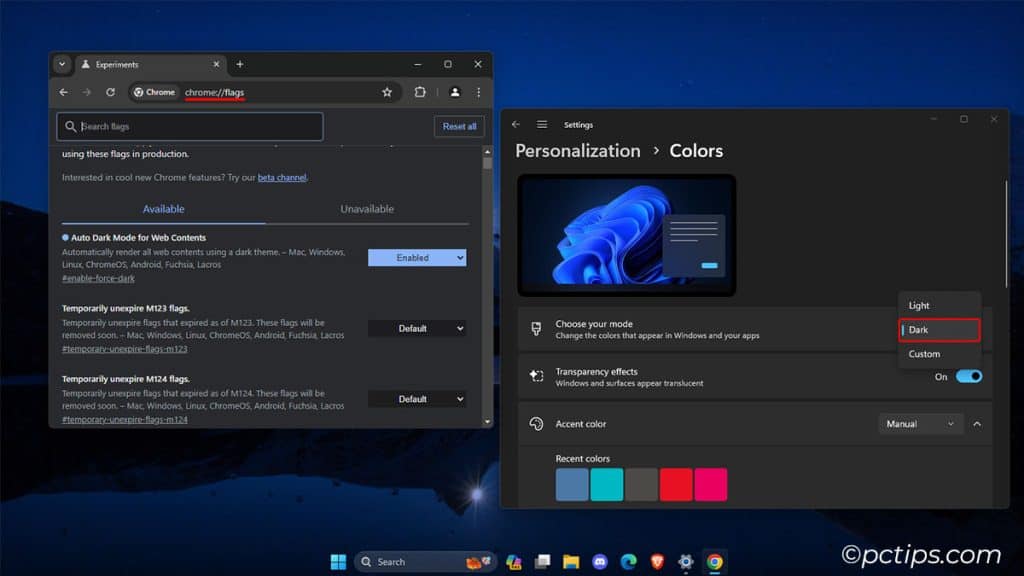
While you’re theme-tweaking, keep an eye out for High Contrast modes too – these use ultra-stark color combos to make things pop!
Enable Night Light Mode
Staring at a blindingly bright screen in a dimly lit room is a recipe for eye strain (and insomnia).
That’s where Night Light comes in.
This handy feature washes your screen with a warm amber tint in the evenings to cut down on blue light and glare.
You’ll find Night Light options under Settings > System > Display.
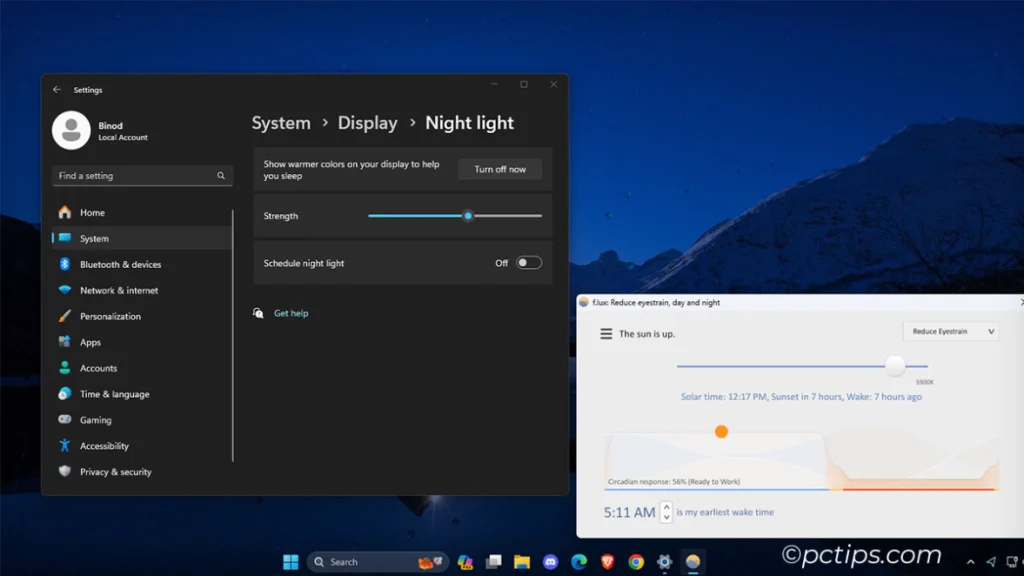
I recommend setting it to kick on automatically at sunset for a gradual, natural transition.
The first night or two it might seem very…orange.
But give it a few days – I bet you’ll stop noticing the tint and simply appreciate how much gentler it is on the eyes!
If you want even more control, check out f.lux.
It’s a popular utility that offers custom color temperature, intensity and scheduling options.
I use to use this before but eventually settled on the native Night Light feature for simplicity’s sake.
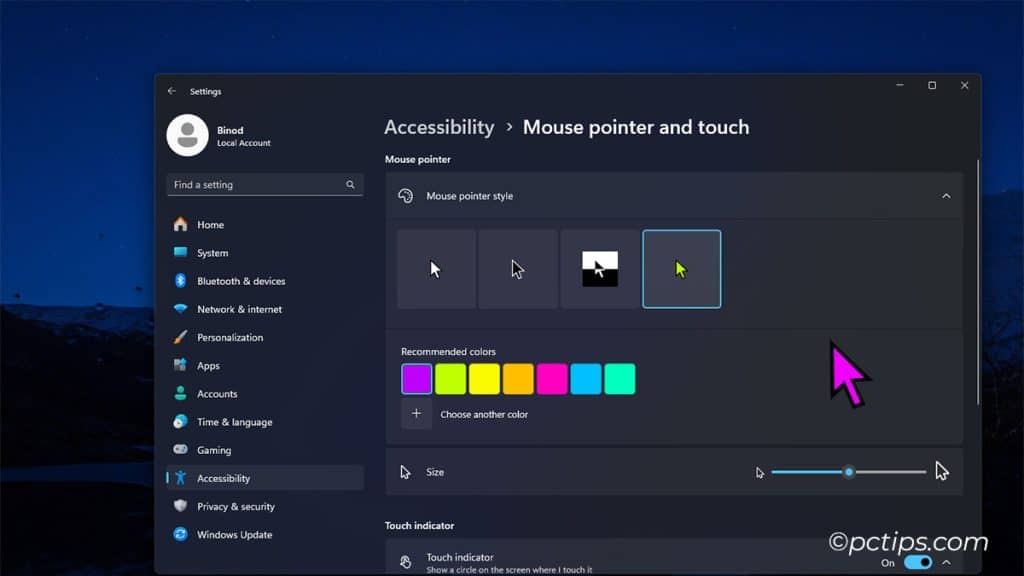
Customize Your Cursor
If you’re constantly losing track of your mouse cursor, you’re not alone.
Those tiny black and white arrows aren’t always easy to spot, especially on a busy screen or high-resolution monitor.
Luckily, Windows lets you resize both the mouse pointer and text cursor to make them stand out more.
Head to Settings > Accessibility > Mouse pointer and touch and experiment with the slider to find a larger size that works for you.
While you’re there, consider changing the pointer color too – bright green or hot pink are much easier to track than basic white!
Didn’t know that was an option, did you? Makes a big difference!
Utilize the Magnifier
Sometimes you just need a quick boost in magnification to read tiny text or examine a photo.
That’s why I love Windows’ built-in Magnifier tool.
Instead of fussing with zoom controls in each app, you can quickly magnify anything on the screen!
Just hit the Windows key and + to activate Magnifier.
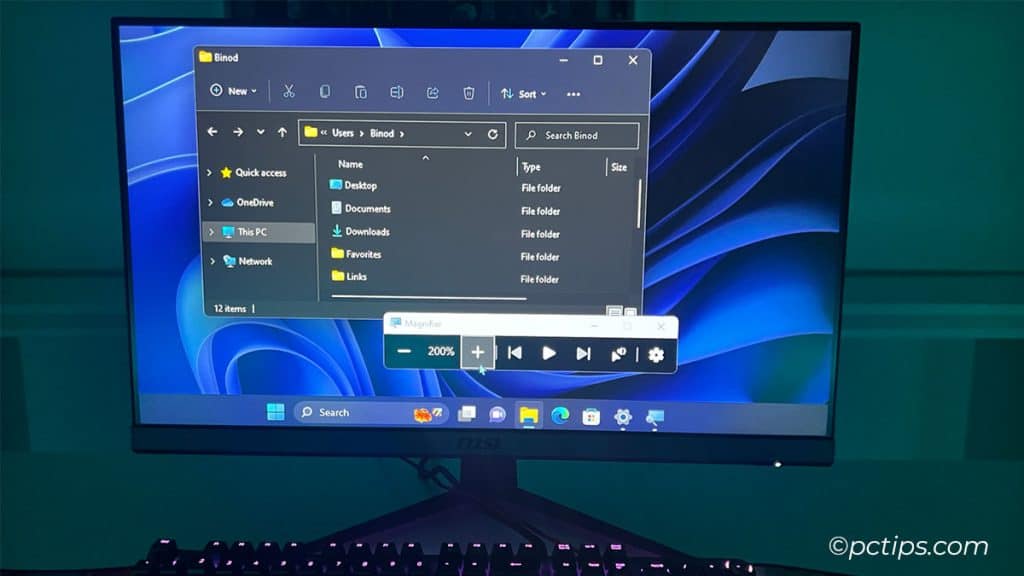
Your cursor becomes a magnifying glass that enlarges anything it hovers over.
Such a time saver! You can even zoom in/out with Ctrl + Alt + mouse wheel.
For more permanent magnification, open the Magnifier app itself by searching the Start menu.
This keeps a section of your screen magnified at all times.
Great for keeping reference material enlarged off to the side while you work.
Use Reader Mode
Speaking of reading mode, have you tried it in your web browser?
When you click that little book icon (or select it from the menu), it strips away all the clutter – ads, sidebars, blinking doodads – and presents the content in a clean, easy-to-read format.
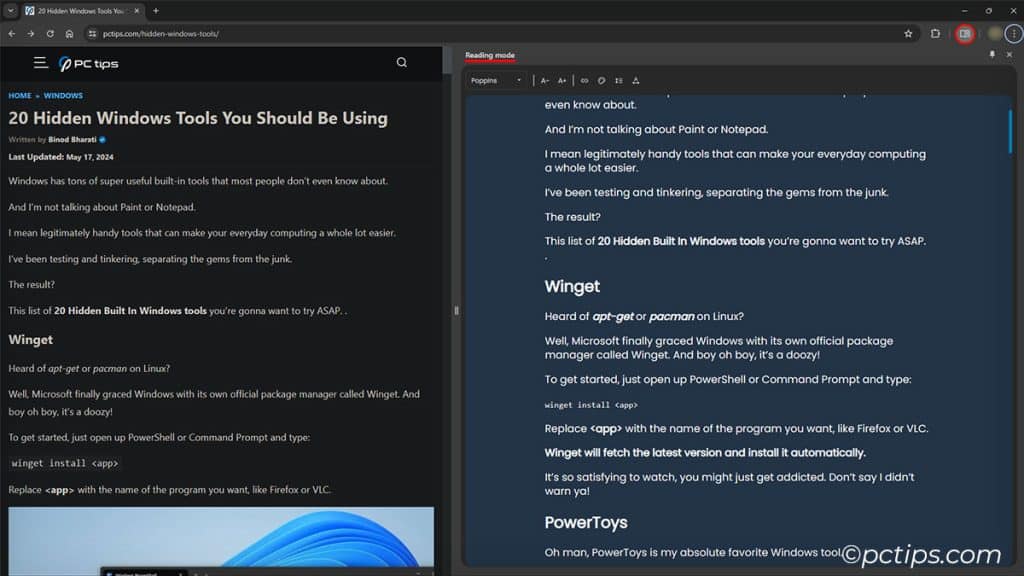
I use reader mode ALL the time when I’m trying to focus on an article or blog post.
It’s especially handy on cluttered websites with ads and popups galore.
Give it a try next time you’re doing some online reading – I bet you’ll be hooked!
Get a Better Monitor
If you spend all day staring at screens for work (and let’s be real, play), it might be worthwhile investing in a nice, easy-on-the-eyes monitor.
Look for things like:
- High resolution (more pixels = less jaggies)
- Matte finish (bye-bye glare!)
- Flicker-free backlighting (no more headaches)
- Blue light filters (easy on the peepers)
- Adaptive sync (no screen tearing)
You don’t have to break the bank either – there are plenty of great options in the $200-500 range these days.
Your eyes spend more time looking at your screen than anything else – they deserve a nice view!
Explore Accessibility Options
Windows’ Accessibility settings are a goldmine for making your computer more comfortable to use, even if you don’t have a disability.
In addition to the tips above, poke around the Accessibility section in Settings to find all kinds of gems:
- Use voice typing to dictate text hands-free with impressive accuracy
- Adjust the thickness and color of the focus rectangle around selected items
- Simplify your screen with fewer animations and transparency effects
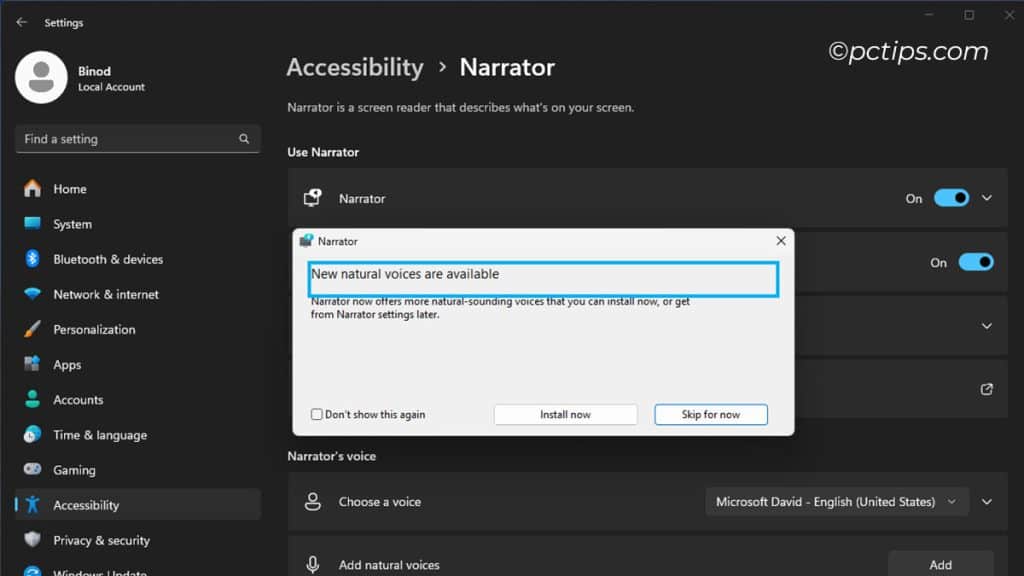
- Hear text read aloud with Narrator (surprisingly listenable!)
Get audible cues for Caps Lock, Num Lock, etc
Really take some time to explore and experiment.
A few thoughtful tweaks here can make a world of difference in usability, eye strain and efficiency.
Don’t assume these features aren’t for you just because they’re labeled as “accessibility” options!
Give Your Eyes a Break!
Finally, don’t forget to give your eyes (and your brain) a break from time to time.
Look away from the screen, focus on something in the distance and blink a few times.
Heck, even close your eyes for a minute if you can.
I like to use the 20-20-20 rule: Every 20 minutes, look at something 20 feet away for at least 20 seconds.
It’s a simple way to reduce eye strain and fatigue during long stretches of computer use.
And if all else fails, there’s no shame in busting out the reading glasses or computer glasses.
I keep a pair on my desk for those moments when my eyes just can’t even.
Over to You
Alrighty, those are my top tips for making your computer a bit easier on the eyes.
I hope you found them helpful!
Now I want to hear from you:
What are YOUR go-to tricks for reducing eye strain and improving readability?
Do you use any special apps or settings I didn’t mention?
Have you tried computer glasses or other gizmos to help with vision issues?
Leave a comment below and let me know!
I’m always on the lookout for new ways to optimize my screen time.
Oh, and if you found this article useful, I’d be over the moon if you’d share it with your friends or colleagues.
You never know who might benefit from a little readability refresh.